
We’ll install Minecraft on Linux, the most popular indie-game of all time. It immerses the player in a world made of blocks where the player can build, destroy, and mine things! The best part is that it is available on Linux too. You can install it on your desktop PC or if you have a powerful machine, you can set it up on your server as well. This article will cover both the desktop and server installs of Minecraft.
Install Minecraft on Linux
Currently, the official Minecraft Download page has three options for Desktop Linux
.deb file– For installation on Debian/Ubuntu and their derivatives.AUR Repository– For installation on Arch based distros..tar.gz file– For installation on almost any Linux distribution. This archive needs to be extracted. It contains the Minecraft binary itself which can be run directly.
In this article I’ll show you installation only through the 1st option i.e. for Debian/Ubuntu systems.
1. Obtain the .deb file from Minecraft’s official website
The .deb file can be downloaded using the wget command as follows:
wget -o ~/Minecraft.deb https://launcher.mojang.com/download/Minecraft.deb

This will download a .deb file in your home directory.
2. Install the downloaded .deb file
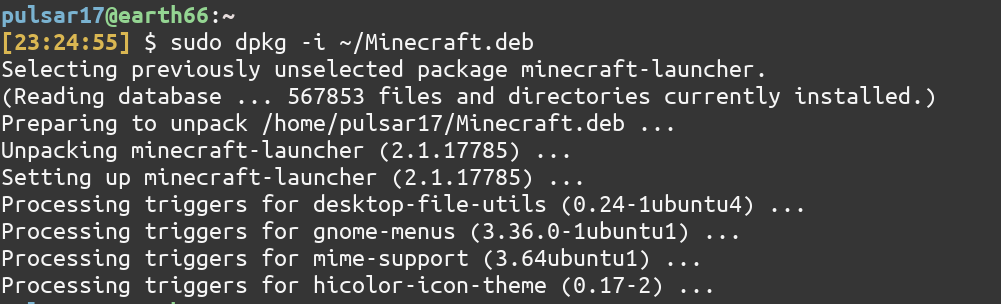
You can install the .deb file using your distro’s .deb opener by double clicking on the Minecraft.deb or you can use the dpkg command.
sudo dpkg -i package_file.deb
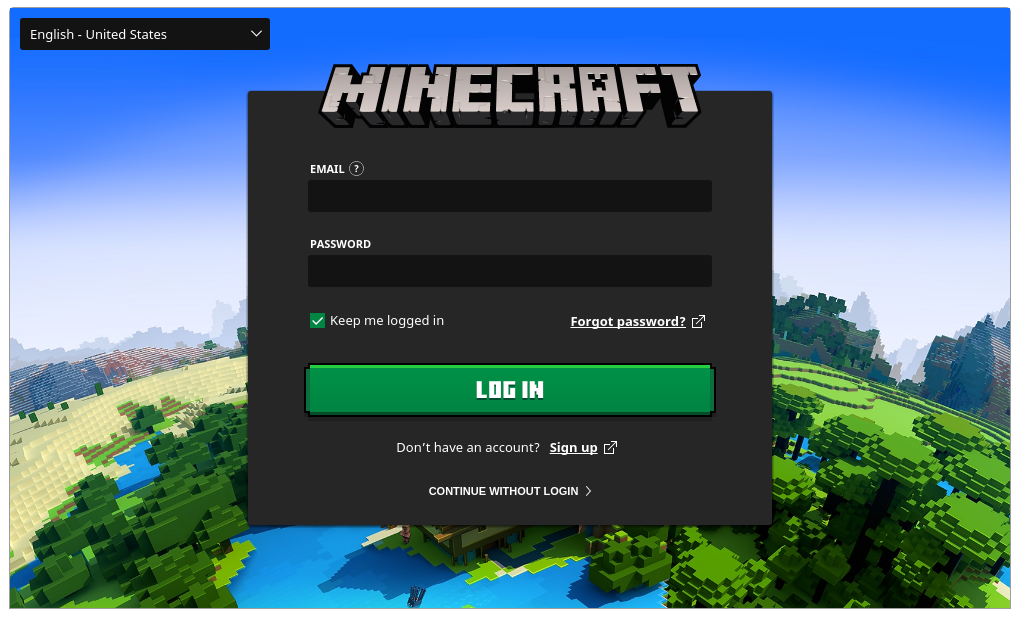
3. Run Minecraft
You will find Minecraft now listed as one of the applications. You can launch it as you may launch any other application. You can also run it using the command line by typing minecraft-launcher on the command line.
Install and setup Minecraft on a Debian/Ubuntu server
You might have installed Minecraft on your local PC but you can have a private server for you and your friends exclusively! To play Minecraft as multiplayer you have to purchase a license. But the server edition is free to run and you don’t need to purchase a license for that. Let’s now get going with installing Minecraft on our server.
1. Install Java
Minecraft Server is only compatible with Minecraft: Java Edition. So, to be able to run Minecraft, you need to have JRE (Java Runtime Environment) on which Minecraft can run. Visit here for complete instructions on installing Java on Debian Linux.
Java ( specifically JRE) is provided by the OpenJDK package(Any version of JDK >=8 will do) . You can install it using the apt command
sudo apt install openjdk-14-jre-headless

We used headless Java as we do not require GUI, or mouse/keyboard support(which is usually the case for a server). You could also install the normal openjdk-14-jre package.
You can verify the java installation by typing
java -version

It should print information like in the above screenshot.
2. Create a Minecraft user
It’s better to create a separate user for Minecraft from a security perspective. This account cannot be accessed through SSH as it has no password. It can only be accessed by a user with sudo privileges. To add a Minecraft user, use the useradd command as follows
sudo useradd -r -m -U -d /opt/minecraft -s /bin/bash minecraft
For further steps you need to change into the newly created Minecraft user using the su command.
sudo su - minecraft
3. Download Minecraft Server edition
Creating a separate directory for a server is a good idea. That can be done using the mkdir command.
mkdir -p ~/server
As of this writing, the latest version of Minecraft server is 1.16.4. To download the server edition you can go to Minecraft’s official download page.
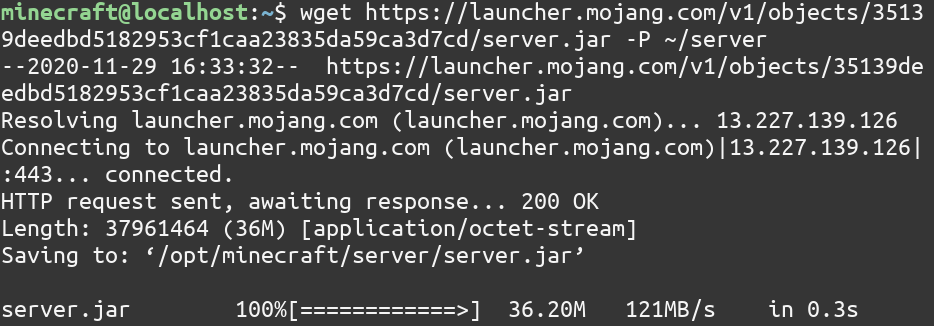
For Minecraft Server v1.16.4, you can download it using this wget command
wget https://launcher.mojang.com/v1/objects/35139deedbd5182953cf1caa23835da59ca3d7cd/server.jar -P ~/server
5. Configure Minecraft server
Now that the server is downloaded, we need to run the server as it generates configuration files when run for the first time.
Since the server is a .jar file, it has to be run using the java command from the server directory
cd ~/server
java -Xmx1024M -Xms512M -jar server.jar nogui

As can be seen in the screenshot, the server generates some configuration files. The 1st file to change is eula.txt. To accept the EULA, you need to change eula=false to eula=true
You can either use your favorite text editor or get away with a one-liner using the sed command
sed -i -e 's/false/true/g' eula.txt
4. Create systemd unit file for Minecraft
It is convenient to run Minecraft as a service as then systemd manages the headache of starting/restarting the service for us.
You need to create a systemd unit file with your favorite text editor. I’ll be using the nano text editor
Switch back to the sudo user by typing exit. From now on, all commands are to be executed by the user with sudo privileges. Next, create the unit file.
sudo nano /etc/systemd/system/minecraft.service
Then, paste the following configuration
[Unit]
Description=Minecraft Server
After=network.target

[Service]
User=minecraft
Nice=1
KillMode=none
SuccessExitStatus=0 1
ProtectHome=true
ProtectSystem=full
PrivateDevices=true
NoNewPrivileges=true
WorkingDirectory=/opt/minecraft/server
ExecStart=/usr/bin/java -Xmx1024M -Xms512M -jar server.jar nogui

[Install]
WantedBy=multi-user.target
Modify the Xmx and Xms flags according to your server resources. The Xmx flag defines the maximum memory allocation pool for a Java Virtual Machine (JVM), while Xms defines the initial memory allocation pool.
Save and exit. And now reload the systemd-daemon
sudo systemctl daemon-reload
5. Start the Minecraft service
This can be done using the systemctl command
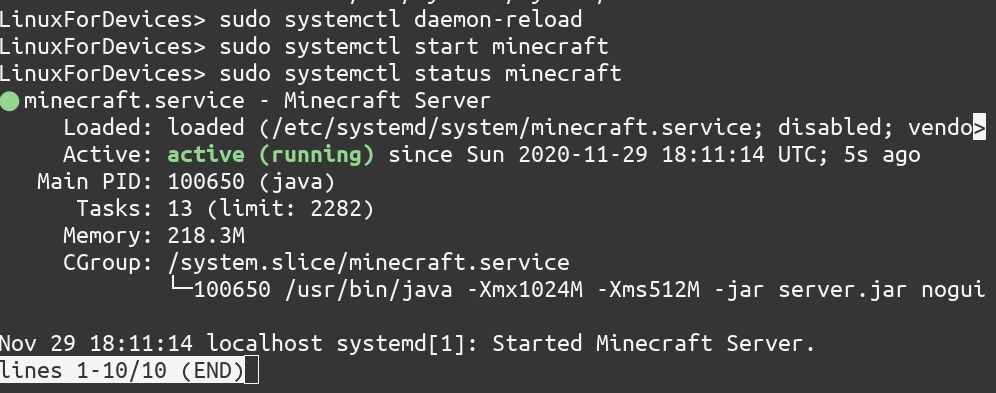
sudo systemctl start minecraft
To check the status of the Minecraft service, type
sudo systemctl status minecraft
Lastly, enable this service so that Minecraft automatically starts on a reboot.
sudo systemctl enable minecraft
6. Configure Firewall for Minecraft
Chances are that the Minecraft server will be behind a firewall. To access it from the internet, port 25565 has to be opened.
To allow traffic from port 25565, we use the ufw firewall:
sudo ufw allow 25565/tcp
7. Additional Configuration for Minecraft (Optional)
You might have noticed that the server also produces a server.properties file. (You can use the ls command to check). This file provides additional control over your Minecraft world in the form of key-value pairs. Some of the options are:
...
max-players=20
online-mode=true
enable-status=true
allow-flight=false
broadcast-rcon-to-ops=true
view-distance=10
max-build-height=256
...
As you can see, you can change almost every parameter of the game to suit your needs.
Conclusion
Minecraft, being the most popular indie-game, has a very large user base. Installing Minecraft on Linux is a breeze. Though the steps for installing on the server might seem difficult, following the steps in this article will get your server set up in very little time. Further, you can look for utilities such as mcron that allow for easy backups of Minecraft worlds. You can also choose non-vanilla modded Minecraft servers with some bells and whistles like Spigot.