

When using Linux, you are going to almost always be hooked to the terminal. And one of the common commands that you’ll have at the back of your hand will be the “ls” command.
Also read: The mkdir command in Linux
Getting Started with the ls Command in Linux
Before we dive into the syntax and other nitty-gritties, let’s understand the basics of the ls command in Linux.
What is the ls command in Linux?
The “ls” command is short for “List” and is used to list directories and files in the folder where the command is run. Simple isn’t it?
Now just like it is with everything else in Linux, this command has multiple options for listing files. Let’s go over the most common options that you’ll use very often.
You can read through the manual pages for a comprehensive understanding of the command (or you can use the “–help” option to get a simplified list of available options).
Syntax and Basic Usage of ls
The ls command is quite streamlined. At its most basic, the syntax is as follows:
ls [OPTION]... [FILE]...
Here, [OPTION] and [FILE] are optional. If you run ls without any arguments, it will list the files and directories in the current working directory in a plain format.
Output
[user@localhost ~]#  ls
Desktop  Documents  Downloads  Music  Pictures
The output you see is a list of files and directories. Each entry is separated by a space. This is the most basic usage of the ls command, and it’s often the starting point for more extensive listings.
Listing Files and Directories with ls
It’s a pretty straightforward command, but combined with the available options, it can be pretty useful. Let’s understand some common usage of the ls command.
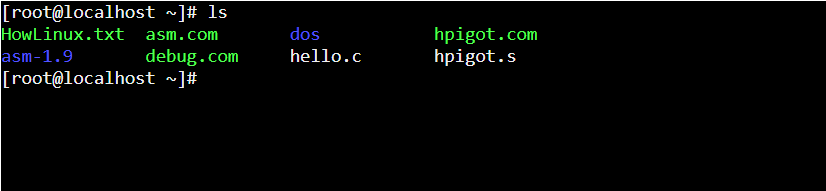
1. ls command default or basic usage
To simply list the files in a directory, you can enter the command as is, and you’ll receive an output with the list of files in a tabulated format as the default setting.
[user@localhost ~]# ls
2. Listing all files including hidden files with the ls command
The default usage does not show you the hidden files in the directory that you’re working in. Even if you haven’t manually hidden any files, Linux saves configuration files as hidden (by adding a period before the name of the file). We do this with the use of the “-a” option. Give the below command a try and see what hidden files you find.
[user@localhost ~]# ls -a

You see, in the same directory, I had the “.Xauthority” and “.xsession” configuration files hidden which are now revealed with the use of the ls -a command.
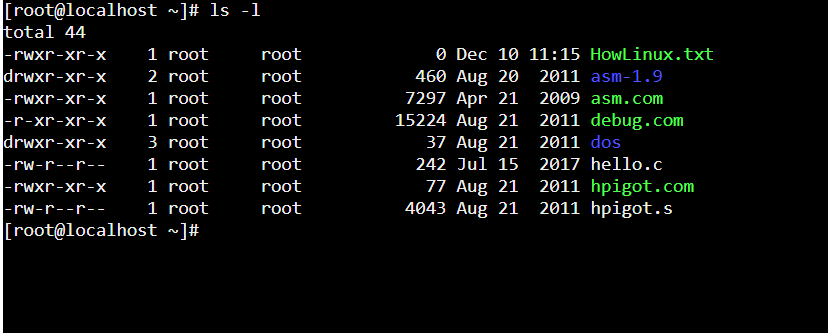
3. Getting a detailed list of files
On multiple occasions, you will need to figure out what permissions a user has for a file or folder. When you log in as “root” you have full access to any file that you want, but as a standard user, that is not the case. We can find the full list of files with the “-l” option. Since I’m on a full access system, I do not have to worry about file permissions but you can run the following command to see what kind of access you have.
[user@localhost ~]# ls -l
Sorting and Filtering Files with ls Command
Now that you know how to list files in a directory, let’s understand how you can sort output in the order you prefer for better comprehension.
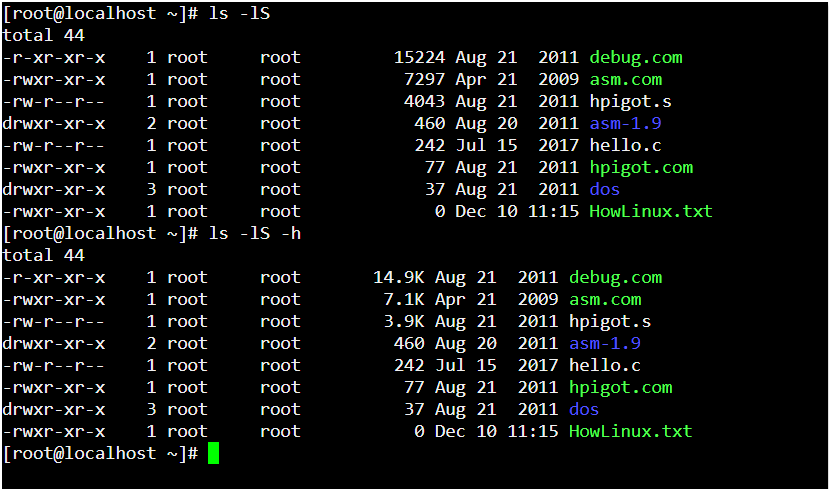
4. Sorting by size, modification time
Let’s introduce a new concept to this tutorial. Combining command options. You can combine options by either writing them separately like “ls -l -a” or “ls -la”. Both will provide the same output. When sorting, we’ll want the full detailed list of files so if we sort for size, we can also see the size instead of just the sorted list.
Here are a few options you can use to sort your lists (the Linux terminal is case sensitive, so -S is not the same as -s):
- -S sorts by size
- -t sorts by modification time
- -r reverses the default order of the file list
- -h will show the file size in a human-readable format i.e. kb, MB, GB etc. (this is not for sorting but helps when sorting by size)
I’ll combine all the above options with the -l option so we see the full detailed list.
[user@localhost ~]# ls -lS -h
OR
[user@localhost ~]# ls -lSh
[user@localhost ~]# ls -lt
[user@localhost ~]# ls -lr
Now, let’s see how you can reverse the print order for your list of files and folders.
5. Reverse the List of Files with ls Command
To reverse the list of files and directories, you can use the -r option with the ls command as follows:
[user@localhost ~]#  ls -r
Pictures  Music  Downloads  Documents  Desktop
6. Human-readable file Size Output
The output generated by the ls command includes the file sizes but they are generally in bytes. We’d prefer to have the file sizes listed in human-readable sizes like KB, MB, GB, etc. You can use the -h option for the same.
We also need to combine the -h option with the -l option to list all the files with all the data.
$ ls -lh
total 48K
drwxr-xr-x 2 user user 4.0K Sep 25 12:34 Desktop
drwxr-xr-x 5 user user 4.0K Sep 25 12:45 Documents
drwxr-xr-x 3 user user 4.0K Sep 25 12:50 Downloads
drwxr-xr-x 2 user user 4.0K Sep 25 12:34 Music
drwxr-xr-x 4 user user 4.0K Sep 25 12:40 Pictures
In this example, the sizes of the directories are shown in kilobytes (K) instead of bytes, making it easier to understand. The 4.0K indicates that the size of the directory is 4.0 kilobytes.
Advanced Usage of the ls command
Let’s look at a few advanced usage and commands.
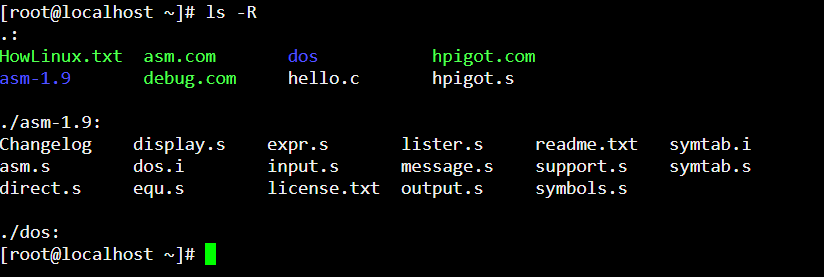
7. Listing All Files And The Files in Nested Folders (Recursive List)
In the above examples, you must have observed two listed files are highlighted in blue color. Those are folders. What if I want to get a list of all the files within my current working folder, along with all the files in all the folders too?
The ls command makes it simple for us to do. With the use of the “-R” option, you can get just that. It will first list all the files within the current working directory (cwd which is also another command in Linux), and then list the folders and the files within them. Let’s see a quick example.
[user@localhost ~]# ls -R
8. Listing only directories with the ls -d command
The ls -d command stands for “list directory.” It shows information about a directory or symbolic link, including its path. The “d” in ls -d stands for directory.
This command can be useful when combined with the * operator, as it can help you to display only the directories from within your current working directory.
Additionally, the ls -d command can be used to display the path of a user’s home directory.
[user@localhost ~]# ls -d *

documents
downloads
music

[user@localhost ~]# ls -d documents

documents
As you can see, the ls -d command will only show the directory names and no additional information here. If we had run the second command without the -d option, we would get the list of all files and folders within the documents directory.
Customization and Aliases with ls Command
Aliases are shortcuts that you can create to avoid typing a long command repeatedly. They are particularly useful for commands with multiple options.
9. How to Create an Alias
To create an alias, you can use the alias command followed by the name you want to give the alias and the command it should execute.
For example, if you frequently use ls with the -l and -a options, you can create an alias like this:
alias lsa="ls -la"
Code Output
After running the above command, whenever you type lsa and hit Enter, it will execute ls -la.
10. Making Aliases Permanent
The above alias will be lost once you close the terminal. To make it permanent, you can add the alias command to your shell’s profile script, such as .bashrc for the Bash shell:
echo 'alias lsa="ls -la"' >> ~/.bashrc
After adding, you’ll need to reload .bashrc:
source ~/.bashrc
11. Colorizing Output
The ls command usually colorizes the output by default on most Linux distributions. However, if it doesn’t, you can enable this feature manually.
To force ls to show colorized output, you can use the –color option:
ls --color=auto
Code Output
This will display the list of files and directories in color, making it easier to distinguish between them.
12. Making Colorization Permanent
To make this a permanent setting, you can either create an alias or add the following line to your .bashrc file:
alias ls="ls --color=auto"
And then reload .bashrc:
source ~/.bashrc
Customizing the ls command through aliases and colorization can make your experience in the terminal more efficient and visually pleasing. Aliases help you make things easy
Summary
You should now have a good and practical understanding of the use of the ls command in Linux. Play around with the options, use the “–help” option to find out more comprehensive options that the command offers. If you’re further interested in learning about the command, Linux manual pages for the ls command provide you with really detailed information.
[user@localhost ~]# man ls