

In this tutorial, we will learn about Linux User Administration.
Linux User Administration denotes how to manage a user account or group accounts. It deals with creating the user account, adding the user to the group, modifying it as well as deleting the account.
However, these all can be managed through GUI easily. Here, we would learn the commands that allow us to perform user administration. Before we begin, we should be aware of the common terminologies in the Linux User Administration.
Basic Terminologies
You might be aware of these terms but let’s again look at these quickly. Some of the basic terminologies are:
- User: We are the “user” who has privileges to access the system’s resources. Therefore, a user is an object with a unique identification number known as User ID(UID).
- Group: The group of users who have the privilege to access the same resources is called the group. In Linux, the users in a particular group can access all the resources assigned to that group. Group has also a unique identification number known as Group ID or GID.
Types of Users
There are three types of users in Linux:
- SuperUser or Root User: The administrator of the Linux system who has all the rights. The root account belongs to the superuser. The root user doesn’t need permission to run any command.
- System User: The users created by the software or applications. For example, We installed Apache Kafka in the system, then it will create the user account named “Apache”. These are known as System Users created at the time of installing any application.
- Normal User: Such accounts created by the root user are called Normal User. For example, the root user created an account named John, JournalDev and so on. The name can be anything. The root user can create it as well as has the privilege to delete the account.
User Configuration Files
There are 4 configuration files that store the information regarding user password, group information and so on. These configuration files are located in /etc directory. Let’s discuss more about this.
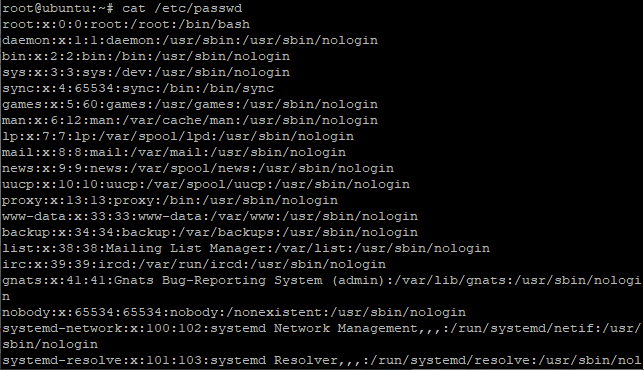
- /etc/passwd: The passwd file located in the /etc directory holds the user account information.
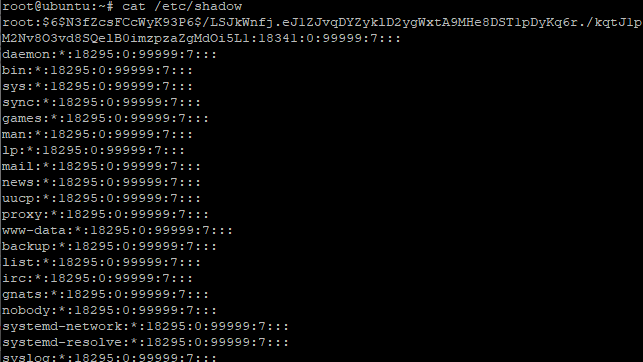
- /etc/shadow: This file saves the passwords for the users in an encrypted format, along with the days since the password last changed.
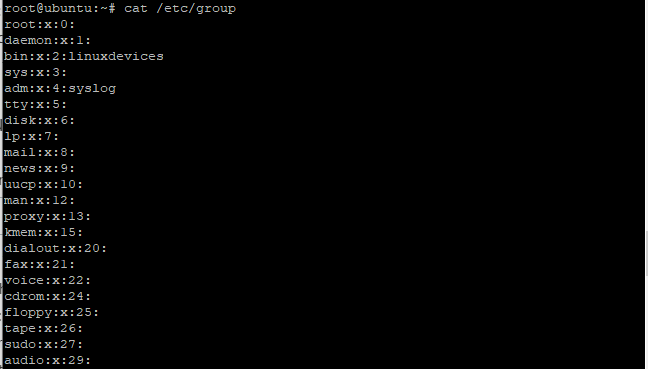
- /etc/group: It holds the group account information. Whenever you create the group, the details are stored in /etc/group file.
- /etc/gshadow: This file is similar to the /etc/shadow file which stores the group account passwords. Since group accounts don’t usually have a password, you’ll see an asterisk for the password field.

You can check all the files using cat command as shown above.
Let’s perform some Linux user administration.
How to create a User account?
The first step in Linux user administration is knowing how to create user accounts. Earlier, we learned about the basic terminologies related to Linux user administration. Let’s move further and discuss how to add or create a new user account.
We can use either useradd or adduser command followed by the username. The username shouldn’t start with uppercase letters. Let’s look at the command below:
sudo adduser [username]
Or
sudo useradd [username]
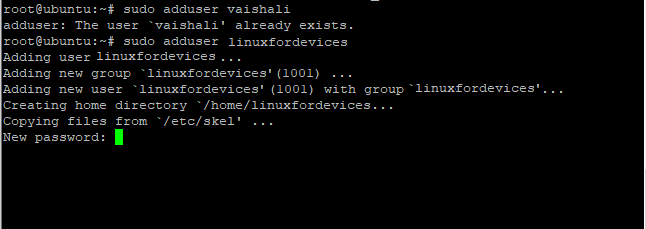
You can see that while creating the user named “vaishali”, It showed an error. Therefore, users with the same name cannot exists in the system. Further, it would ask to enter the details such as password, full name, contact details as shown in the image given below:
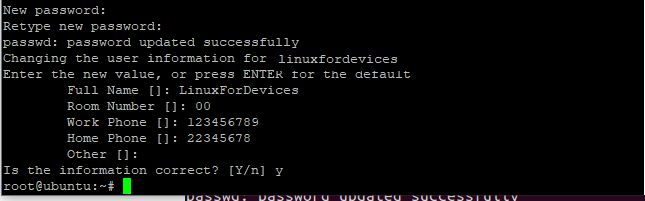
Hence, the new user account has been successfully created. Some of the operations are performed while creating the account such as:
- When we create a new user account, It automatically amends the configuration files (discussed above).
- The home directory is assigned to the new user.
- There are 3 hidden files mainly, .bash_logout, .bash_profile, .bashrc which are copied to the home directory of the new user.
- Set the permission and ownership for the home directory.
- The group with the same name as the user account is created.
Check the Linux Official documentation of useradd command for more details.
Add the user to multiple groups
Earlier we discussed how to create the user. The next step in Linux user administration is understanding how to add users to groups. We learned that the group is created having the same name as of user account. What if, we want to add the user to the multiple groups already created. “-G” option is used to add the user to the multiple groups.
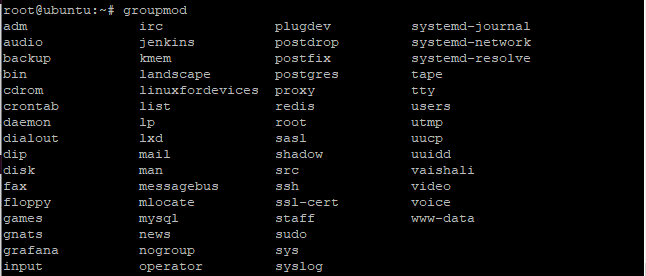
Each group name is separated by the comma. To list the group name use groupmod followed by the tab key twice command. Let’s have a look at the command below:
groupmod [press tab key twice]
Add the user to the group you want using the following command given below:
useradd -G group1,group2,group3 [username]
Options used with Useradd command
There are some of the common options used with useradd command. The list of options is described below stating their use. Let’s first look at the syntax :
useradd [options] LOGIN
OR
useradd -D [options]
| Option | Description |
| -b, –base-dir, BASE_DIR | gives the base directory for the home directory of the new account. |
| -d, –home-dir HOME_DIR | denotes the home directory of the new account |
| -h, –help | prints the help message |
| -m, –create-home | Create the new home directory but if it doesn’t exist |
| -p, –password PASSWORD | specifies the encrypted password of the user account |
| -u, –uid UID | specifies the user ID of the new user account |
These are the common options used with useradd command. For more details, check the Linux Official Documentation.
Delete the user account
The next step in Linux user administration is to learn how to delete the user account. We’ll use the userdel command to delete the account.
You can choose to get the password expired with the command below so the user cannot login. Let’s have a look at the command below:
sudo passwd -l 'username'
Now use the userdel command to delete the account as shown below:
sudo userdel -r 'username'
Check Linux Official Documentation of userdel command for more details.
How to modify the account?
To create an account, we use useradd command whereas to modify an already existing account, we use usermod command. This command is used to modify the attributes of an existing user account. When performing Linux user administration, it’s necessary to know how to modify existing attributes of a user.
The attributes can be changing a user’s home directory, login name, password expiry date and so on. Let’s suppose you want to change the current name of the user account. Let’s have a look at the command below:
usermod -d /home/[user_account_name] -m -l [new_name] [current_name]

The current of the user account is linuxworld which has been changed to linuxfordevices. Here, -m is used to move the content of the home directory to the new location whereas -l option notifies the name of the user will be changed to “new user” from “old user”. The usermod command consists of the options as useradd command.
To have the detailed knowledge, check the Linux Official Documentation for Usermod command.
How to create a group?
As of now, we have learned how to create, modify and delete the user account to perform Linux user administration. Let’s learn how to create a group. A group is a collection of users. The main purpose of the group is to manage users collectively. The groupadd command is used to add a new group to the system.
At the time of creating a new user account, the group is created automatically with the same name. Multiple users can be a part of a group as well as a user can be a part of multiple groups. the groupadd command is used to create the group. Let’s have a look at the command below:
groupadd [options] [group_name]
For more details, check the Linux Official Documentation of groupadd command.
How to modify the group?
Earlier, we learned that usermod command is used to modify the user account. Similarly, groupmod command is used to modify the definition of the specified group. It also contains the options as groupadd command. The groupmod command is used to modify the group id of the group account, name of the group and so on. Let’s have a look at the command below:
groupmod [options] groupname
For more detailed information, check the Linux Official Documentation of groupmod command.
How to delete a group?
Here, the groupdel command is used to delete the group. This command modifies the system files as well as delete all the group information related to the group. Before removing the group, it’s important to remove the user. The command to delete the user is described above. Let’s have a look at the syntax below:
groupdel groupname
For more detail information, check the Linux Official Documentation of groupdel command.
Conclusion
We have discussed how to create, modify and delete the user and group account and perform Linux user administration. We also discussed the configuration files as well as the basic terminologies related to the Linux user administration. If you have any issues, do let us know in the comment section. Feel free to give feedback.