
In this article we’ll learn how to install Django with NGINX, Gunicorn, and PostgreSQL on Ubuntu.
Django comes with a lightweight development server that is not suitable for production as it is less secure, low-performance, and not scalable.
It’s intended to be only used for development purposes so you can rapidly focus on your application development without having to worry about the production server. Similarly, if you are deploying an application in production, it is recommended to use PostgreSQL (or some other popular database server).
Why use NGINX and Gunicorn with Django?
We can conclude from the above text that we cannot use Django’s development server in production as it lacks security and performance features, which is why NGINX and Gunicorn come into play.
- Gunicorn is a WSGI (Web Server Gateway Interface) HTTP Server used with web applications and frameworks written in the Python programming language.
- WSGI descendent of CGI is an interface that sits in between the web server and Django to allow them to communicate with each other.
- NGINX is used to provide additional features like load balancing, caching, and other features.
Steps for installing Django with NGINX, Gunicorn, & PostgreSQL
Follow the steps below to install and configure Django with NGINX, Gunicorn, and PostgreSQL.
Step 1: Installing required packages with the apt package manager
Before we install all the packages, update your apt package manager index by executing the following apt command with sudo:
sudo apt update
To install all the required packages, execute the following command:
sudo apt install nginx python3-dev python3-pip python3-venv postgresql postgresql-contrib libpq-dev
Now that we have all the required packages installed, we can proceed to further steps.
Step 2: Create a user and database in PostgreSQL
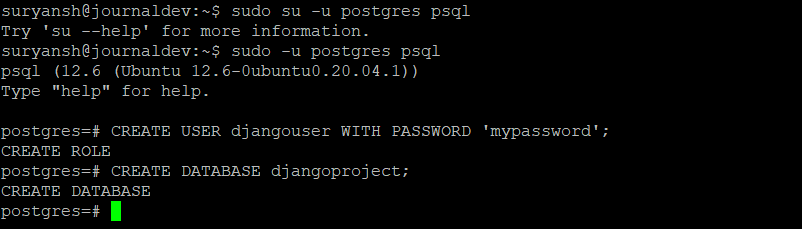
To enter into PostgreSQL interactive shell execute:
sudo -u postgres psql
Now to create a user and database enter:
CREATE USER djangouser WITH PASSWORD 'mypassword';
CREATE DATABASE djangoproject;
Django expects the parameters listed here for its database connections, enter the following inside PostgreSQL interactive shell to set these parameters.
ALTER ROLE djangouser SET client_encoding TO 'utf8';
ALTER ROLE djangouser SET default_transaction_isolation TO 'read committed';
ALTER ROLE djangouser SET timezone TO 'UTC';
Django would work fine without these parameters but, it will require making additional queries, so Django recommends doing it in hand before. Now grant all the privileges of the djangoproject database to the djangouser by entering:
GRANT ALL PRIVILEGES ON DATABASE djangoproject TO djangouser;
and quit the interactive session by entering \q in the PostgreSQL interactive shell.
Step 3: Creating a Python virtual environment
We will create our virtual environment inside a new directory. To create a new directory execute the mkdir command:
mkdir ~/newProject
and, change directory by executing the cd command:
cd ~/newProject
Now we create a new virtual environment inside our directory newProject called django_venv by executing:
python3 -m venv django_venv
To activate our newly created virtual environment execute:
source django_venv/bin/activate
And your shell prompt should change as shown in the image below.

Step 3: Installing required packages with pip and configuring Django
To install Django framework, Gunicorn for WSGI and psycopg2 is required for PostgreSQL execute the following pip command:
pip install django gunicorn psycopg2
Now let’s create a sample project called djangoproject with Django.
To create a new project execute:
django-admin startproject djangoproject .
The period at the end of the command will create the project in the same directory.
You can find the Django settings at ~/newProject/djangoproject/settings.py , you can edit them using your favorite text editor.
nano djangoproject/settings.py
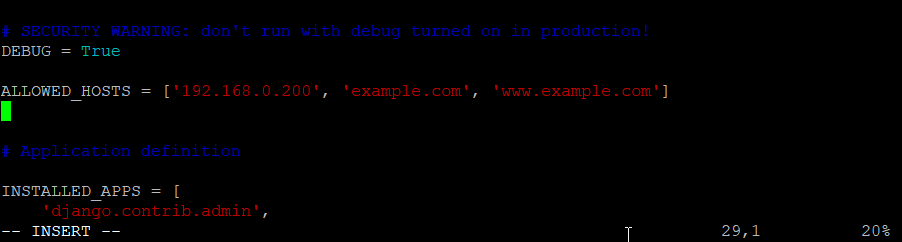
And add your server domain or IP under ALLOWED_HOSTS
. . .
ALLOWED_HOSTS = ['your_server_domain_or_ip', 'your_server_domain_or_ip', . . .]
. . .
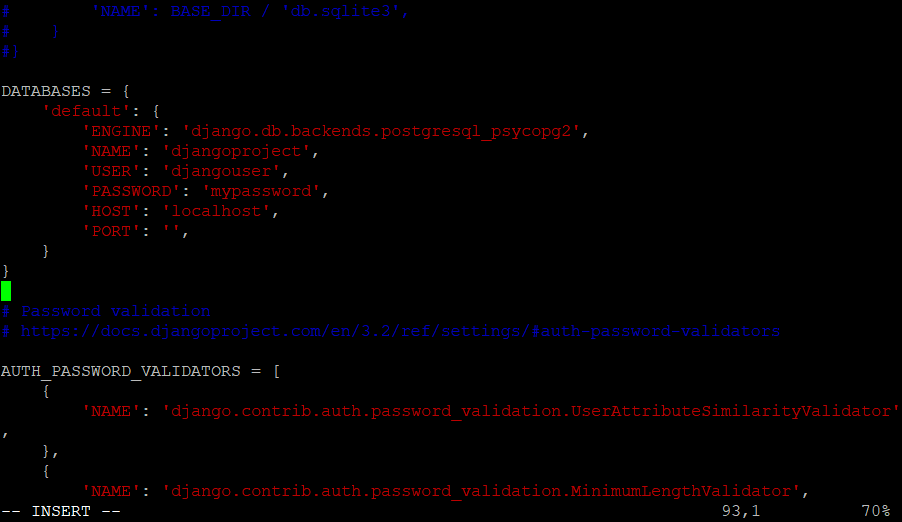
The following changes are needed to be made in your settings.py of your project to use the PostgreSQL database:
. . .
DATABASES = {
    'default': {
        'ENGINE': 'django.db.backends.postgresql_psycopg2',
        'NAME': '<db_name>',
        'USER': '<db_user>',
        'PASSWORD': '<db_password>',
        'HOST': 'localhost',
        'PORT': '',
    }
}
. . .
Next, add the import os at the beginning of settings.py and then define the STATIC_ROOT path in settings.py, this is where the static files of your website will be generated and stored. It is necessary for NGINX to function.
import os
. . .
STATIC_URL = '/static/'
STATIC_ROOT = os.path.join(BASE_DIR, 'static/')
. . .

Save the file. Now to migrate the database, execute:
python manage.py migrate

You are required to create an administrative user to use the Django web admin interface, execute the following command to create:
python manage.py createsuperuser
You will be required to answer several prompts (Username, Email, Password).

Now allow port 8000 in the firewall for the Django Development Server to be accessible, by executing:
sudo ufw allow 8000
Finally, we can test our new project with the help of the Django Development Server by executing:
python manage.py runserver server_ip:8000

Now you can visit your browser at http://server_ip:8000/ to test out your newly created Django project.

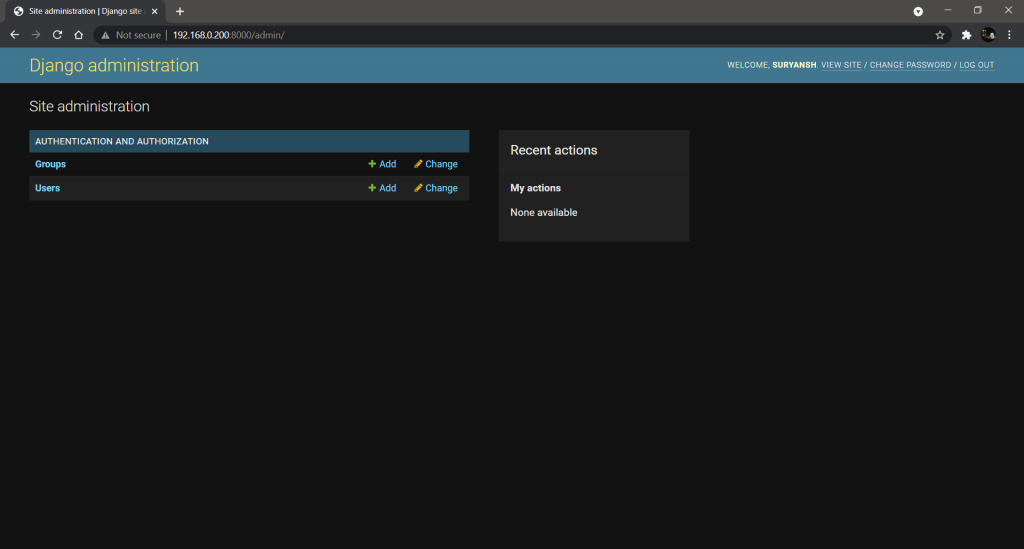
You can also visit the admin page at http://server_ip:8000/admin/ and enter credentials of the admin user we created above.
To test out Gunicorn’s ability to serve pages with your Django application, execute:
gunicorn --bind 0.0.0.0:8000 djangoproject.wsgi

Now go back to your browser and go to http://server_ip:8000/ to test it out. You should be able to see the same page.
Press CTRL+C to stop the Gunicorn server and return to the terminal.
Step 4: Create a systemd service file for Gunicorn
Using your favorite text editor, create gunicorn.service file at /etc/systemd/system/ by executing:
sudo nano /etc/systemd/system/gunicorn.service
Then make the following changes in the gunicorn.service file, and make sure to replace your details below:
[Unit]
Description=gunicorn daemon
After=network.target

[Service]
User=myusername
Group=www-data
WorkingDirectory=/home/myusername/newProject
ExecStart=/home/myusername/newProject/django_venv/bin/gunicorn --access-logfile - --workers 3 --bind unix:/home/myusername/newProject/djangoproject.sock djangoproject.wsgi:application

[Install]
WantedBy=multi-user.target
Then execute the following commands to start and enable Gunicorn service:
sudo systemctl start gunicorn
sudo systemctl enable gunicorn
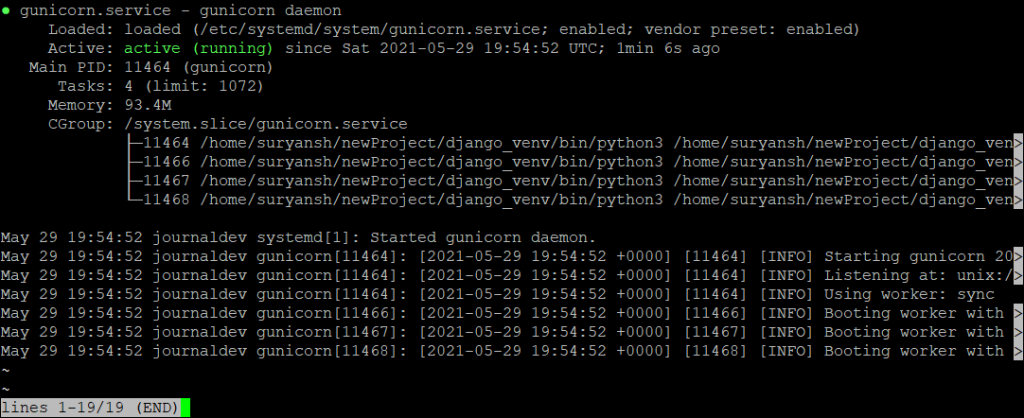
You can found out the status of Gunicorn service by executing:
sudo systemctl status gunicorn
Step 5: Configure NGINX reverse proxy
We have Gunicorn set up, now we need to set up NGINX reverse proxy to Gunicorn.
Create a new file by executing:
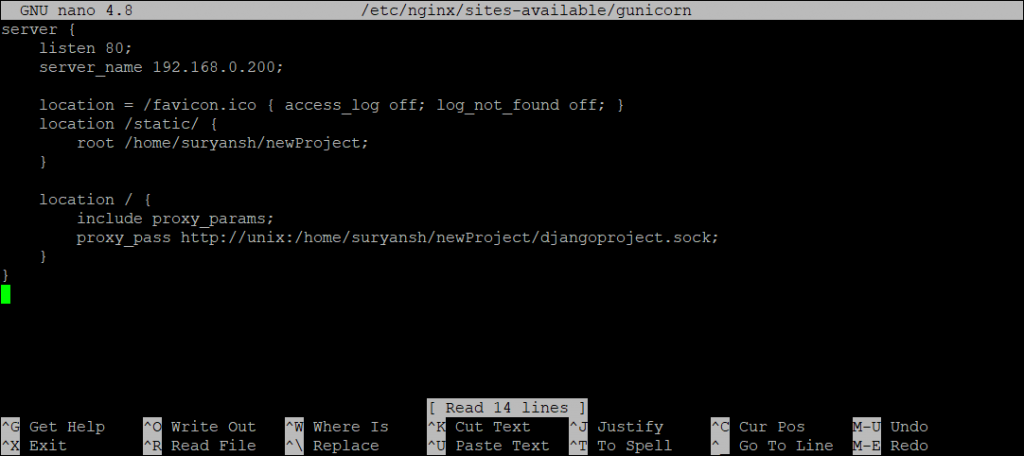
sudo nano /etc/nginx/sites-available/gunicorn
And then add the following and replace them with your details:
server {
    listen 80;
    server_name your_server_domain_or_IP;

    location = /favicon.ico { access_log off; log_not_found off; }
    location /static/ {
        root /home/myusername/newProject;
    }

    location / {
        include proxy_params;
        proxy_pass http://unix:/home/myusername/newProject/djangoproject.sock;
    }
}
Save the file.
Then create a symlink to enable NGINX virtual host, by executing:
sudo ln -s /etc/nginx/sites-available/gunicorn /etc/nginx/sites-enabled/
To test your NGINX configuration for errors, execute:
sudo nginx -t

Finally restart the NGINX service by executing:
sudo systemctl restart nginx
You can now close port 8000 and allow NGINX ports, by executing:
sudo ufw delete allow 8000
sudo ufw allow 'Nginx Full'
Now visit http://your_server_domain_or_ip/ to test out your Django set up with NGINX, Gunicorn, & PostgreSQL.

Congratulations! We have successfully set up Django with NGINX, Gunicorn, and PostgreSQL.
Conclusion
Django is a great Python web framework for developing web applications, it comes with a handy development server that shall never be used in a production environment. In production environments, a setup similar to what we have shown above must be used. In this article, we have set up a Django application with PostgreSQL for the database, Gunicorn for WSGI, and NGINX as a reverse proxy. If you’re wondering between PostgreSQL vs SQLite, the answer generally lies in your use-case and how portable and simple you want your database system to be.
We hope you found this tutorial helpful. Thank you for reading! 😀