
Because Linux is a multi-user system, several user profiles can be created on the same machine. This is a basic System Administration task, and you should also know how to add new users and into which group, and you should also know about the process of removing a user.
Also read: Linux User Administration: A Complete Guide to Managing Multi-User Systems
There are several methods of adding a user, however, we are only going to discuss the useradd command.
Adding a user with the useradd command
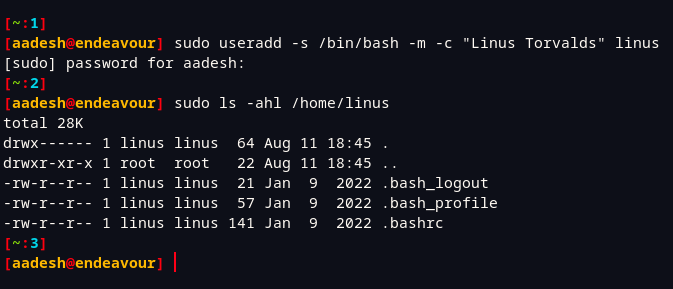
The useradd command is the most basic method through which you can add a user. Other commands or GUI elements are just more user-friendly frontend for the same command. You can add a user simply by typing:
sudo useradd -s /bin/bash -m -c "Linus Torvalds" -G jellyfin linus
In the above command, we have used the following options :
- sudo: This just means we are running the command as a root, i.e, with administrative privileges.
- useradd: The main command
- -s /bin/bash: The default shell of the new user.
- -m: This option is used to create a home directory for the new user. A new ‘/home’ directory will be created with the specified account name.
- -c “Linus Torvalds”: This is optional, it just sets the full name of the user.
- -G jellyfin: This is also optional. With the -G option, you can add the user to a specified group, the group must exist to run the command with this option successfully. In the above example, we are adding the new user to a group named jellyfin.
- linus: It is the name of the new user account. This must be a unique string.
Now, when you check the /home/linus directory, you will find all the default hidden files:
sudo ls -ahl /home/linus
- You can also use the -d option to set a custom home directory location for the new user. For example :
sudo useradd -m -d /opt/username username
This command will create the home directory for the new user in /opt/username directory.
- Using the -u flag, you can create a new user with a specific User ID. For example, to create a new user with UID 1600, you can type:
sudo useradd -u 1600 username
- A new user can also be created with an expiry date, just use the -e flag along with the expiry date like this:
sudo useradd -e 2023-01-01 username
Note that we have not created a password for this user yet. To do that type:
sudo passwd username
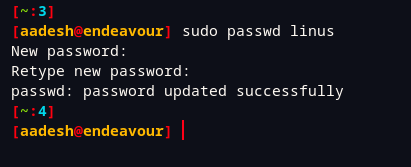
Type a new password and then press the enter key and then re-type it to confirm the new password.
- It is advisable that the user should change their password once they have the access to their account. In order to force this, you can add the –expire flag. This will force the user to create a new password upon login.
sudo passwd --expire linus
Removing a User
userdel command is used, along with some options, to remove a user. You have to simply type :
sudo userdel username
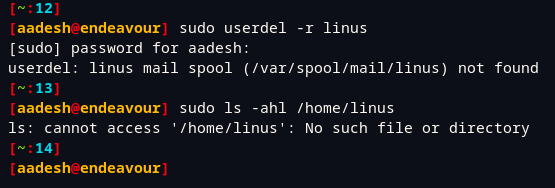
This will automatically remove the entries from /etc/passwd and /etc/shadow files. However, in most Linux distributions, the home and mail spool directories are not removed. In order to remove them, you can use the -r option like this :
sudo userdel -r username
If the user you want to remove is currently logged in, this command won’t run successfully. You can kill all the processes running from that user using the following command and then try to remove the user :
sudo killall -u username
Summary
In this tutorial, we have learned the complete process of adding and removing new users from the Linux system. Let me know in the comments if you have any doubts regarding any command/option.