
Samba serves a Linux directory to Windows, macOS, and Linux clients over the Server Message Block (SMB) protocol, and CentOS Stream 10 needs matching service, firewalld, SELinux, filesystem, and account settings before that directory becomes available.
What you will configure
This setup creates a writable share at /srv/samba/teamshare for one Samba user. It uses CentOS Stream 10 commands, a dedicated Unix group, a persistent firewalld rule, and an SELinux file label that permits smbd to serve the directory.
- Install the Samba server and client utilities.
- Create a group, user, and shared directory.
- Add a restricted share to smb.conf.
- Allow SMB through firewalld and validate the configuration.
Install Samba on CentOS Stream 10
Install Samba with dnf. The samba-client package supplies smbclient, which gives you a local client check after the server is configured.
sudo dnf install samba samba-client policycoreutils-python-utils
The package installation makes the Samba programs available, but it does not publish a share or start the service.

The retained package image shows the package-management step that precedes the server configuration. Use dnf on CentOS Stream rather than copying a yum command from an older release.
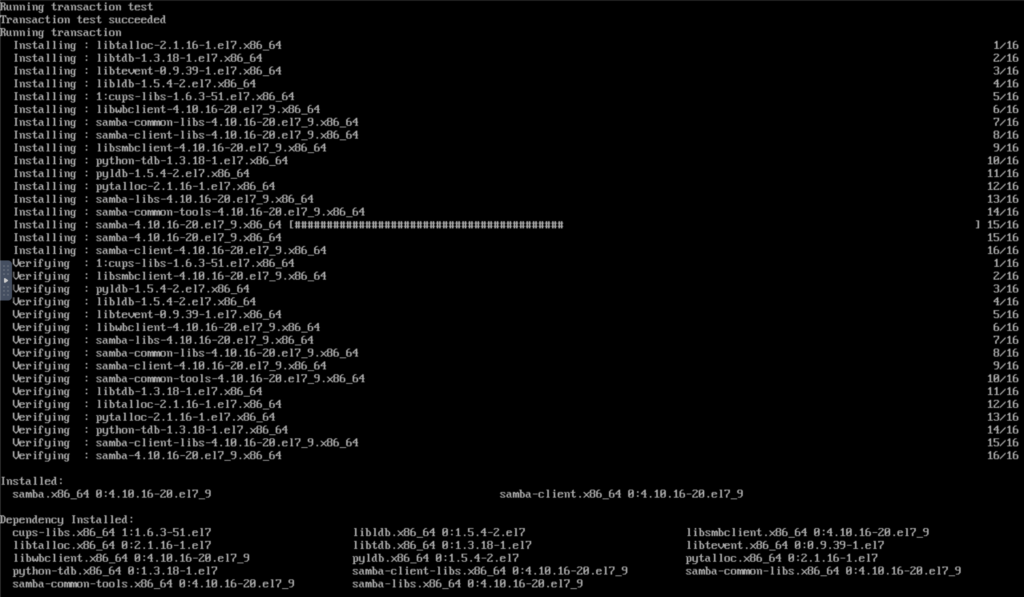
Package output confirms that the server utilities entered the system. Continue with the service and share configuration rather than treating the install as the acceptance check.
Create the share directory and Samba user
Samba checks its own password database, while the directory still follows normal Linux ownership and mode rules. Create the Unix group and account before adding the Samba password.
sudo groupadd --system smbshare
sudo useradd --create-home --groups smbshare alice
sudo passwd alice
sudo smbpasswd -a alice
sudo install -d -o root -g smbshare -m 2770 /srv/samba/teamshare
The set-group-ID mode bit keeps new files in the smbshare group. If several people need access, add each Unix account to that group and run smbpasswd -a for each person.

The directory must have matching group ownership and mode before Samba can grant access. A Samba password alone cannot bypass the filesystem permission check.
Label the directory for SELinux
On CentOS Stream, SELinux can deny smbd even when the Samba configuration and Unix permissions look correct. Label this dedicated share with samba_share_t, then restore the label onto the directory.
sudo semanage fcontext -a -t samba_share_t '/srv/samba/teamshare(/.*)?'
sudo restorecon -Rv /srv/samba/teamshare
Use a dedicated share path so the SELinux rule stays narrow. The Linux security and access control guide explains how SELinux and firewalls enforce separate checks.
Configure smb.conf
Back up the configuration file, then add one share definition. This example limits access to alice and makes the directory writable.

Keeping a backup gives you a clean restore point if you later add a guest share, printer share, or Active Directory integration.
sudo cp /etc/samba/smb.conf /etc/samba/smb.conf.bak
sudo bash -c 'cat >> /etc/samba/smb.conf <<"EOF"

[teamshare]
    path = /srv/samba/teamshare
    browseable = yes
    read only = no
    valid users = alice
    force group = smbshare
    create mask = 0660
    directory mask = 2770
EOF'
sudo testparm -s
testparm parses smb.conf before the service reloads it. Fix every reported error before you start smbd, because a malformed share can leave the previous configuration in service.
Start Samba and allow SMB through firewalld
Enable the smb service and add the named Samba service to the active firewalld configuration. The permanent rule survives a restart only after firewalld reloads it.
sudo systemctl enable --now smb
sudo firewall-cmd --permanent --add-service=samba
sudo firewall-cmd --reload
sudo firewall-cmd --list-services

The service state tells you whether systemd started smbd. It does not confirm that a client can authenticate or that SELinux permits the share path.
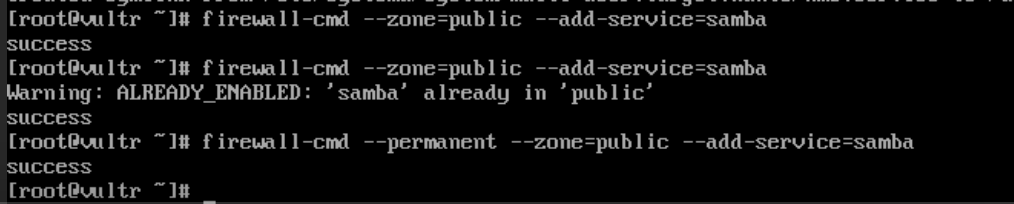
The firewalld rule exposes the Samba service through the current zone. For a broader CentOS zone workflow, use the CentOS firewalld tutorial.
Verify the share locally
First validate the service and Samba syntax, then list the share through smbclient. Enter the password created with smbpasswd when prompted.
sudo systemctl status smb --no-pager
sudo testparm -s
smbclient -L //localhost -U alice
smbclient //localhost/teamshare -U alice -c 'ls'
A successful list confirms that smbd accepted the account and could reach the share. If the share is absent, read the testparm output first, then check journalctl -u smb and the directory label with ls -Zd /srv/samba/teamshare.

The retained service output is useful for comparing a running daemon with a failed start. Use current systemctl and smbclient output for the final acceptance check.
Connect from another machine
From Windows, open \\server-name\\teamshare in File Explorer and sign in as alice. The Windows Samba mounting guide covers the client-side path and credential prompt.
For a Linux client, mount the share with CIFS after installing cifs-utils. The Samba on Linux overview gives protocol context, while the SSHFS guide helps when encrypted SSH-based access fits the job better.
Troubleshooting checklist
- Run sudo testparm -s after every smb.conf edit.
- Check sudo systemctl status smb –no-pager when smbd will not start.
- Confirm the firewall rule with sudo firewall-cmd –list-services.
- Inspect the SELinux label with ls -Zd /srv/samba/teamshare.
- Check authentication with smbclient before debugging a remote client.
Conclusion
A Samba share on CentOS Stream 10 works when five controls agree: smbd is running, firewalld allows Samba, SELinux labels the share, Linux permissions admit the group, and smb.conf names the user. Start your next change with testparm, then run smbclient locally before asking a remote client to connect.