

Wireshark is one of the best tools for penetration testers and network administrators alike. Let’s learn to install Wireshark on Ubuntu in a step-by-step manner. I’ll document the complete steps from installing to running and a few basic functionalities below. So if you follow through, you should have an up and running Wireshark on your Ubuntu machine.
How to Install Wireshark On Ubuntu/Debian?
Let’s get right into it now. The Wireshark package is available in the Ubuntu and Debian repositories by default. The only time you’d really want to compile from the source or use a PPA would be if you need specific functionality that you know is unavailable on the default package. But I’ll leave that up to you. For the most part, you can get just about everything with the default package.
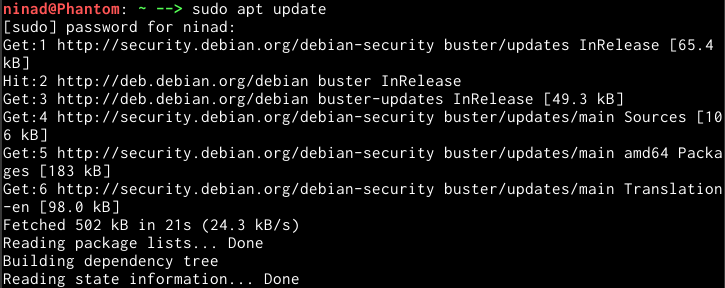
1. Update System Repositories
As we always do, let’s get our system repositories updated using the apt update command. Notice that we’re not using apt-get. If you want to know the difference between the two commands, read through the apt vs apt-get command article we previously wrote.
sudo apt update
2. Install Wireshark on Ubuntu Through the Repository
Let’s download and install the Wireshark package using the apt install Wireshark command.
apt install wireshark
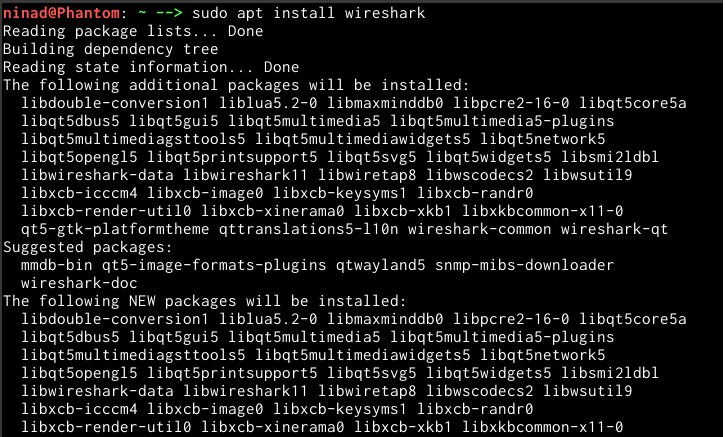
When you are trying to install Wireshark on Ubuntu or Debian, you don’t need to worry about the dependencies because the apt package manager auto resolves all the required and addon packages to do a “complete” install.
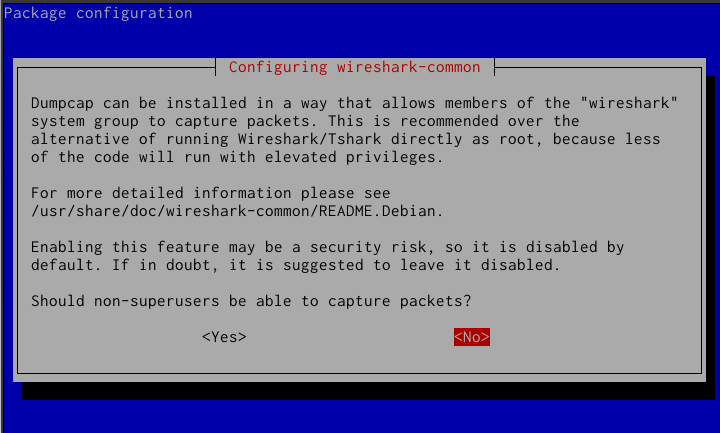
3. Configuring Wireshark
Once the Wireshark package has been downloaded, you’ll be presented with the following screen on your terminal. If you’re looking for added security, allowing only super users to analyze packets is a good idea. What this essentially means is that the users who are not root, or are not allowed to use the sudo command won’t be able to use Wireshark to capture packets. I’ll continue with “No” here which denotes that I am only allowing super-users to capture network packets.
How to Capture Packets With Wireshark
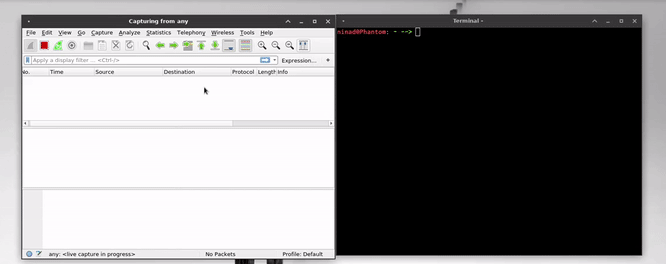
Alright, now that you’re done with what’s required to install Wireshark on Ubuntu or Debian, it’s time to run it and play around with the functionality. To run Wireshark, you can type the command sudo wireshark in your terminal or run Wireshark from the Ubuntu menu.
You’ll reach this screen as soon as you enter the command above. Now to capture your first set of packets, you can select the “any” network interface and then click on the shark fin icon on the top left of the screen as shown in the screenshot below.
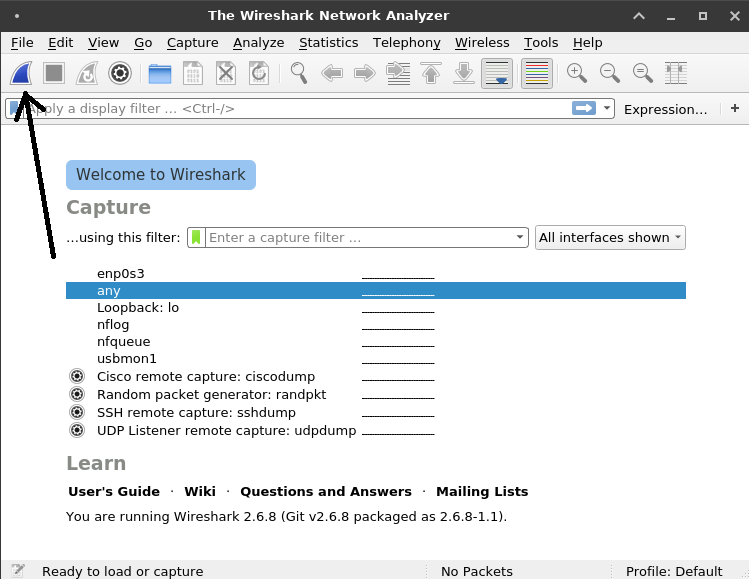
What this essentially does is it allows you to view all the incoming and outgoing packets on all the interfaces. The below section will give you a glimpse of what happens when you capture the packets and how they’re displayed on the Wireshark screen.
Capturing and Viewing Packet Information
Once you have clicked on the shark fin icon, a computer with an active internet connection and background services will see packets being captured. In my case, I don’t really have any services running in the background so I’ve simply run an apt update to show some network activity.
Have a look at the GIF below:
As you can see in the above gif, the Wireshark screen immediately displays all the packets that have traveled through the network. Any information that is plaintext can be easily viewed by clicking on individual packets. This concept of viewing network packets that are not intended for your device or application is called as “sniffing”.
Who Uses Wireshark and Why?
I’m hoping that you’ve already gotten a gist of what this tool does. But if you’re still not clear, let’s understand what the use of Wireshark is. Here’s an example:
- You’re sitting in a cafe and have your laptop connected to their open wifi
- Someone (let’s call her HackerWoman) interested in learning more about you sits in the same cafe and connects to the same wifi
- HackerWoman opens up Wireshark, and starts sniffing (the act of capturing network packets not intended for you) the network and identifies your device’s IP
- Now, she is able to filter the packets by recipient IP and only see your network activity
Any website that you connect to is sent over the network and a person with the right skills and an intention, will easily be able to sniff out private data from your network activity.
Now you know why your device warns you before connecting to open and public networks stating that others can “see” your network activity.
Conclusion
I hope this tutorial has been of value to you and have been able to install Wireshark and understand the concept of packet capturing. If you’re still confused, I’d suggest you start your journey into exploring this really vast tool by browsing through the Wireshark Docs.