
If your Ubuntu operating system is getting stuck at the boot process, it is a serious issue as it prevents you from accessing anything on your PC. As we cannot access the OS, we are left with the BIOS and the bootloader, which can be a bit complex for an average user. Ubuntu is a stable operating system, but as it is very forgiving in terms of superuser privileges, sometimes one might mess up with the system files unintentionally, which causes issues like this. Possibility of this error increases if you dual boot your system, specially with Windows 10 or 11.
In this guide, we will discuss the issue along with its potential fixes or workarounds.
Reasons for the error
There can be many reasons for this error to occur. Some of the most common causes are:
- Issues with hardware or device drivers
- Issues with the GRUB configuration file
- Broken software packages
- PC crashed during an update
As there can be a lot of reasons for this error, there might not be one general solution, and we will have to try various methods.
Identifying the problem
Using the journalctl utility, one can quickly identify the problem by looking at the system logs. This utility can be used in Ubuntu recovery mode, making it ideal for troubleshooting when your PC has trouble booting up. To see the system logs using journalctl, follow the steps below:
1. Turn on your system, then quickly press and hold the Shift key to enter the GNU GRUB menu
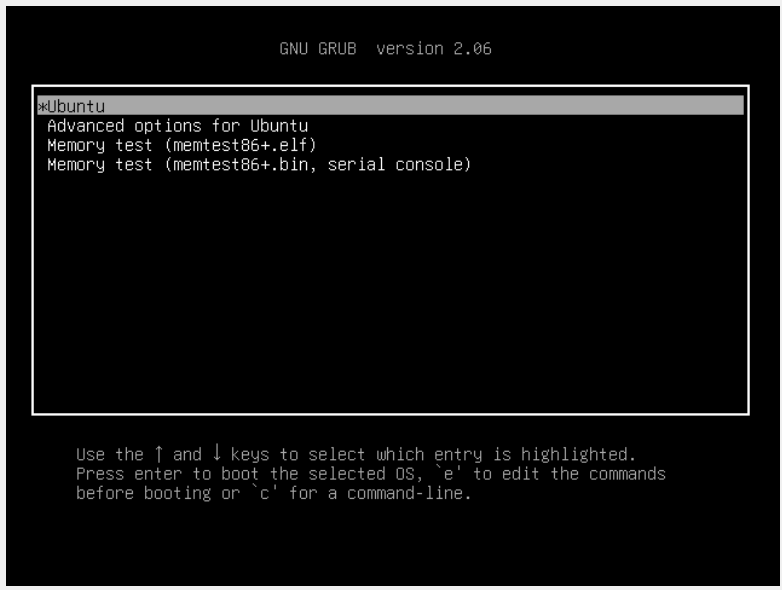
2. Select the option which says ‘Advanced options for Ubuntu‘
3. In the next menu, select the option ending with ‘(recovery mode)’ which will open a few recovery options
4. Select the Drop to root shell prompt option and press Enter for maintenance
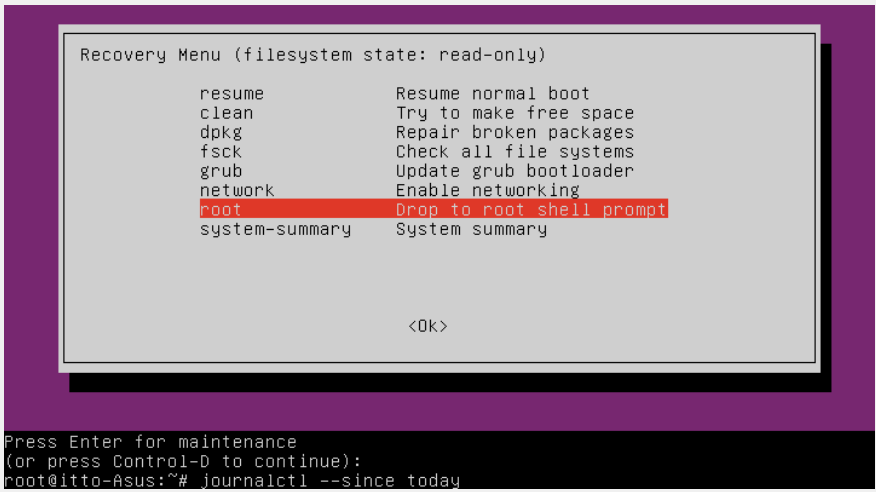
5. Enter the following code:
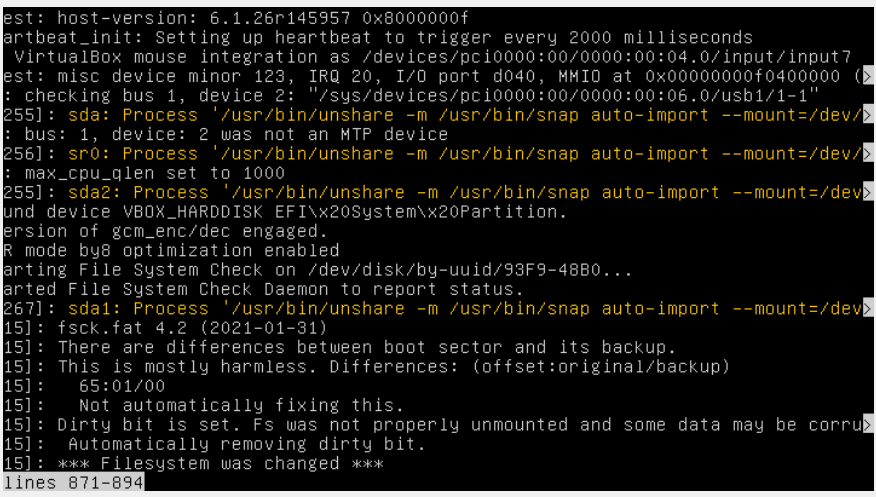
journalctl --since today
This code will show the system log for all the activities on your system today.
If the log is very long, you can limit the number of lines using the command:
journalctl --lines=100
The above code is an example to show the last 100 lines of the log. If you notice any error (usually highlighted with red), or warning (highlighted with yellow), it will likely cause the OS to freeze on boot.
Methods to fix the error
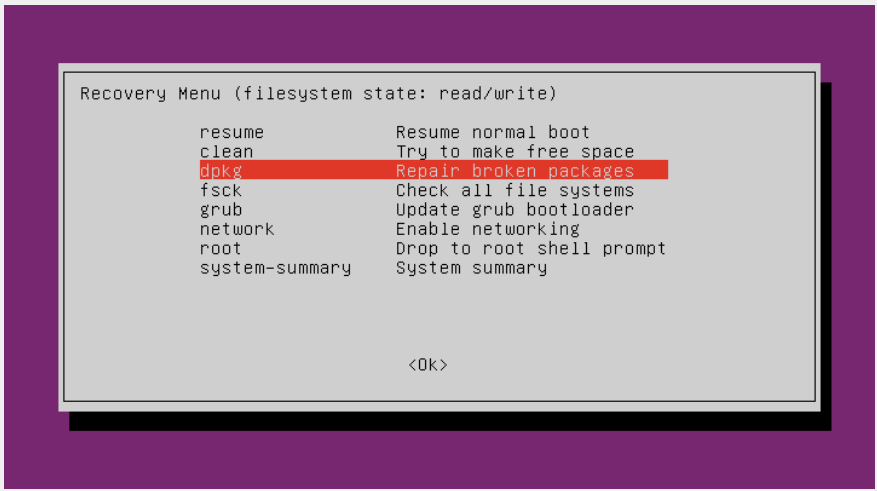
Method 1: Repair broken packages
It is possible that while an upgrade or installation, some installation packages got corrupted because of network/server issues. These corrupted packages can cause problems like boot screen freeze. To repair the broken/corrupted packages, follow the steps below:
1. Enter recovery mode using the method discussed above in the ‘Identifying the problem‘ section
2. Select the Repair broken packages option and continue with the instructions on the screen.
Method 2: Remove the Nvidia driver
NOTE: Try this method only if you have an integrated GPU available on your system, as this will remove your dedicated GPU drivers.
To utilize the dedicated Nvidia GPU, an operating system needs Nvidia drivers. Nvidia drivers are usually a common cause of this issue on Linux systems, as there is a chance that your system might have corrupted driver files.
In case of corrupted driver files, we need to remove them. To do this, follow the steps below:
1. Using the method discussed in the ‘Identifying the problem‘ section, Select the Drop to root shell prompt option
2. In the root shell prompt, enter the following code:
sudo apt-get purge nvidia*
If you have enabled UEFI secure boot, then running this command will also ask you for a password. This command will remove all the Nvidia driver-related files, after that, just reboot your system.
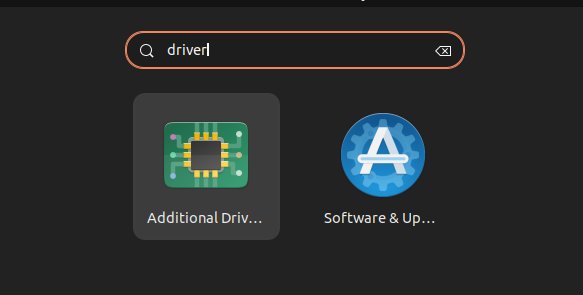
Once you have successfully logged in to the system, you can reinstall the drivers by using the following method:
1. Open Additional drivers
2. Select the suitable latest version and click on Apply Changes
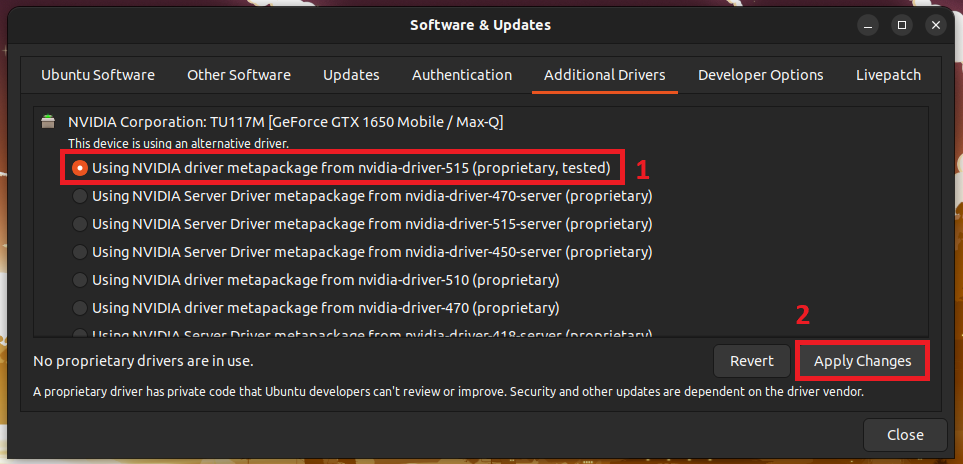
3. Wait for the installation to complete, then restart the system.
Method 3: Boot into Ubuntu without a graphics driver by changing GRUB
This method doesn’t have the constraint of only working for Nvidia drivers. This method allows the kernel to boot up the OS without loading the graphics driver by modifying the grub boot parameters. This is a relatively easy and quick solution, follow the steps below:
1. Turn on your system, then quickly press and hold the Shift key to enter the GNU GRUB menu
2. While in the GRUB menu, press E to edit the bootup commands
3. Look for the line starting with linux and add nomodeset at the end
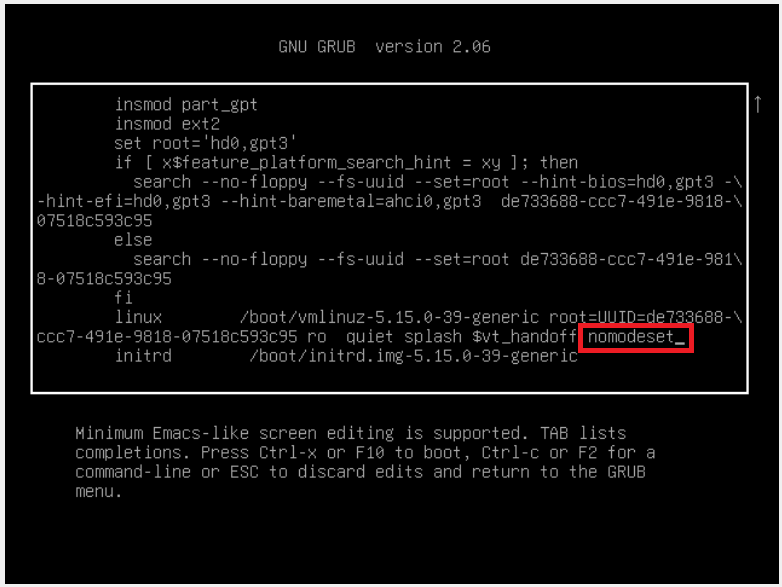
nomodeset‘ at the end of this line4. Press F10 or CTRL+X to boot into the system.
From here, you can either reinstall the driver files or use Ubuntu as it is.
To make nomodeset permanent (so that you don’t have to edit the bootup commands every time), open the terminal and follow these steps:
1. Enter the following command to edit the grub file:
sudo vi /etc/default/grub
2. Add nomodeset to the GRUB_CMDLINE_LINUX_DEFAULT="quiet splash” so that the content of the file looks like the following:
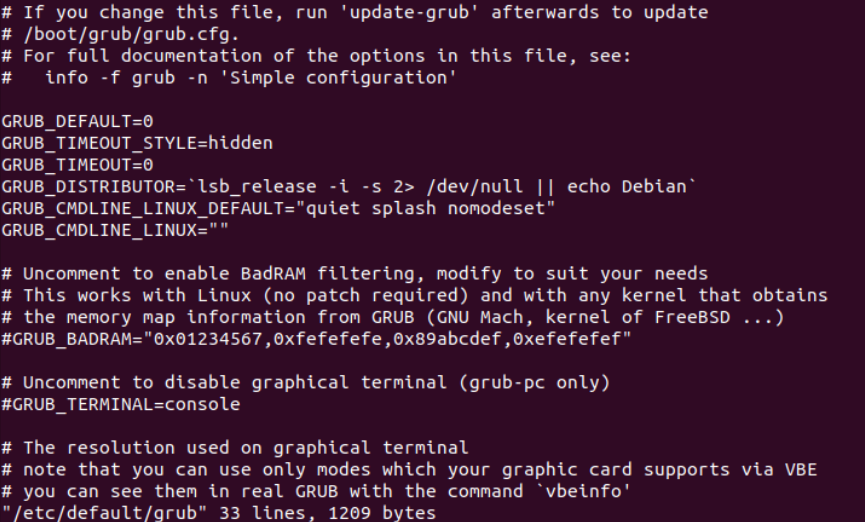
nomodeset in GRUB config file3. Save the changes made by pressing the ESC key and entering :wq
4. Update the GRUB file using:
sudo update-grub2
Conclusion: Fixing Ubuntu freezing at boot time
We can conclude that most boot-up-related issues are because of broken drivers or system files. We hope that you were quickly able to fix the problem with the help of this article. In case none of the above methods worked, you might need to consider reinstalling Ubuntu on your PC.