

Setting up two or more operating systems alongside each other in dual-boot is one of the easiest things that seems like a daunting task for those who don’t have experience in installing an operating system. Dual boot in separate hard drives has its own advantages such as:
- Less cluttered partition table
- More space for each operating system (depending on the capacity of the drives)
- Further partitioning becomes less confusing
- No need to back up data for the current OS
Installing Windows and Ubuntu by partitioning the same drive has already been covered by us. In this guide, we will set up Windows and Ubuntu on separate hard drives.
Struggling to uninstall your single partition Ubuntu dual boot? Read how to uninstall Ubuntu dual boot.
Prerequisites
The must-haves for successfully setting up Windows and Ubuntu in the dual boot configuration are:
- A Windows/Ubuntu bootable medium: Usually a CD or USB drive that acts as an installation medium for the operating system. This is the most important component as it contains the OS installation files.
- Free space: Around 50 GB of free space is recommended on both drives for an optimal experience.
Optional prerequisite: A non-metered internet connection to download updates and drivers during installation and setting up an account on Microsoft Windows.
Creating the bootable media using an ISO file
In most cases, you will be using a USB drive to install the two operating systems. Let us now create a bootable USB drive:
1. First, we will download the respective ISO file:
- For Windows: Microsoft Website
- For Ubuntu: Official Ubuntu
Once you have downloaded the ISO files, you will need to flash the file to the USB drive.
NOTE: Make sure to backup your USB drive as it will be formatted during the process.
Flash the USB drive with an Ubuntu ISO file
We will be using software called Rufus to flash the USB drive.
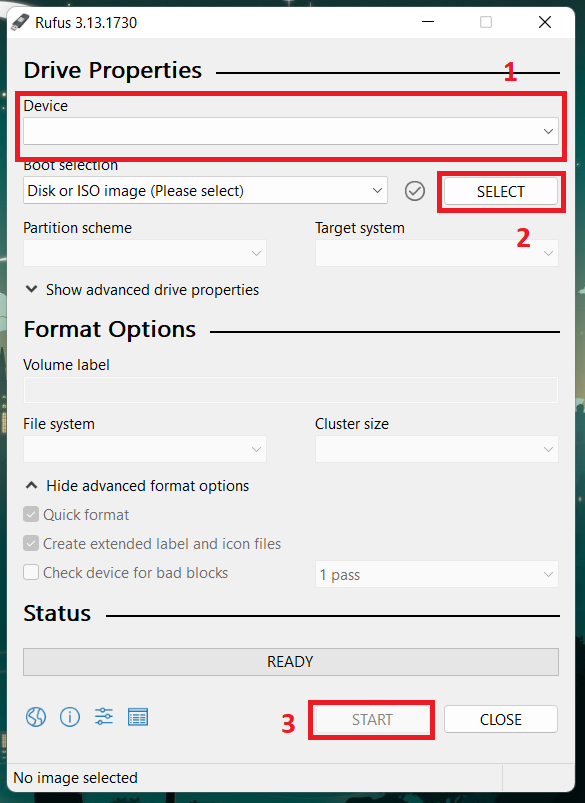
1. Plug in the USB drive, then open Rufus
2. In Rufus, under Device, select your USB drive using the drop-down menu
3. Under Boot selection, click on the SELECT button and select the ISO file you just downloaded
4. Click on the START button at the bottom and wait until the process is finished.
Flash the USB drive with a Windows ISO file
Here, we will be using the latest version of Windows, Microsoft Windows 11.
1. Download Balena Etcher and install it, here is a guide on how to do that on Ubuntu.
2. Run etcher and click on flash from file to select the ISO file
3. Select the target drive and click on the Flash! button to start flashing the drive.
Now that you have the bootable USB device ready, we can start the installation process. We will look at how you can set up the dual boot in two scenarios:
1. When you have Ubuntu as your primary OS
If you have Ubuntu as your primary OS and want to install Windows on the second hard drive, follow the steps below:
1. Make sure the bootable USB is plugged in and restart your device
2. Enter the boot menu (Note: Each laptop/motherboard brand has different key bindings to access the boot menu. Usually, it is done by pressing F2, F10, F12, or ESC keys when the computer is booting up).
3. Among the listed drives, select your USB device
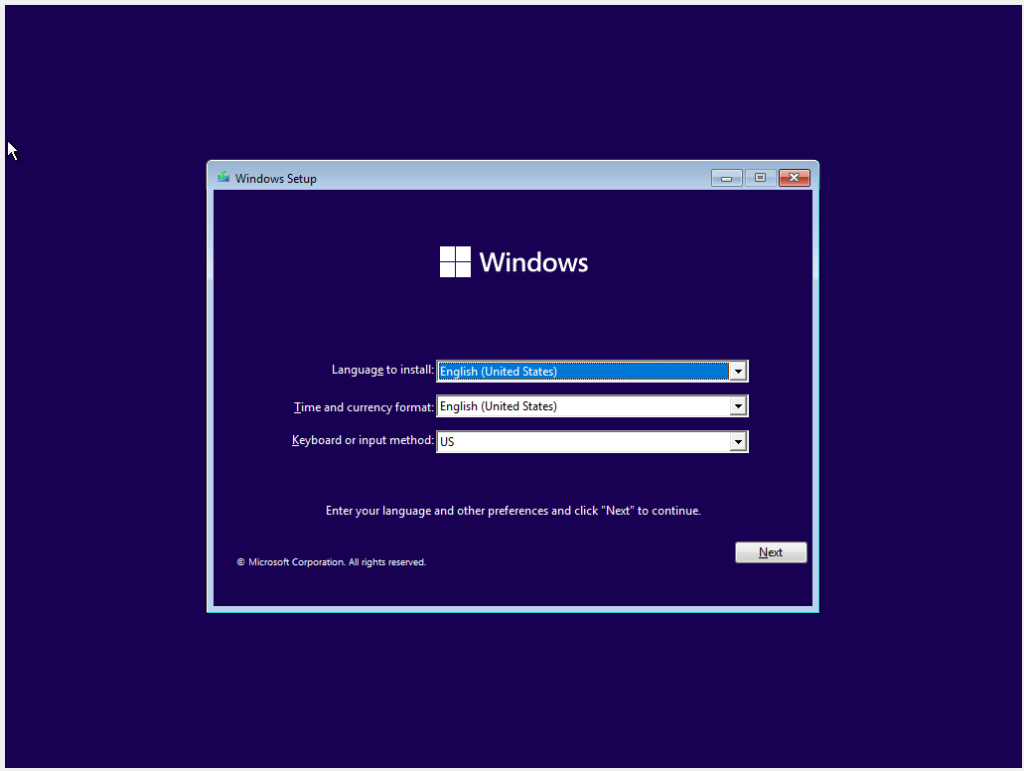
4. When you see the following screen, you have successfully entered the installation phase. Select your preferences and keep going
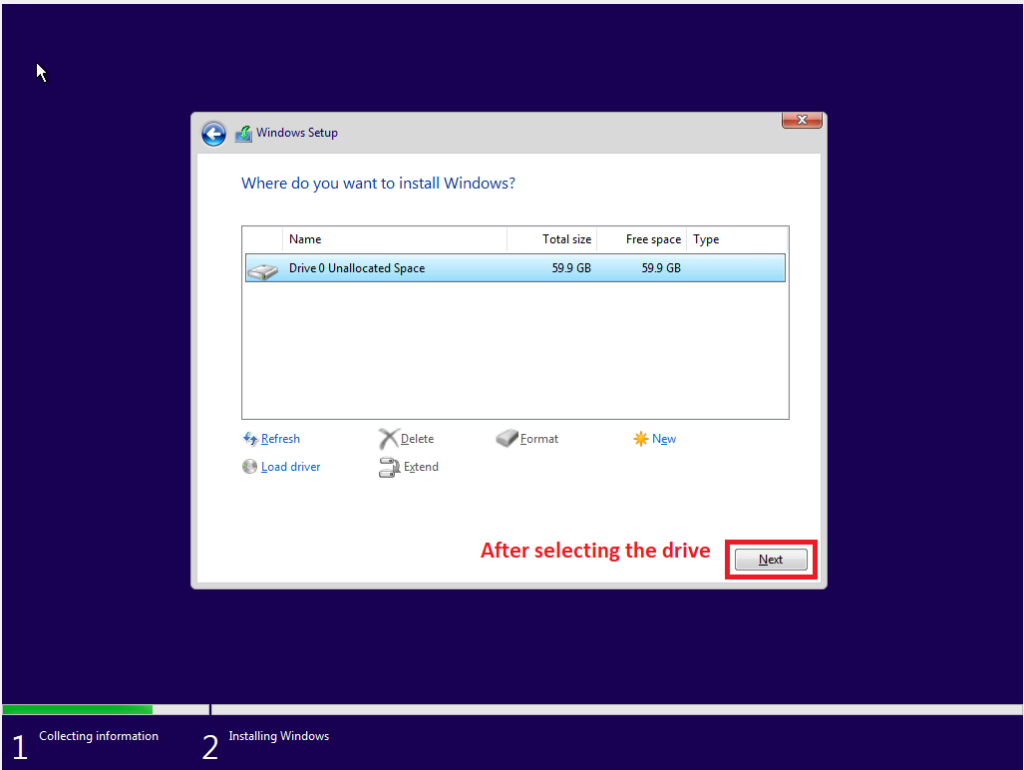
5. When you reach the following screen, you will be prompted to select the drive where Windows should be installed. All you need to do here is select the empty hard drive where you want to install Windows 11 and then click Next
Wait until the installation is completed. Your PC will restart automatically and you will see the bootloader menu which allows you to choose the OS you want to use.
2. When you have Windows as your primary OS
If you have Windows as your primary OS and want to install Ubuntu on the second hard drive, follow the steps below:
1. Repeat the above method up to step 3 and select your USB device
2. You will boot into the Ubuntu desktop, you can either try Ubuntu or Install it
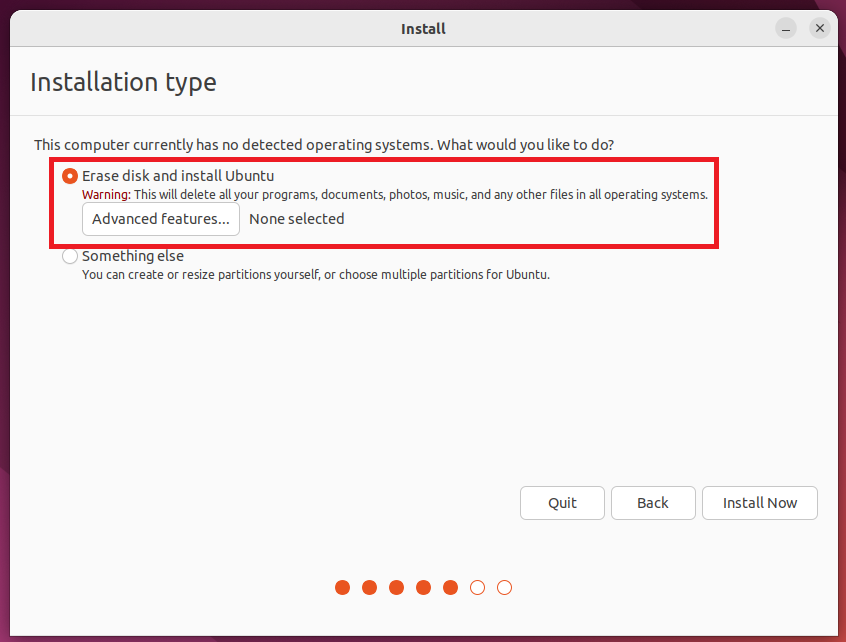
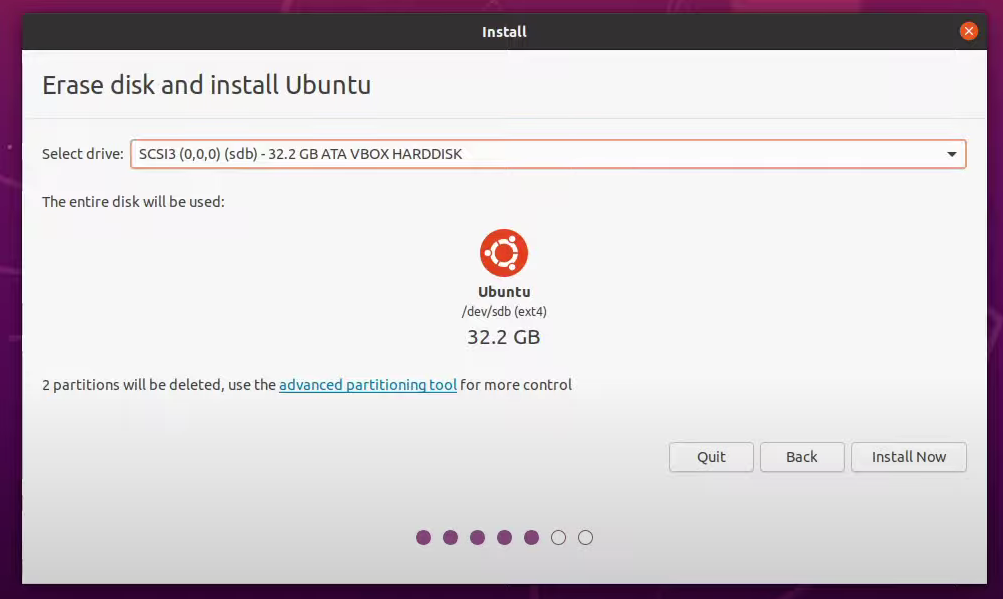
3. After selecting Install Ubuntu, choose your language and other preferences and continue until you see the following screen. Choose the ‘Erase disk and Install Ubuntu’ radio button and click Install Now
4. On the next screen, you will have to select the hard drive on which you want to install Ubuntu
5. You will be given a warning prompt that notifies you about the partitions that will be formatted, click Continue
6. Complete adjusting the settings (such as the time zone and login details) according to your preferences and the installation will begin.
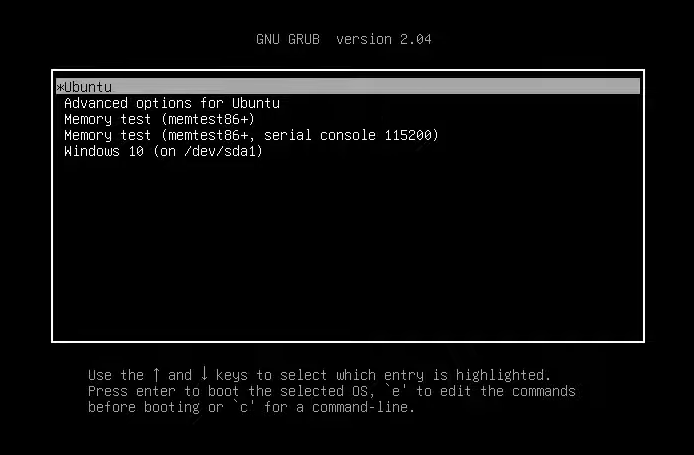
After the installation is completed you will be greeted with the GRUB bootloader menu where you can select the OS you want to use.
Summary
We learned the method to install Microsoft Windows and Ubuntu in a dual boot configuration on separate hard drives. This solution doesn’t differs much and is rather easier than installing both operating systems on the same hard drive. We hope you were able to accomplish your goals effortlessly with the help of this guide.