
Many users dual boot Ubuntu Linux and Windows 10 side-by-side on one hard drive. However, what if they decide to leave Ubuntu Linux for some reason and want to safely uninstall it without having any effects on Windows 10? This article will provide a step-by-step tutorial for removing Ubuntu from Windows dual-boot systems safely.
This procedure will delete Ubuntu from your device’s disk and permanently delete all the data you had stored there because the dual boot will be removed. Make sure to move any data you might not want to delete elsewhere before making any changes to your computer.
There are two steps to uninstalling Ubuntu Linux from your system. The first step is to remove Linux from your disk, and the second step is to remove the bootloader and restore the default Windows boot manager.
Step 1: Deleting Ubuntu Linux Partitions
If you installed Ubuntu in a dual boot setup on its own partition, all you need to do is uninstall that Linux partition from your computer. Let’s take a closer look at how to get all that done.
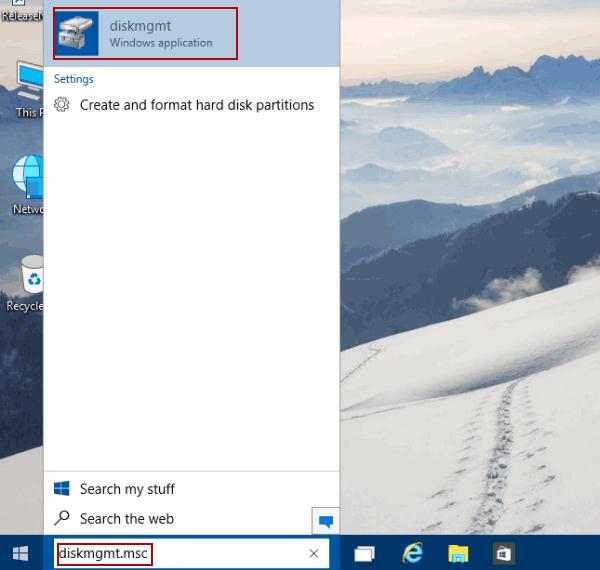
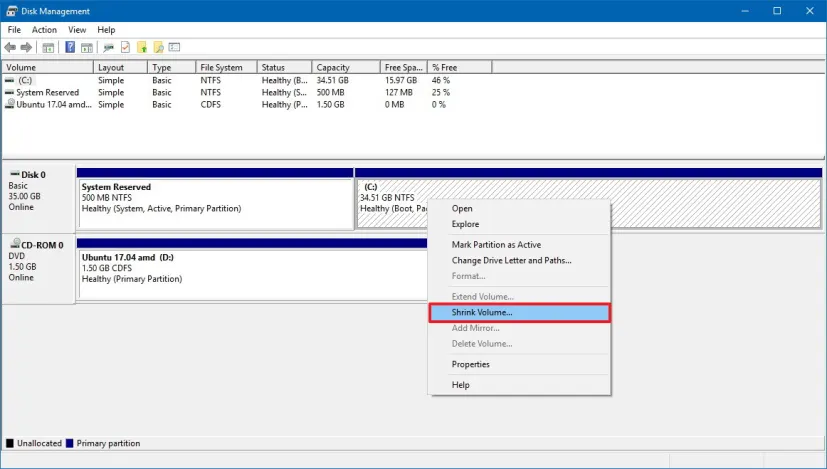
Initially, boot into your Windows operating system to begin the process. To access the disk management tool, open the search bar by pressing Windows + r, then type “diskmgmt.msc” and the Windows Disk Management window will pop up.
By looking at the partition’s size, you can quickly identify the Ubuntu root and boot partition. If you still can’t identify it, another tip is to look at the partitions that lack a file system and drive number. Windows files are typically in NTFS or FAT file systems and are identified by a drive letter, such as C, D, E, or F.
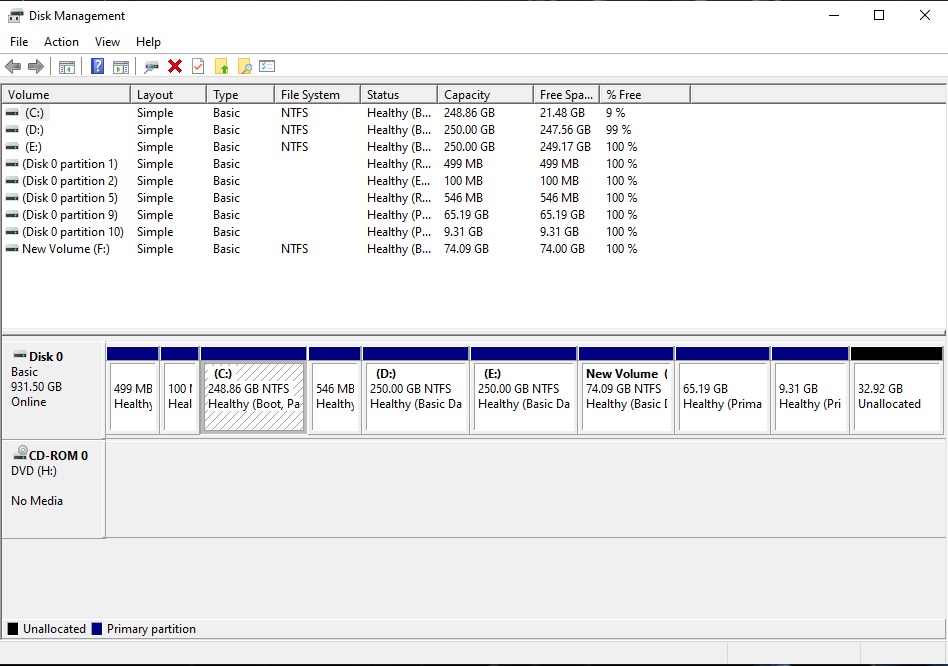
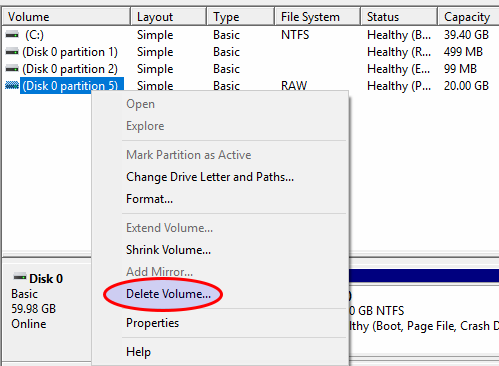
In order to uninstall Ubuntu, first, select all the Ubuntu partitions with a right-click and then choose Delete Volume, this will delete the Ubuntu OS from your PC and also any other data which you have stored on that partition.
Once the partitions have been deleted, they will show up as unallocated space on the Windows partition table. At this point, you can either create a new partition or extend an existing one using the unallocated space.
Step II: Remove Ubuntu Boot Loader
Once you remove the Installed Linux OS from your system, the GRUB bootloader is still there and needs to be removed as well. There are several ways to fix the bootloader; we’ll talk about the easiest two here:
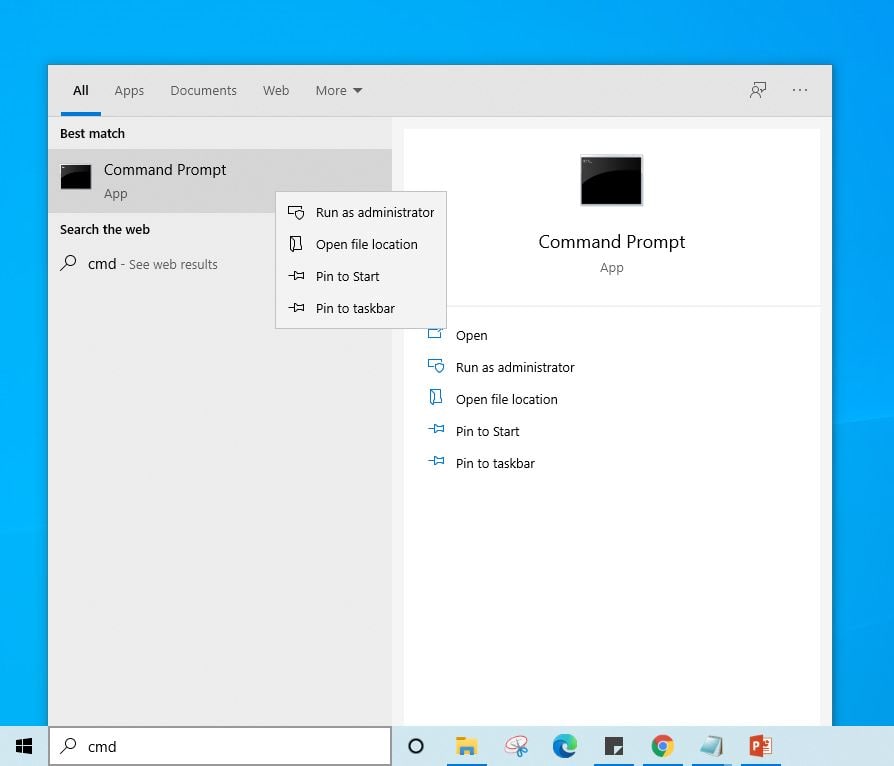
From the Command Prompt
You do not require a USB or CD for the installation of Windows when using this method. Simply search for the command prompt on Windows and select the option to run it as an administrator.
To set the correct EFI for default boot entry, type the following command into the command prompt once it has opened:
bcdedit /set "{bootmgr}" path \efi\microsoft\boot\bootmgfw.efi
In order to verify that the command was successful, boot your computer after that. Windows will successfully direct you there.
Using UEFI for changing boot orders
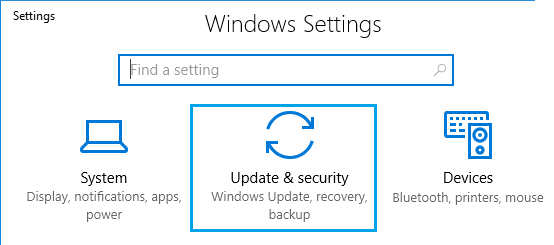
Additionally, you can alter the UEFI boot orders from the firmware settings. To do this, go to settings and choose Update Security:
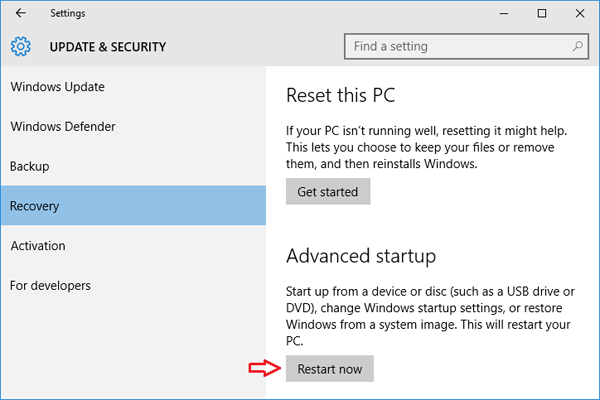
There will be a number of options presented in the following window; select “Recovery” and then click “Restart Now.”
When the system restarts, a window will appear asking you to select “Troubleshoot” and then “Advanced Options.”
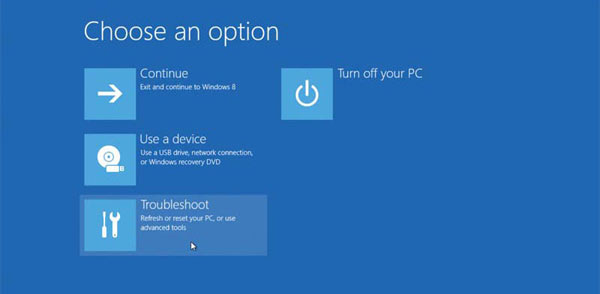
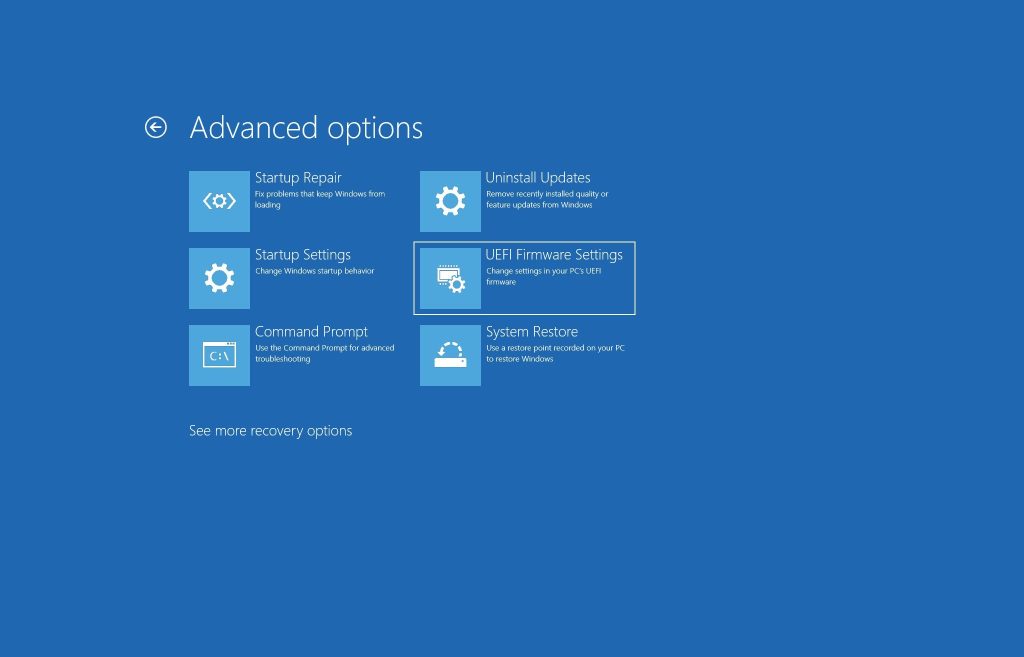
Next, select “UEFI Firmware Settings” and a screen with a “Restart” option will appear. If you choose this, the computer will successfully load into the BIOS.
Conclusion
In this article, we removed Ubuntu from Dual Boot from a system. Deleting the Linux partitions was the easy part, however, I can understand if you have trouble restoring the Windows Boot Loader and the Windows boot sequence after the process. If you encounter any issues after following this guide, then you can let us know down in the comments, and we will help you out. You can try out any other Linux Distribution in the meantime, or just reinstall the latest version of Ubuntu if you are willing to give it another shot.