
In this tutorial, we will be learning how to dual boot Ubuntu and Windows 10. Ubuntu is one of the most popular and user-friendly Linux distributions. Ubuntu would be usually recommended to anyone who is starting out using Linux. You might not want to fully commit and replace Windows 10 with Ubuntu and rather have both options and choose every time you boot up the machine. Doing so will be a piece of cake so let’s get started!
Steps to Dual Boot Ubuntu and Windows 10
Before we start this installation, it is recommended to take backup of all your data.
1. Creating a partition for Ubuntu
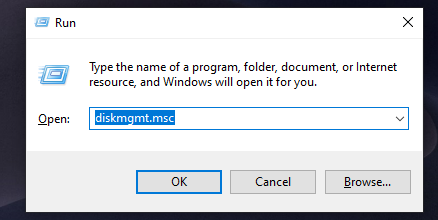
The first thing that we are going to do is take out some space from our hard disk for Ubuntu. To do us so we will be using the Disk Management utility on windows. To open up Disk Management, open the run dialog box by pressing Windows + R on the keyboard. After that in the dialog box type in “diskmgmt.msc” and press enter.
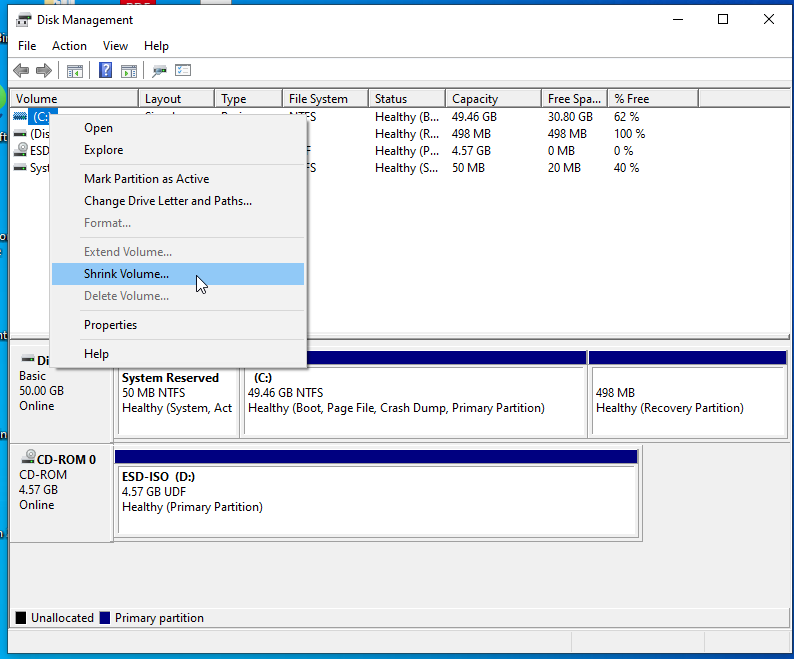
Now Select the drive you wish to partition, right click on it and select “Shrink Volume...“.
Now it will prompt you to type in the amount of space you need to shrink the drive. The space that we are shrinking will be space where our new OS will reside, so take a decent size at lease above 20gb. Here I am separating 20000 MB from the disk.
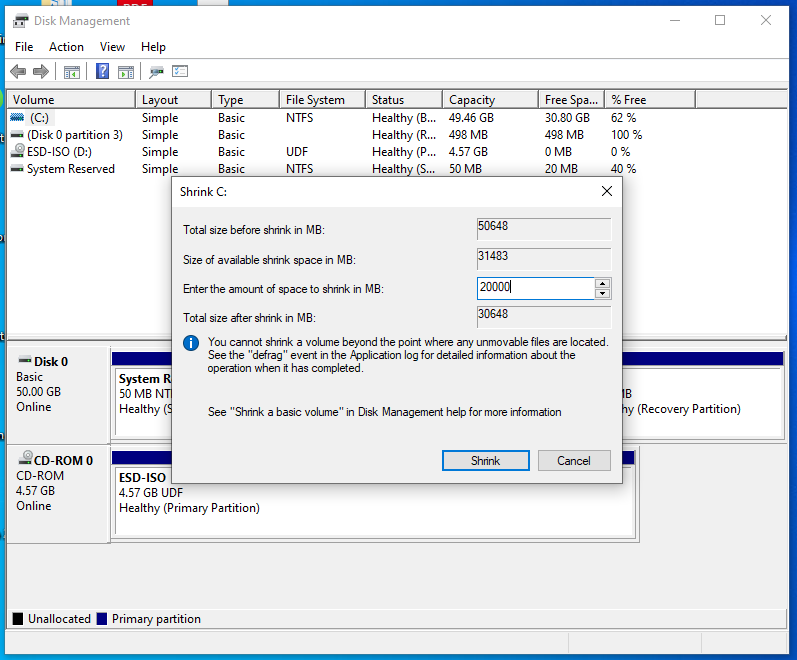
Click on Shrink and you will be seeing a chunk of Unallocated Space on your disk.
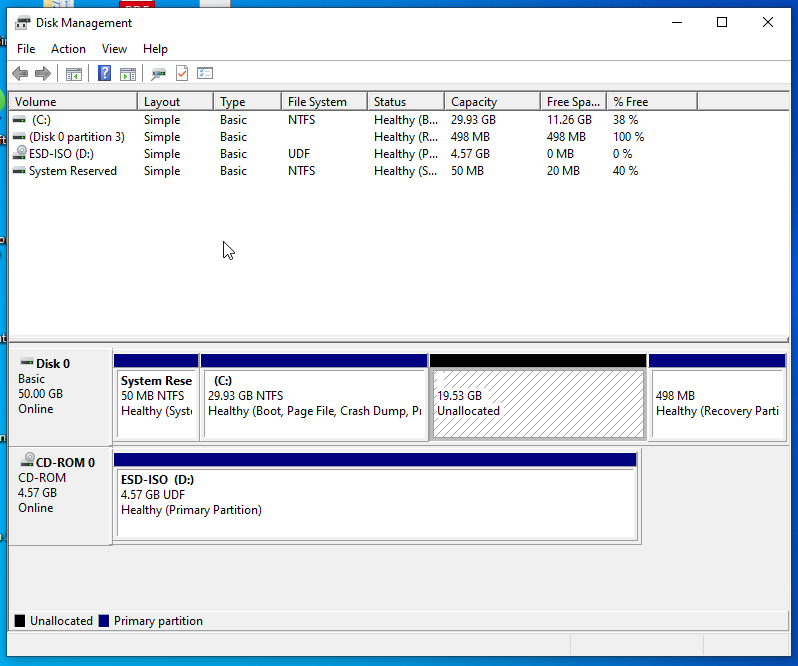
Now you can close the utility and head on to the next step.
2. Preparing Ubuntu Installation Media
The next step is to setup the Ubuntu installation media. Depending on the medium you will use to boot the device, you will need to change the steps below. We’re working with a USB boot setup here.
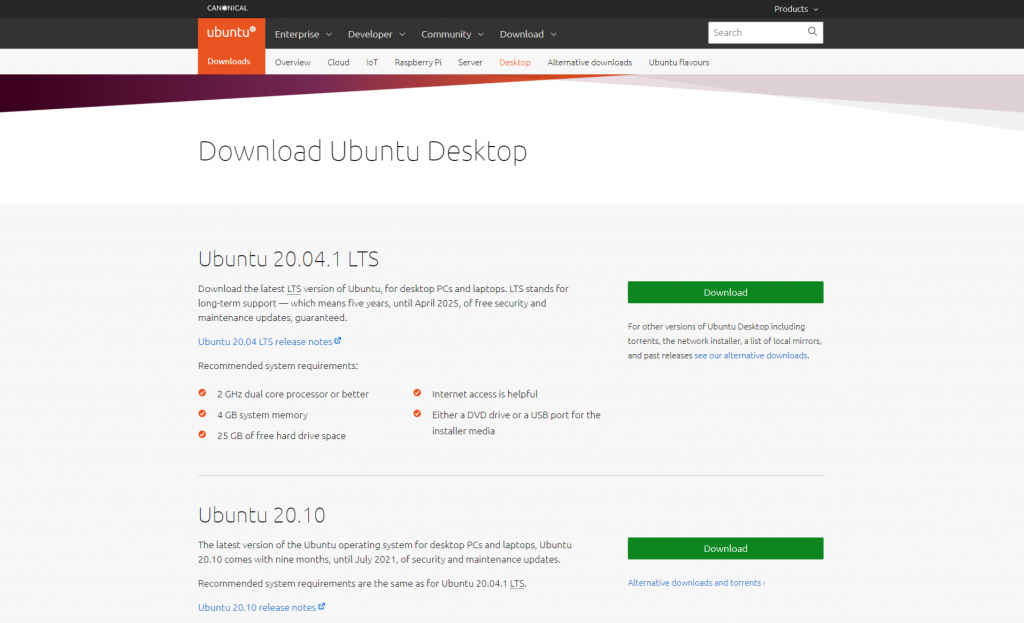
Downloading Ubuntu ISO files
First we download the latest version of Ubuntu from their official website.
Preparing Bootable Drive/Disk
Now we need to download a utility that will help us flash the ISO file to a disk/drive. There are many utilities to create an installation drive like Rufus, Etcher etc. I will be using Etcher as it is pretty simple to use. You can download Etcher from their official website.
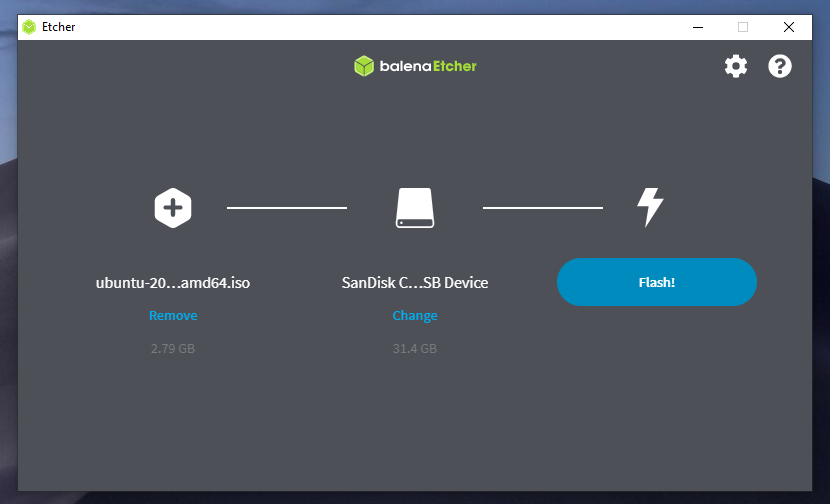
In Etcher, simply select the file that we are flashing (in this case the Ubuntu ISO file), select the drive on which we are flashing and click on “Flash!”. It will take a couple of minutes and your drive will be ready.
3. Installing Ubuntu
Once you’re all set with the install media, it’s time to begin with the installation to dual boot Ubuntu on Windows 10.
i) Booting up to Ubuntu Installation
First we insert the drive/disk that we have just flashed in the machine. After that we reboot the machine.
As soon as the machine starts we need to press a special key (usually F2, F10, or F12) to get into the boot selection menu. Once you are in the boot selection menu select the drive/disk that you have inserted and press enter. After which you will be booted into the Ubuntu installation screen.
ii) Setting Up the installation
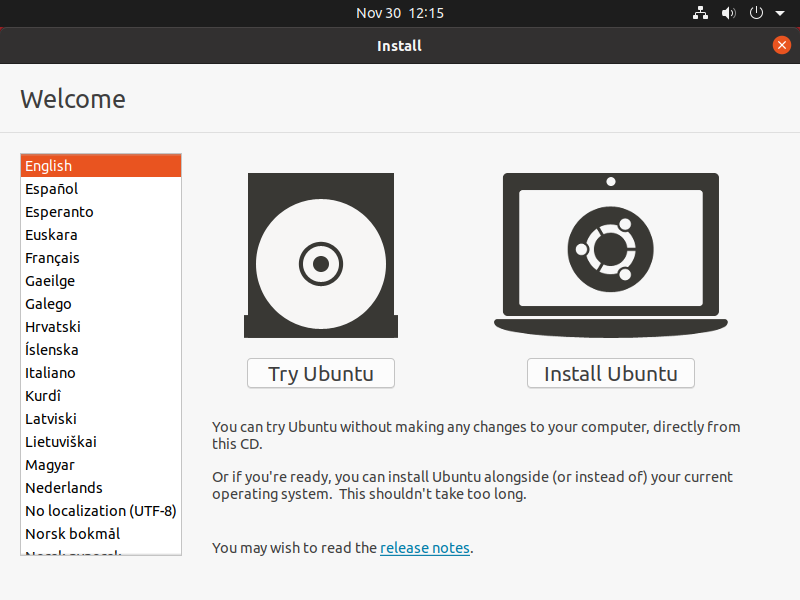
Click on “Install Ubuntu” after which select your keyboard layout and language. After continuing you will be seeing the following screen:
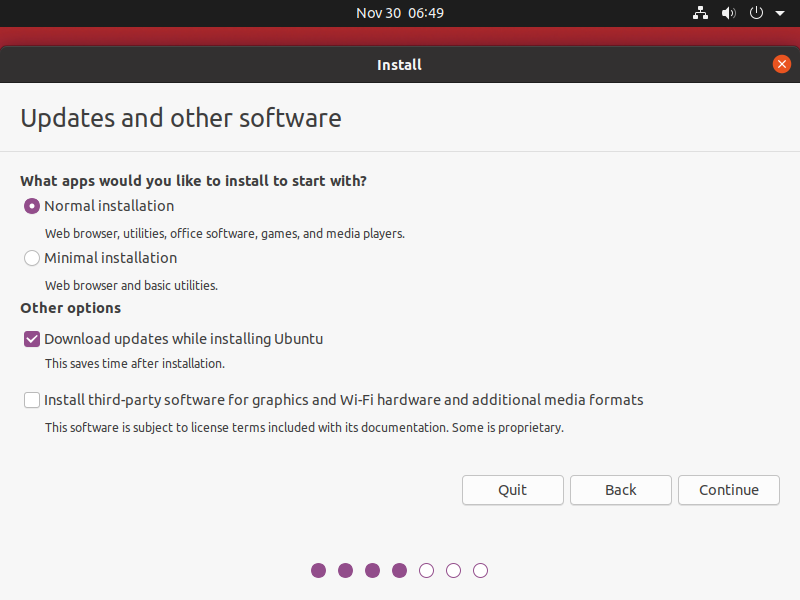
Now you can choose “Minimal Installation” if you only want all the necessary utilities and press Continue.
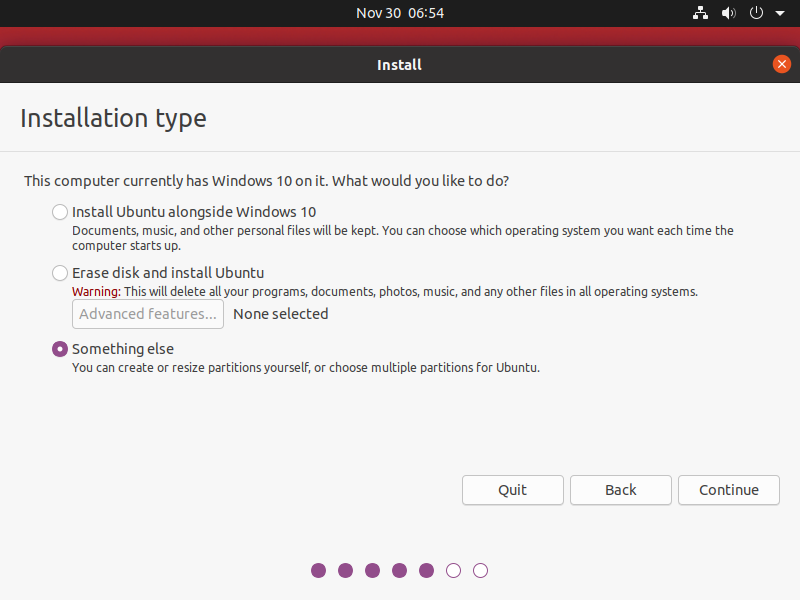
You can choose “Install Ubuntu alongside Windows 10” if you don’t wish to configure partition space yourself. It is a simpler option that you can go with. Here I will be going with the “Something Else” option as we have already partitioned the system and want to allocate that empty unallocated space that we created in the first step to Ubuntu.
iii) Partitioning Drives
Now if you have selected the “Something Else” Option, you will see the following screen:
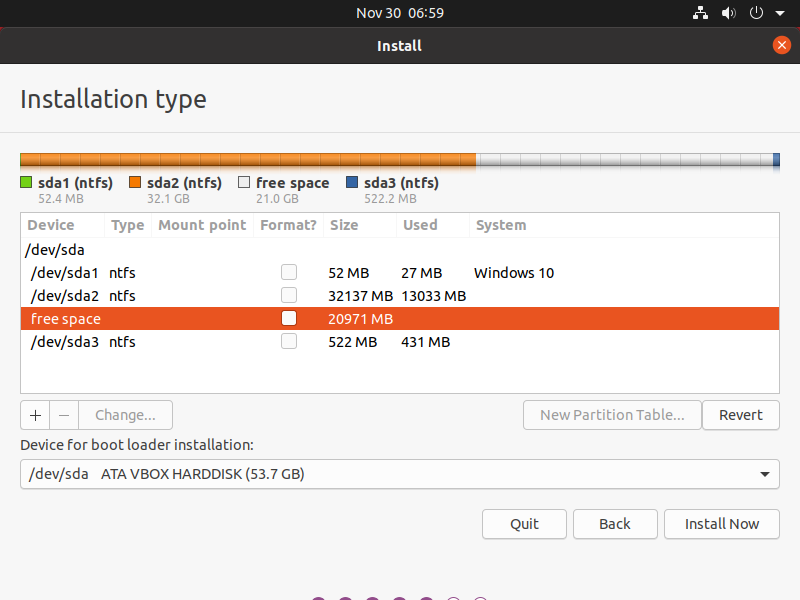
Now we need to partition this “free space” into two.
- The first will be our root directory (
/) having a major chunk of this partition. - And then the home (
/home) directory which will have roughly 4-6 GB of space
To create a partition, select the plus option on the bottom right, it will prompt you to select the type and size of the partition. Here I have selected the following configuration for the root partition:
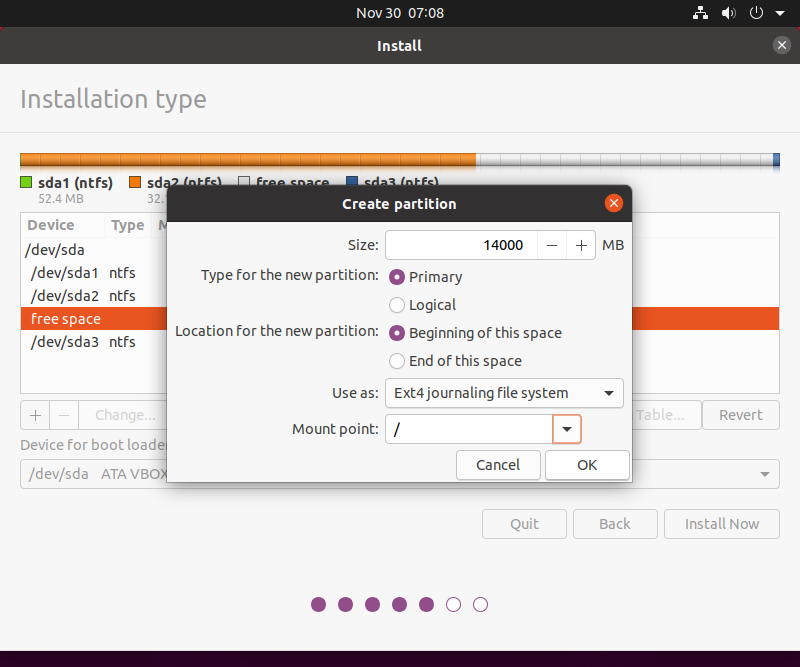
After setting the type and size of the root partition press OK. Select the “free space” device again and press the “+” option again to set the /home partition with all the remaining space.

iv) Installing Ubuntu alongside Windows 10
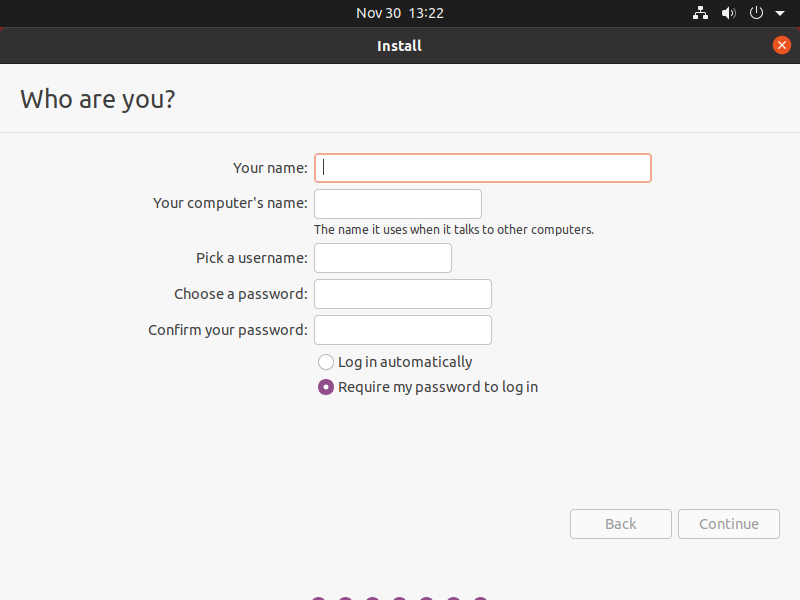
After all this, simply click on “Install Now”. Check the partitions are correctly set and press OK. After that, it will prompt you to select your time zone and then the username and password for the machine.
Now your installation should start in no time. After a few minutes Ubuntu should be successfully installed and you should be good to go!
4. Dual Booting Windows 10 and Ubuntu
After the installation, when you reboot the machine you will be seeing the following screen where you can choose the operating system you wish to boot into. This is the GRUB bootloader which displays the different operating system options. You can continue to install more Linux operating systems and run a Grub update to get GRUB to retrieve the locations for the other operating systems to choose from.
With this, you can even triple boot or have many more Linux-Windows operating systems installed.

Conclusion
I hope after reading this tutorial you will be able to install Ubuntu alongside Windows 10 with not hassle. Navigating the world of Linux might be slightly tricky so be sure to check for other tutorials on this website. Thank you so much for reading this article. Have a great day ahead! Cheers!