

Samba, as described by their official website is: “Samba is the standard Windows interoperability suite of programs for Linux and Unix.”
Samba basically allows Unix systems to share files and printers with Windows so that in spite of their differences, these two systems can peacefully exist.
Samba is also very instrumental in integrating Linux/Unix servers and application into an Enterprise’s Active Directory. In this module, we will learn how we can install and setup a samba server with our Ubuntu distro.
Installing Samba on Linux
To install samba, we can use the default package manager of our system. In this case, I am using an Ubuntu machine so my package manager is apt:
$ sudo apt update && sudo apt install -y samba
To verify that samba was successfully installed, we’ll use the whereis command:
$ whereis samba
samba: /usr/sbin/samba /usr/lib/samba /etc/samba /usr/share/samba /usr/share/man/man7/samba.7.gz /usr/share/man/man8/samba.8.gz
Hence, as we see, samba was successfully installed !
Editing The Config Files
First, we need to create a directory that we want to share. Create a directory with the mkdir command as shown below:
$ mkdir /tmp/sambashare
We created a directory in /tmp folder but you can create it anywhere you choose. Next up we need to edit the samba config file located under /etc/samba/smb.conf
$ sudo nano /etc/samba/smb.conf
Append the following to the end of the file :
[sambashare]
    comment = Samba And Linux
    path = /tmp/sambashare
    read only = no
    browsable = yes
Let’s analyze what we did here :
- comment: A brief description of our share
- path: The complete path of the directory we are going to share
- read-only: This allows the files of the share to be modified by others
- browsable: This would allow File Managers to list the share under “Network”
Starting The Samba Server
You can start the samba server with the service command:
$ sudo service smbd restart
Note that if you have a firewall like ufw enabled, we need to configure it to allow our samba traffic as such :
$ sudo ufw allow samba
Setting Up User Account
Samba doesn’t use our system account password. Hence, we need to to set up a Samba password manually for our account :
$ sudo smbpasswd -a $USER
Now, our samba server is ready to use !
Connecting To The Shared Folder
First we create a file in the folder we shared just for testing purposes:
$ echo "This Is A Test File" > Test\ File
We can connect to our samba share using two methods:
- The GUI method: Go to your File Manager > Network > Search Bar and type in the following:
smb://localhost/sambashare
This should give you the following prompt:
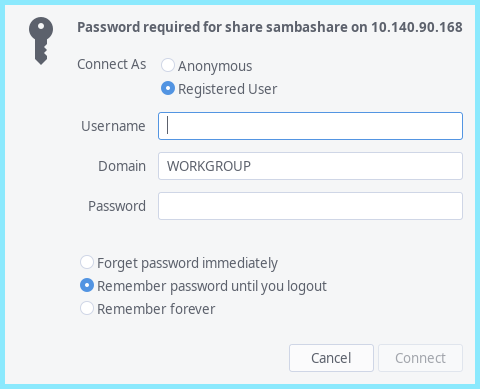
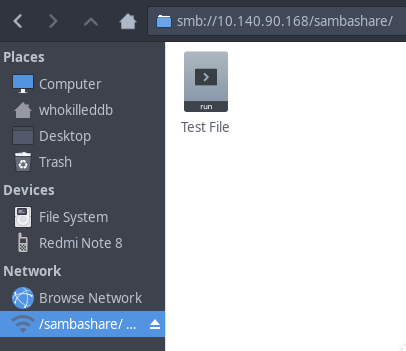
Once you put in the username and password, you will be able to see your file there!
- The CLI method: Here we would need a utility called smbclient which can be installed with:
$ sudo apt install smbclient
Next Up, we can now list our available shares with:
$ smbclient -L //{IP}//
This should list all our available shares:
Enter WORKGROUP\whokilleddb's password:

	Sharename       Type      Comment
	---------       ----      -------
	print$          Disk      Printer Drivers
	sambashare      Disk      Samba And Linux
	IPC$            IPC       IPC Service (Samba 4.13.4-Debian)
Now you can access the share with:
$ smbclient -U {USER} //{IP}/sambashare
Enter WORKGROUP\{USER}'s password:
Try "help" to get a list of possible commands.
smb: \> ls
  .                                   D        0  Sun Feb 21 18:42:49 2021
  ..                                  D        0  Sun Feb 21 18:42:18 2021
  Test File                           N       20  Sun Feb 21 18:42:49 2021

		971515904 blocks of size 1024. 843676384 blocks available
smb: \>
As we see, here we have the test file we created earlier which we can now get onto our system.
Conclusion
In this module, we saw how we can create our own Samba shares and access the same. However, it must be configured carefully as they can be exploited very easily to gain root access on your system.