

In this tutorial, we will discuss how to install Apache Kafka on CentOS.
Let’s first understand what is Apache Kafka? Have you ever thought how will you use the data stored or how will you transfer your data from one location to another location? Sounds interesting? Yeah! This is called streaming. In earlier times it was difficult to send the message across many users. It was difficult to process real-time data. Therefore, LinkedIn came up with an idea in 2011 to process real-time data i.e. introduced KAFKA and later donated to Apache Software Foundation(ASF).
Basically Kafka is a messaging system i.e. sends the message from producer to consumer. You might be confused about what is streaming? Basically, streaming is publishing the data from some sources like weblogs or sensors in real-time to your cluster and lets you process the data too. Let’s understand more about this messaging system.
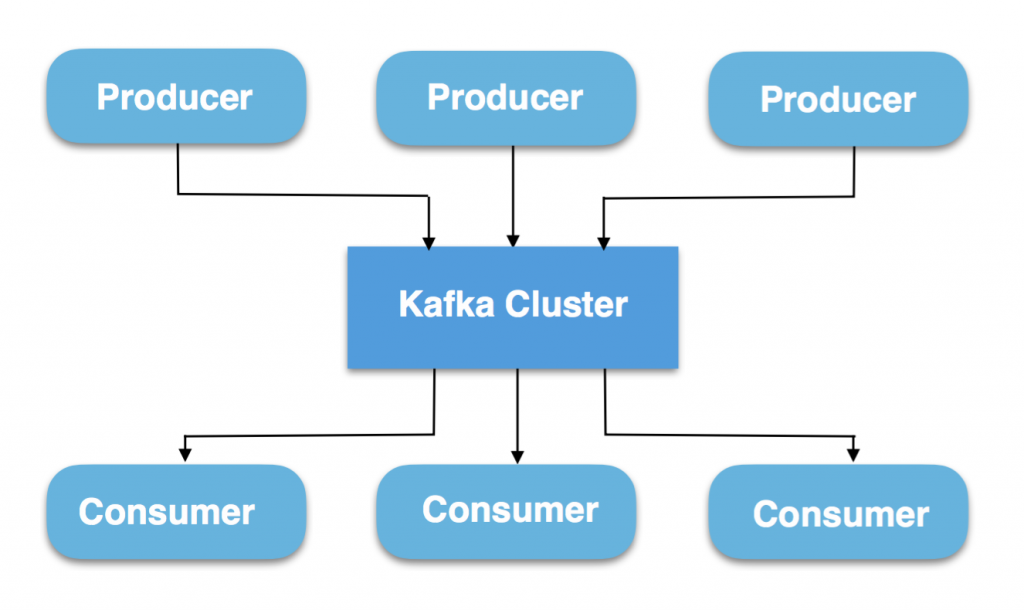
You have got producers who generate all the data. For example, Publishers on YouTube who make videos and post it on Youtube are considered as Producers. Now, that data generated is stored in the form of a stream in the Kafka cluster. This Kafka Cluster can be considered as a group of brokers. What consumers do then? Basically, consumers generate a request to consume the data from the cluster. Consumers can be considered as subscribers or viewers of Youtube who views the video. I hope you understood the concept.
Apache Kafka is being used by many of the leading firms like Twitter, LinkedIn, Netflix, Mozilla, Oracle and so on. So it’s a valuable skill to have. Let’s learn how to install Apache Kafka on CentOS.
Steps to install Apache Kafka on CentOS
Let’s discuss how to install Apache Kafka on CentOS. Basically, Kafka is written in Scala and Java. Therefore, Kafka runs on Java. I am assuming that Java is already installed in your system. If not, follow the first half of this tutorial to install Java. Then proceed further.
Refresh the Packages
The first step is to update the repositories. Updating the repositories denotes that we are refreshing the packages. We will use the yum update command to update the packages in CentOS. The command for this is as follows:
sudo yum update
This command will update all the repositories.
Downloading and extracting the setup file to install Apache Kafka on CentOS
After refreshing the repositories, to install Apache Kafka on CentOS, you need to download the package. Download the tar file using wget command. Basically, wget command is used to download the files from the web servers using HTTP, HTTPS, and FTP protocols. After downloading the tar file, it will be extracted using tar command. This will be discussed later. The command for downloading the file is as follows:
wget https://www.apache.org/dyn/closer.cgi?path=/kafka/2.4.1/kafka_2.12-2.4.1.tgz

You can see the Kafka tar file in the image shown above. Use the ls command to list all the folders.
After successfully downloading the file, you need to extract the file using tar command. The command for this is as follows:
tar -xzf kafka_2.12-2.4.1.tgz

Once it is extracted, change its directory using mv command as shown below:
mv kafka_2.12-2.4.1 /usr/local/kafka

Set configuration files
After successfully extracting and changing the directory, the next step is to make some configurations in systemd files so that it could manage zookeepers and Kafka’s state. You might be confused about what is Zookeeper? Basically, Zookeeper is used to manage the brokers. In simple words, Zookeeper is a manager who knows which key belongs to which room. Here, messages are denoted as keys. I hope you understood it. However, creating files would help to manage Kafka services i.e. to start and stop. The command for this is as follows:
vim /etc/systemd/system/zookeeper.service

Add the following code in the text editor:
[Unit]
Description=Apache Zookeeper server
Documentation=http://zookeeper.apache.org
Requires=network.target remote-fs.target
After=network.target remote-fs.target

[Service]
Type=simple
ExecStart=/usr/local/kafka/bin/zookeeper-server-start.sh /usr/local/kafka/config/zookeeper.properties
ExecStop=/usr/local/kafka/bin/zookeeper-server-stop.sh
Restart=on-abnormal

[Install]
WantedBy=multi-user.target
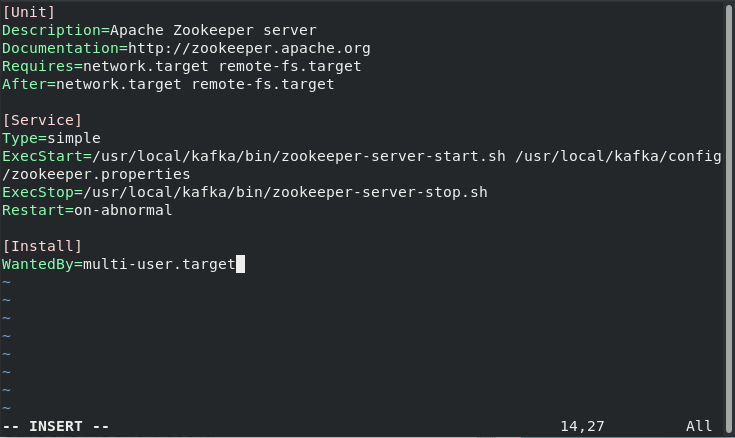
Don’t forget to save the file. Press Esc key or Ctrl +C to exit the Insert mode followed by “:wq!” to save the changes and exit the editor.
After this you need to create Kafka.service file using the same command:
vim /etc/systemd/system/kafka.service

Add the following code. Do change the path of JAVA_HOME. It might be different in yours.
[Unit]
Description=Apache Kafka Server
Documentation=http://kafka.apache.org/documentation.html
Requires=zookeeper.service

[Service]
Type=simple
Environment="JAVA_HOME=/usr/lib/jvm/jre-11-openjdk"
ExecStart=/usr/local/kafka/bin/kafka-server-start.sh /usr/local/kafka/config/server.properties
ExecStop=/usr/local/kafka/bin/kafka-server-stop.sh

[Install]
WantedBy=multi-user.target
Save it using the command as discussed above. Therefore, you have successfully made the configurations.
Start the Zookeeper Server
I have already explained about the Zookeeper in the above section. I hope you got the point. Here, we have to start the Zookeeper server. The fact about this messaging system is that the producer doesn’t know the identity of consumers. For example, publishers on YouTube don’t know that who are the viewers of his video. He is unknown to the subscribers. Here comes the Zookeeper. It sends the message to the particular consumer.
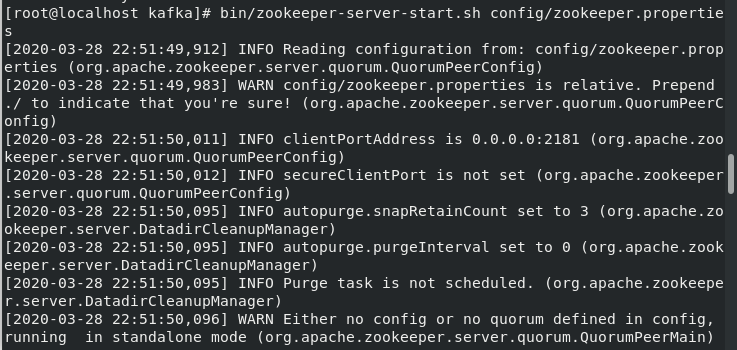
Before using the command do change the path. Let’s have a look at the command below to start the server:
cd /usr/local/kafka
bin/zookeeper-server-start.sh config/zookeeper.properties
Start the Kafka Server
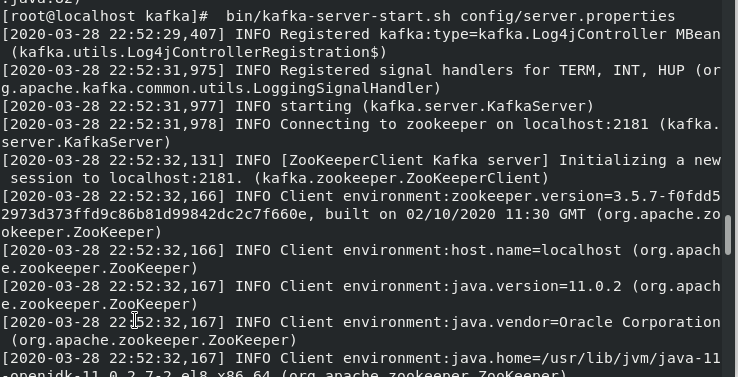
After you completely install Apache Kafka on CentOS start the Zookeeper server, the next step is to start the Kafka server. This will set the relationship between producer and consumer. Let’s have a look at the command below:
bin/kafka-server-start.sh config/server.properties
Command to Create a Topic in Kafka
Till now, we have successfully started both the servers. As discussed above that Kafka is a message broker which sends the message from producer to consumer. Have you ever thought about how it does the work? It simply creates a topic, provides the partitions and assigns an offset number. Consumers consume through an offset number. Let’s have a look at the command to create the topic.
bin/kafka-topics.sh --create --bootstrap-server localhost:9092 --replication-factor 1 --partitions 1 --topic test

You can change the name of the topic. I have taken “test” as an example.
If you want to view the list of topics use the following command to do so:
bin/kafka-topics.sh --list --bootstrap-server localhost:9092

It will print the list of the topics you created.
Set the relationship between Producer and Consumer
What happens in the messenger? The sender sends the message which is received at another end. So what is this? This is the connection set up between the producer and the consumer. Same here, we will set the connection between the producer and the consumer. The messages sent from the producer end will get displayed at the consumer’s end.
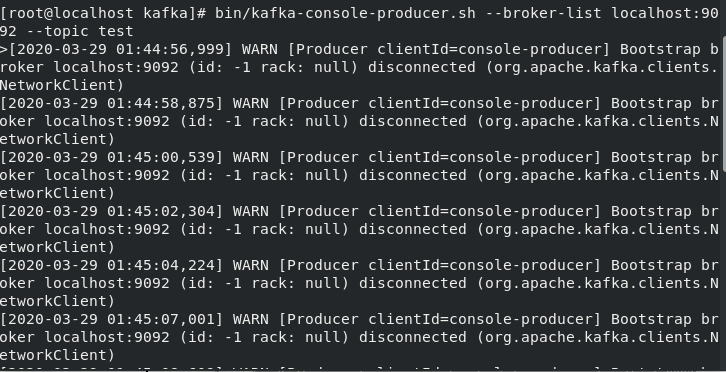
For this, You need to start the producer and consumer. Let’s have a look at the command below to start the producer
bin/kafka-console-producer.sh --broker-list localhost:9092 --topic test
Select the new terminal to start the consumer service and type the following command:
> bin/kafka-console-consumer.sh --bootstrap-server localhost:9092 --topic test --from-beginning

Display the Messages at Producer-Consumer site
After setting the connection successfully, when you will type the message at the producer’s site it will be received at the consumer’s end. But don’t forget both the commands should run in different terminals. Even when you start the Kafka services, the producer and consumer services should be in the different terminals.
Let’s have a look at the following images below:

This message is generated by the producer at the producer’s site. It will be successfully received at the consumer’s end. Let’s have a look at the image below:

Therefore, you have successfully set up the connection between Producer and consumer.
Conclusion
In this tutorial, we’ve gone over how to install Apache Kafka in CentOS. We hope that you now know how to use the command efficiently. If you have any questions, do let us know in the comments.