
In this tutorial, we will learn how to install WordPress on Debian or Ubuntu.
Let’s first discuss WordPress. I hope you might have heard about WordPress. But what exactly WordPress is? WordPress is a web publishing software used to create your own website or blog. It was released in 2003 and it has become one of the most popular web publishing platforms.
It offers you the best features. If you want to build your website, most of the people think that they should learn web development. This is for the technical people but what about the non-technical ones! Folks, don’t need to worry at all. WordPress offers plugins to build and manage your own full-featured website using just your web browser. How easy is this! Don’t you think? Without learning how to code, you can easily build the website.
You know what, it is very easy to manage WordPress. Without spending so much time in coding, you can change your theme and plugins. There are 1000s of free themes and plugins available for WordPress.
I hope you have understood about WordPress. Let’s understand how to install WordPress on Debian.
Refresh Ubuntu APT Repositories
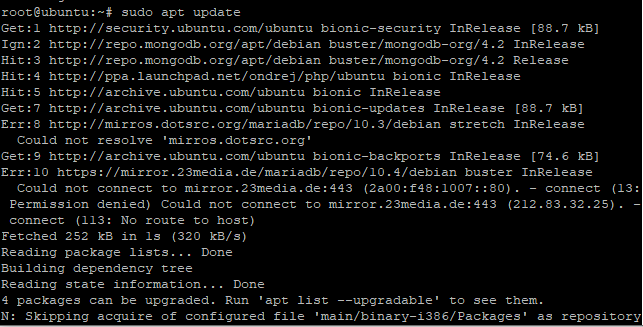
The first step is to refresh the repository data. We will use the apt update command to refresh the repositories. If you want to update the packages, use apt upgrade command to do so. The apt command is used because it combines all the functionalities in a single command. The command for this is as follows:
# sudo apt update
Install WordPress on Debian along with the LAMP Stack
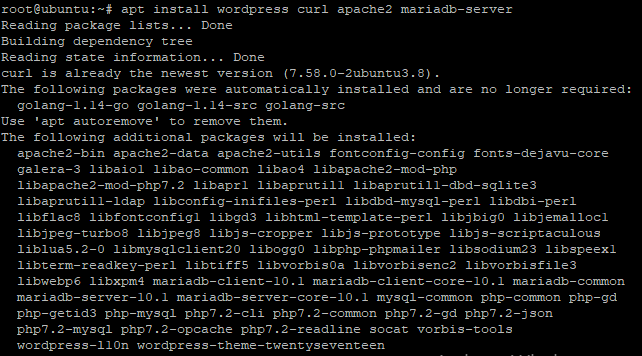
LAMP stands for Linux Apache MariaDB and PHP. These are the packages we need before we can install WordPress on Debian. Therefore, we will install all these three components.
We have two things either we could download all three components individually or we can install it by just typing a single command. It’s upon you. I have just used a single command to install all these three components. Using this command, it would automatically install WordPress, apache server and MariaDB. The command for this is as follows:
sudo apt install wordpress curl apache2 mariadb-server
If you want to install all these components separately, use the following commands:
To install apache web server:
sudo apt install apache2 libapache2-mod-php
To install the MariaDB server:
sudo apt install mariadb-client mariadb-server
To install PHP:
sudo apt install php php-mysql
While installing these packages, you will be asked to accept the changes. Just respond yes to it. It will be installed.
Install WordPress on Debian from the Official Tar archive
If you’re more of the D-I-Y kind of person you can install WordPress on Debian using the tar archive as below. If you use the apt package manager to download and install WordPress, you don’t need to follow the section where I set up the directory and file permissions.
wget https://wordpress.org/latest.tar.gz
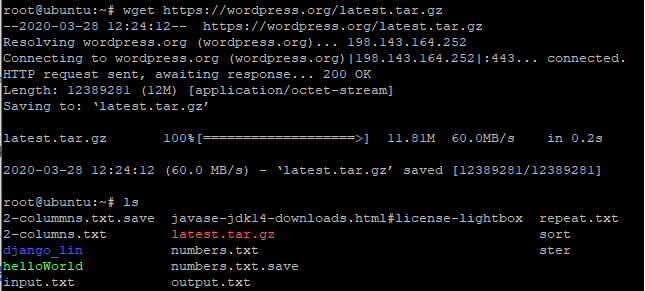
It will install the latest version of WordPress. You can check that the tar file has been downloaded by using ls command as shown in the above image. But you need to extract this tar file. to do so, use the following command.
tar xpf latest.tar.gz
It would be successfully installed. You can use any of the commands to install the LAMP stack.
Database installation on Debian
You might be thinking what now when we have already installed the Database. Folks, here we need to create the database and user. Further, we need to give all the privileges to that user over the Database created. I have discussed the command below :
sudo mysql -u root -p
> CREATE DATABASE wordpress;
> Grant all privileges on wordpress. * TO 'wordpress_user'@'localhost' IDENTIFIED BY '1234'
> Flush privileges;
> Exit
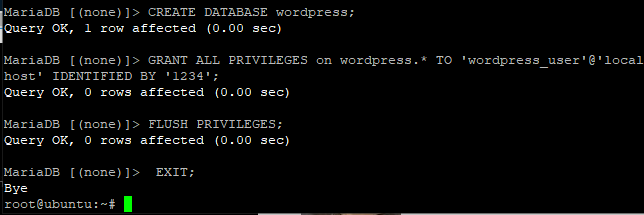
While using the privilege command, you can set your own user name and password. I have used a simple password. You can set your own password.
Grant File and Directory Permissions for WordPress and Apache
As mentioned before, you need to follow the steps in this section only if you want to install WordPress on Debian by downloading the tar file from WordPress.org. If you want to finish the install using the apt command, you’re fine to go ahead to restarting apache and MariaDB and skip this section completely.
After successfully installing WordPress and creating the database for it. The next step is to grant some permissions. But before this, we need to move the contents of WordPress to the HTML directory. Remove the files present in /var/www/html directory by using rm command and then use the cp command to copy the contents to /var/www/html directory. Let’s have a look at the command below:
sudo rm -fr /var/www/html
This command would remove the files present in /var/www/html. Let’s have a look at the command to copy the contents to /var/www/html directory.
sudo cp -r wordpress /var/www/html
This command would simply copy the contents of WordPress to /var/www/html directory.
The next step is to grant the permissions or to change the ownerships. We will use chown command to change the ownerships. Basically, the chown command is used to change the owner and group of files, directories, and links. Let’s discuss the command for this:
sudo chown -R www-data:www-data /var/www/html
sudo find /var/www/html -type d -exec chmod 755 {} \;
sudo find /var/www/html -type f -exec chmod 644 {} \;
Be careful, while typing the commands. Basically, 755 permission on any directory means that everyone has the access to read and execute and write access for the owner of the file. While 644 permission on any directory means that the files are readable and writeable by the owner of the file and readable by users in the file owner group, as well as everyone else. I hope you understood the concept.
Stop the Apache server
After making these changes, the next step is to stop the server or we can say to reload it again so that when you install WordPress on Debian, you can access the CMS from the web browser. We can also use reload command to load it again or we could stop it and start the server again. Let’s discuss the command for this:
sudo systemctl stop apache2
Start the Apache Server
After stopping the services, you need to start the service again. This can be done using start with systemctl command. The command is discussed below:
sudo systemctl start apache2.service
You can either use apache2.service or simply apache2.
Begin with the WordPress
After you install WordPress on Debian and make the necessary configurations, we can begin with setting it up. Here, you need to access WordPress on the local browser simply by typing the localhost command as URL in the browser. Let’s discuss the command for this:
localhost
OR
http://IP_ADDRESS
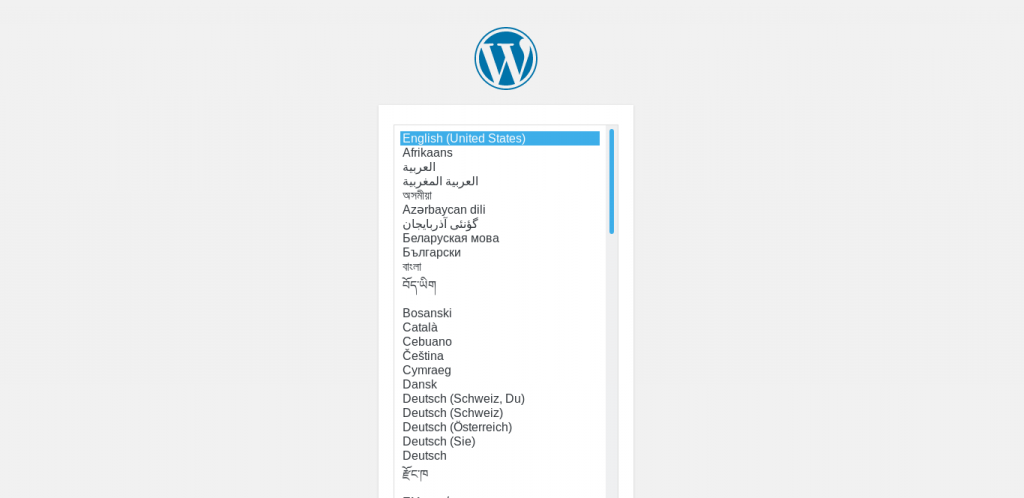
You will see the following interface where you need to set the language you are comfortable with. Press continue after selecting the language.
Information regarding WordPress installation
After you install WordPress on Debian, the next interface will contain the information regarding WordPress installation. The window would appear like this:
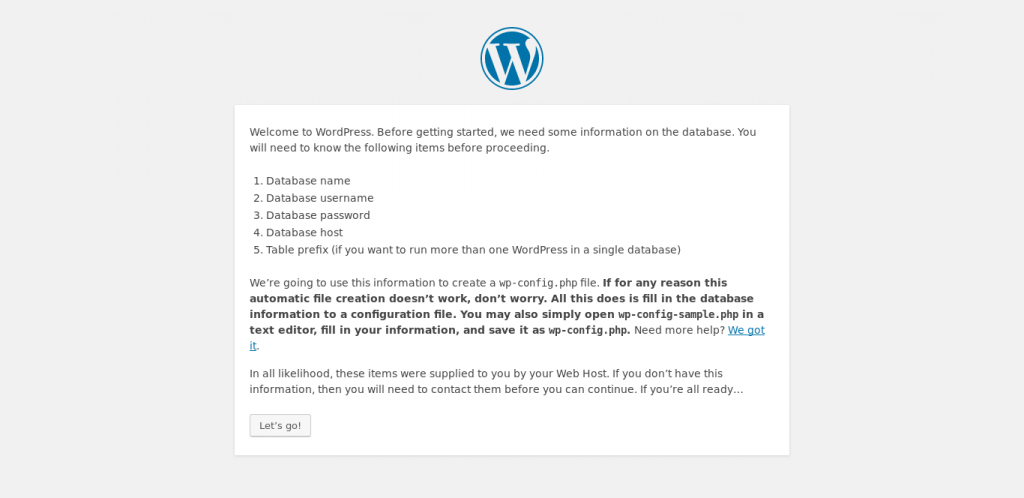
It would simply instruct you to add information regarding Database name, username, password, and host which you have used while creating the database. You would see the following window after selecting Let’s go option.
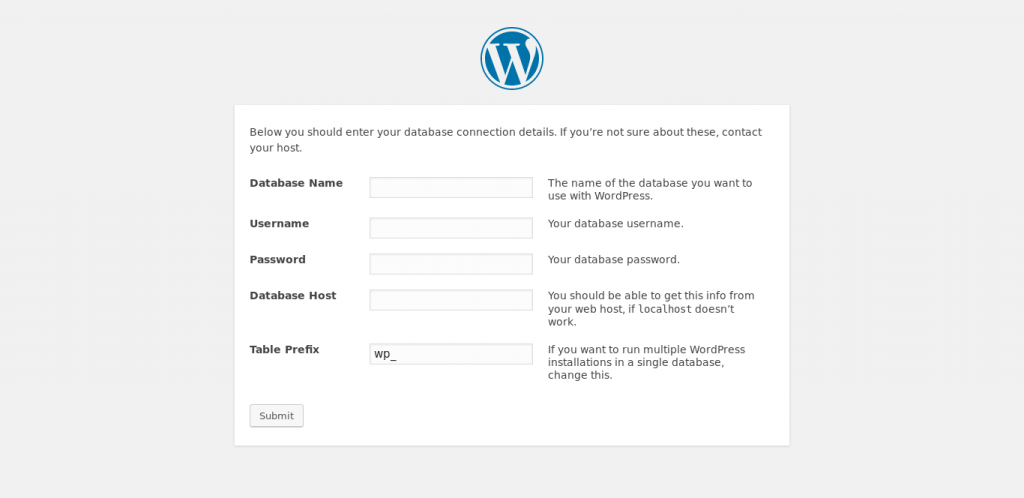
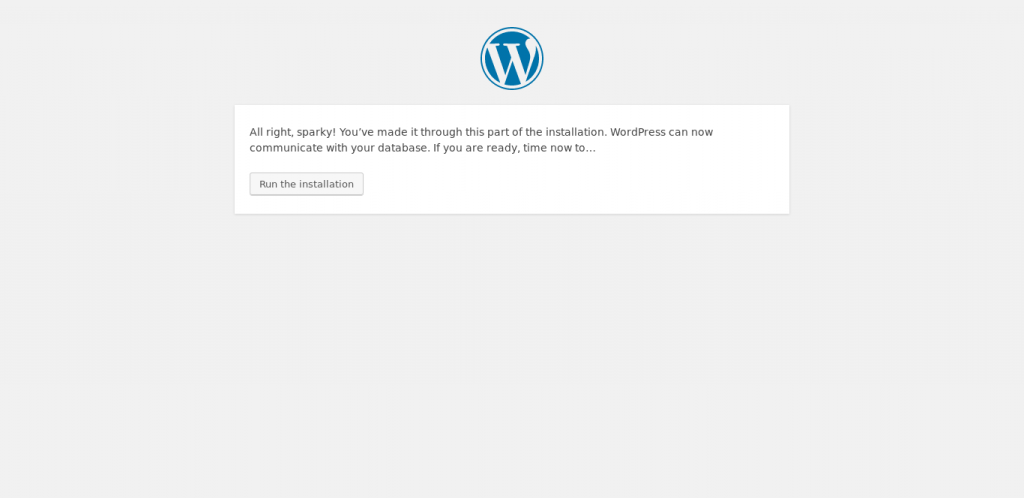
Here you need to add the details used before while creating the database. After adding up all the details you would see the following window denoting to run the installation as shown below in the image:
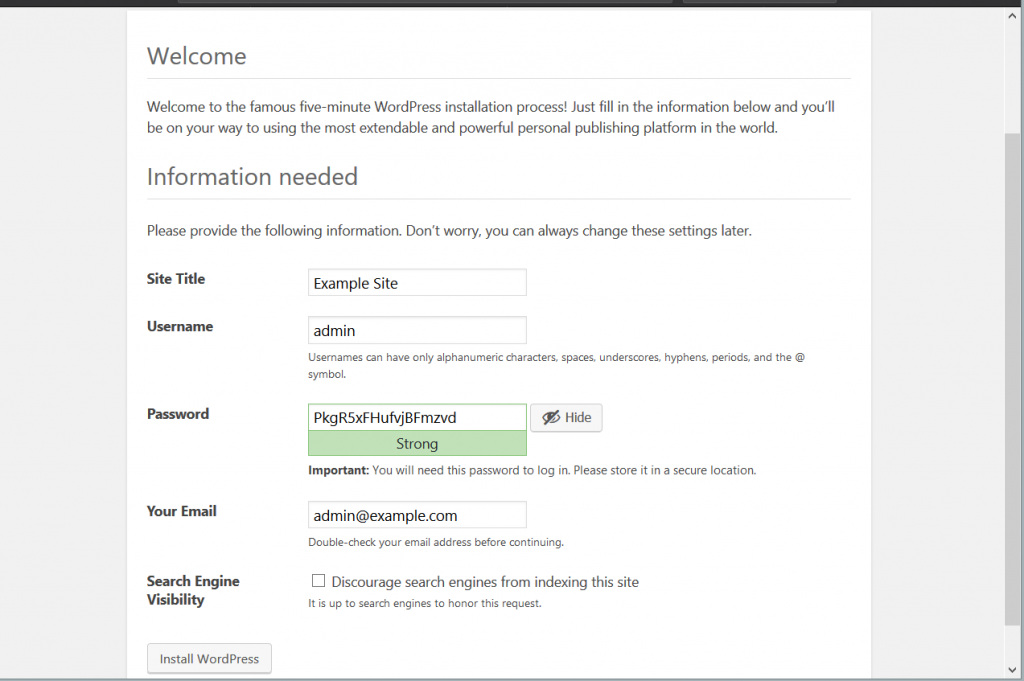
Define the admin account
Here, you need to define the admin account i.e username and password followed by the name of your site. You can set any name as per your choice. Fill up the details and proceed further. Let’s have a look at below image:
Next, you would see the login window where you have to add up the same details as used before. Let’s have a look at the image below:
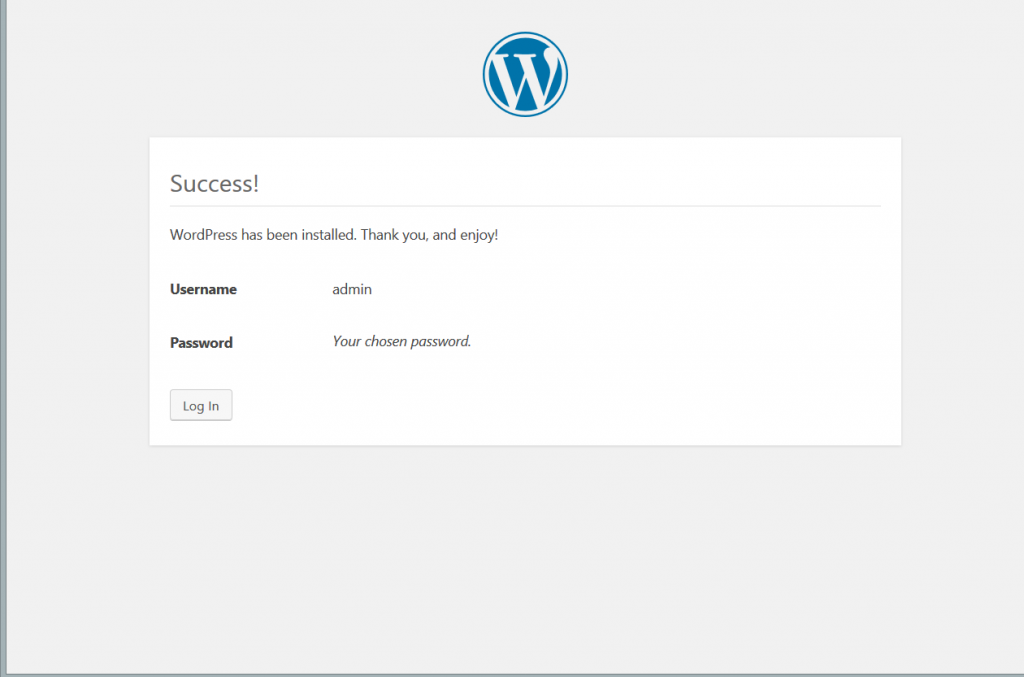
Just add up the details and click on login. You would see the following window:
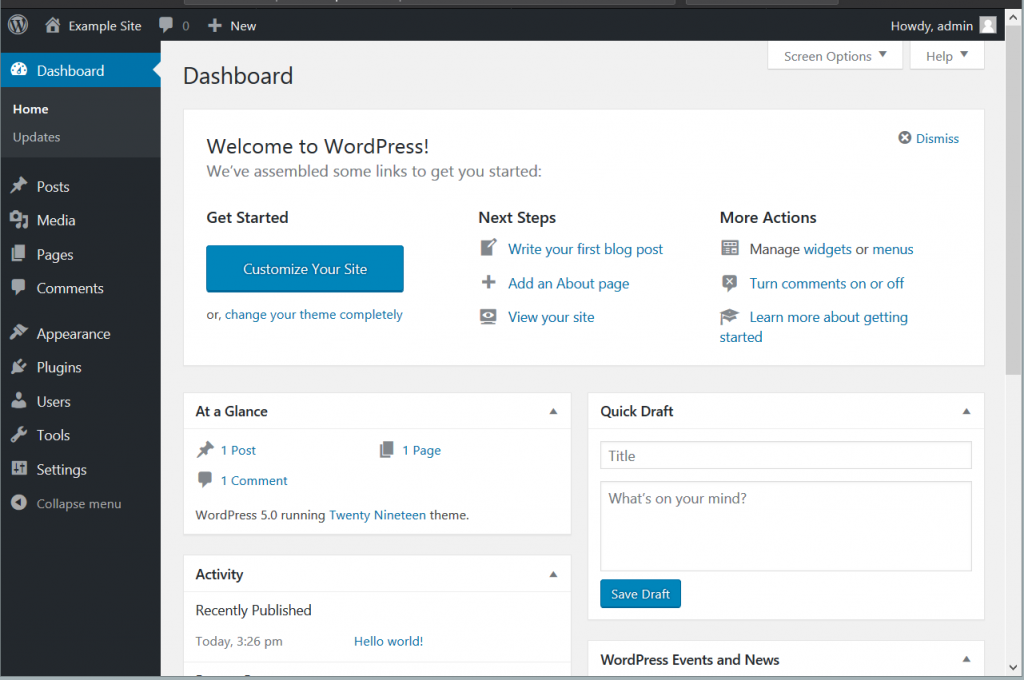
Here, you would see various options like to add a post, customize the site, add about your site and so on. And now, you can start creating your website. That’s it! After you install WordPress on Debian completely, you can continue with setting the themes and the plugins for your website.
Conclusion
We hope you have a solid understanding of how to install WordPress on Debian now. Though you might need to play around with the directory permissions a bit if you have strict user administration policies, the overall setup to install WordPress on Debian is very straightforward. Feel free to get in touch with us if you need any help in this case!