

In this tutorial, we’ll have a look at how to install Tomcat on CentOS 7. But before going on further, are you clear with what is Apache Tomcat?
Tomcat is an open-source web server and servlet container. You might have identified its developer’s name i.e. Apache Software Foundation is also known as ASF. Talking about the use of Apache Tomcat, it implements Java Servlet (JSP) and JavaServer Pages specifications from Sun Microsystems.
It provides a “pure Java” web server environment for Java code to run in. It includes tools for configuration and management. If you want to configure the tomcat configuration files, it can be configured directly by editing XML configuration files. Have you ever heard its old name? It was formerly known as Jakarta Tomcat. Sounds different? Yeah! Now known as Apache Tomcat.
Basically tomcat can work upon various operating systems that’s why it is also called cross-platform software. You can use Apache Tomcat on Windows, Ubuntu, CentOS, Debian and so on. Just look upon its versatility! Have you ever thought that how tomcat started off? What purpose did it serve initially?
Apache Tomcat started off as a servlet reference implementation by James Duncan Davidson, a Software Architect at Sun Microsystems and later on it was converted to an open-source. However, after some time the Apache Tomcat was donated to Apache Software Foundation.
We might have used Tomcat on windows. What we did there, simply build our code on MVC structure (Model-View-Controller), build the Java – Web applications in Spring boot or in Eclipse and deploy it on tomcat server. To access it, we use localhost://8080 on Web Browser to view the result. It was quite easy to deploy applications on the tomcat server in Windows. Here, the process is a little bit different.
Let’s understand how to install Apache Tomcat on CentOS 7.
Install Java using yum
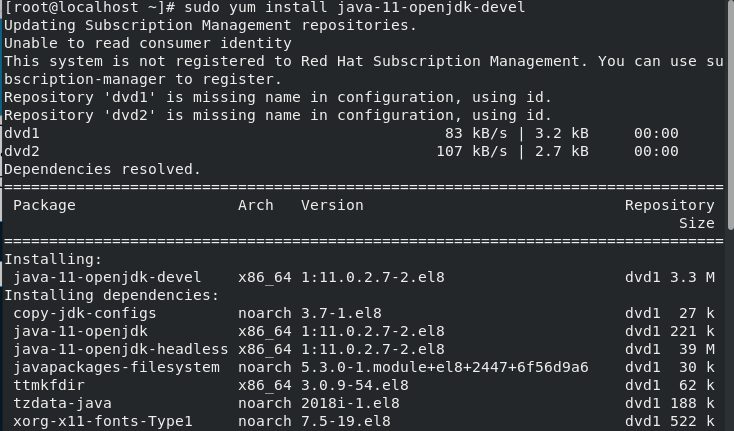
The first step is to install Java packages. If you have already installed Java Packages, no need to use this command. But do check which version of Java you are using. I have installed JDK -11. The latest version of Java is JDK -14. JDK stands for Java Development Kit. Here, we will use the yum command to fetch all the packages of JDK. Yum stands for YellowDog Updater Modified. Use the following command to install the Java Packages:
# sudo yum install java-11-openjdk-devel
If you have already installed Java on your system, then just run a simple command to check for its version.
The command to check the version of Java:
# java --version
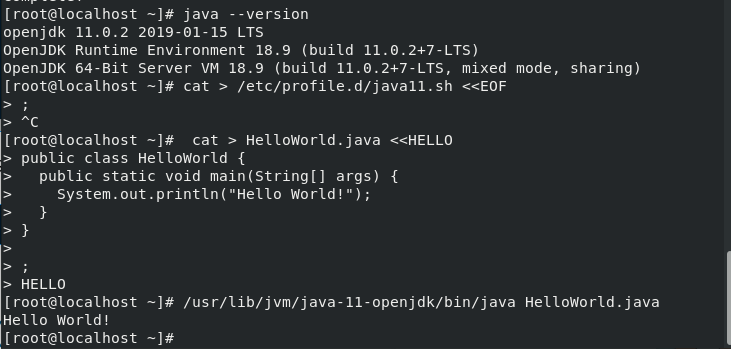
You can also perform an example to check whether it’s working properly or not. Here, in the above screenshot, I have created a helloWorld.java file which prints the “Hello World!” when compiled. Hence, Java installed in my system is working properly. No need to worry about that!
Install Tomcat on CentOS 7
Let’s look at the steps on how to install Tomcat on CentOS 7. It’s an easy process.
Install wget to Download and Install Tomcat on CentOS
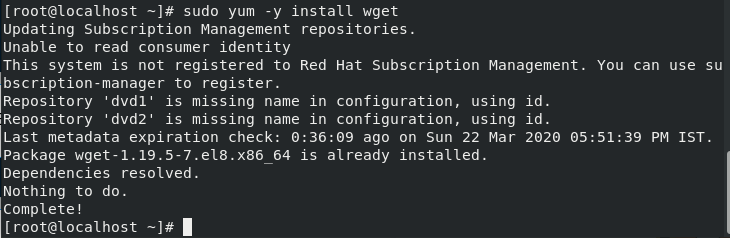
After installing Java successfully, we will install Apache Tomcat on our system. We will use wget command to install tomcat. wget command is used to download the files from the web. I just installed it using yum command as shown in the figure below. The command used is as follows:
# sudo yum -y install wget
Download the file using wget command
Now, Let’s see how to download it. You might see in the image given below that I have exported the version of tomcat. Yes! we will assign it to the VER variable and export it. Further, we will use this VER in wget command to install the Apache tomcat server. The size of this file is 10.1M as shown in the details given in the image.
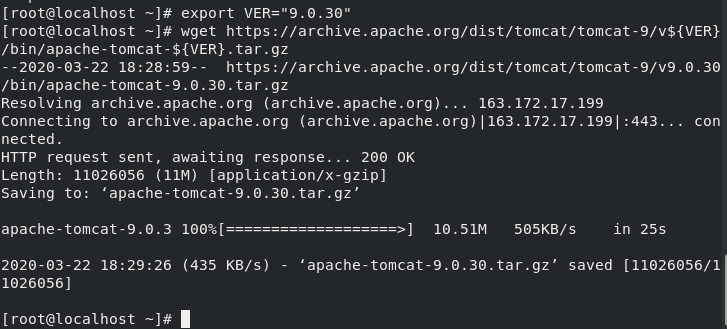
Note that there are many ways to install tomcat either you can simply use the yum command to install it or just download the tar file locally on your system and extract it using -xvf command in CLI. It depends on you, use the method which is easy for you.
Extract the Tar File to Install Tomcat on CentOS
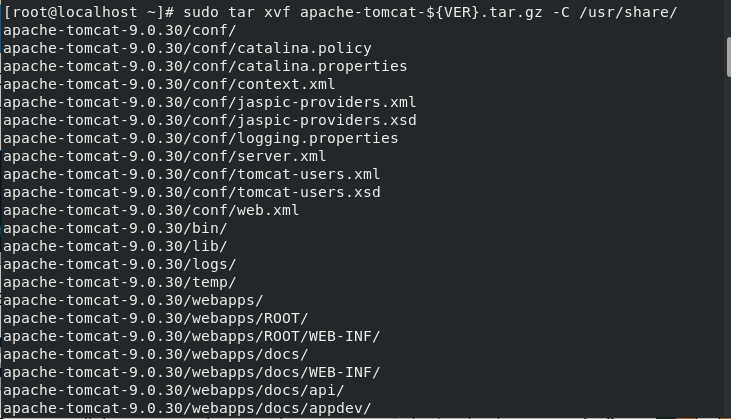
After downloading the file from the URL. Extract it using tar command. Be clear with the use of xvf,
- x means to extract the files,
- v used to print the file names as extracted one by one,
- f means use the following tar file to achieve the operation.
The extracted files will be saved in /usr/share/ directory. Let’s look at the command to extract the files:
# sudo tar xvf apache-tomcat-${VER}.tar.gz -C /usr/share/
Create Users and User Groups When you Install Tomcat on CentOS
When you install tomcat on Centos, you need to set up user groups. The next step is to create groups and add users to them. You might be thinking, why we are creating users? This is done for security purposes. Let’s have a look at how to create the group in tomcat. We will use the groupadd command to add a group named tomcat.
The command for this is as follows:
# sudo groupadd --system tomcat
This will add the group. Now, the next step is to create users in this group. We will use the useradd command to add the user named tomcat to the group named tomcat. The command used for this is as follows:
# sudo useradd -d /usr/share/tomcat -r -s /bin/false -g tomcat tomcat
Update permissions for Users to Use Tomcat on CentOS
As of now we have successfully extracted the archive and created the tomcat-users. Next what? Every user is allowed to use some services or we can say the user is granted access or to read or write. Similarly, here we need to grant the permissions to the tomcat-users so that they access the tomcat services properly without any interruption.
We will chown command to set the permissions. chown is the abbreviation of Change-Owner, is used to change the files, system files or directories. Let’s have a look at the command:
# sudo chown -R tomcat:tomcat /usr/share/tomcat
# sudo chown -R tomcat:tomcat /usr/share/apache-tomcat-$VER/

Create a systemd service file for Tomcat on CentOS
After successfully setting up the permissions to the users created in the tomcat group, we will create a systemd service file. We set them so they are accessible by all the processes running under the operating system. Similarly, the same is required here. Systemd file is created to set the environment variables of tomcat.
Use vi command to create the tomcat.service unit file in the /etc/systemd/system directory. The command for this is as follows:
# vi /etc/systemd/system/tomcat.service
It will open a text editor. It might be possible that you won’t be able to edit anything. If you face such issues, press “i” key that will enable you to insert it in the text editor. Paste the following code in the “tomcat.service” file:
[Unit]
Description=Tomcat 9 servlet container
After=network.target

[Service]
Type=forking

User=tomcat
Group=tomcat

Environment="JAVA_HOME=/usr/lib/jvm/jre"
Environment="JAVA_OPTS=-Djava.security.egd=file:///dev/urandom"

Environment="CATALINA_BASE=/opt/tomcat/latest"
Environment="CATALINA_HOME=/opt/tomcat/latest"
Environment="CATALINA_PID=/opt/tomcat/latest/temp/tomcat.pid"
Environment="CATALINA_OPTS=-Xms512M -Xmx1024M -server -XX:+UseParallelGC"

ExecStart=/opt/tomcat/latest/bin/startup.sh
ExecStop=/opt/tomcat/latest/bin/shutdown.sh

[Install]
WantedBy=multi-user.target
To exit this editor, press Esc to exit insert mode, followed by “:wq!”. It will redirect you to the terminal. Use this to exit from the text editor. wq will save the file and exit while “qa!” will make an exit from the editor without saving it.
It might be possible that the path of JAVA_HOME might be different in your system. Verify it and change accordingly. You can also check the value of JAVA_HOME using the command:
# sudo update-java-alternatives -l
It will print the address of JAVA_HOME or in other words the path of the java installed in your system.
Reload the Server
Always remember that if you make any changes in the system file or bashrc file, save and exit the file. The changes you made will only be in effect when you reload the server again. Similarly, we made the changes in tomcat.service file. Therefore, we need to reload the tomcat server again. Use systemctl command to reload the server. Note that, daemons are the services or programs running in your system internally. The command to reload the server again is as follows:
# sudo systemctl daemon-reload

Enable and Start the tomcat server on CentOS
After reloading the services, enable and start the tomcat server using systemctl command. This will enable us to use the tomcat services. First, enable the tomcat services. The command for this is as follows:
# systemctl enable tomcat.service

After this, run the start command to start the services. The command for this is as follows:
# systemctl start tomcat.service

This command will start the server.
Check the status of the service
As of now, you have started the services; now you need to check whether the services are running or not. For this, we will use the status keyword with systemctl command. Let’s look at the command below:
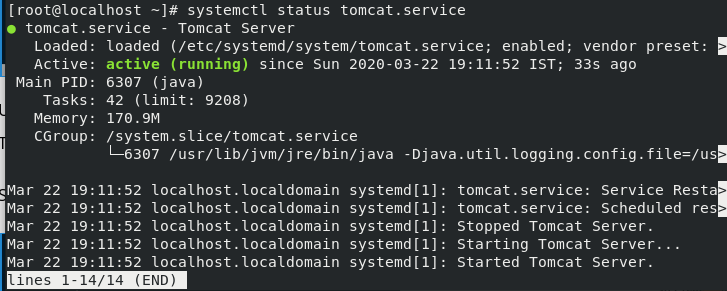
You can see the highlighted section denoting active, i.e. tomcat service has successfully started.
Adjust the Firewall for Apache Tomcat on CentOS 7
A firewall is like a gate that monitors incoming and outgoing networks. So to access the service, we need to open the port 8080. Here, we will add the port 8080 using firewall command.
# sudo firewall-cmd --permanent --add-port=8080/tcp

After configuring the firewall successfully, you need to reload it. I have already made it clear above that why it’s important to reload the services. The command for this is as follows:
# sudo firewall-cmd --reload

This will successfully reload the firewall. You can also verify whether port 8080 is enabled or not by using netstat command. This command is used to list all the services running in your system. The command for this is as follows:
# netstat -tnlp

You can see the list of services, 8080 port is enabled!
Configure the Interface for Tomcat On CentOS
As discussed earlier when you install tomcat on CentOS, we have to open the port 8080 through which we can access the service. Now, tomcat has three web interfaces i.e. server status, manager interface, and host-manager interface. Therefore, we need to create a user having a password for security purposes. So that we could access it from remote IP. Open the file as shown in the command below:
# sudo nano /usr/share/tomcat/conf/tomcat-users.xml
This will open the file names tomcat-users.xml. This will open the editor where you need to add the roles, add the user with a password too. Add the code shown below before </tomcat-users>. Paste the following code as shown below:
<role rolename="admin-gui"/>
   <role rolename="manager-gui"/>
   <user username="admin" password="admin_password" roles="admin-gui,manager-gui"/>
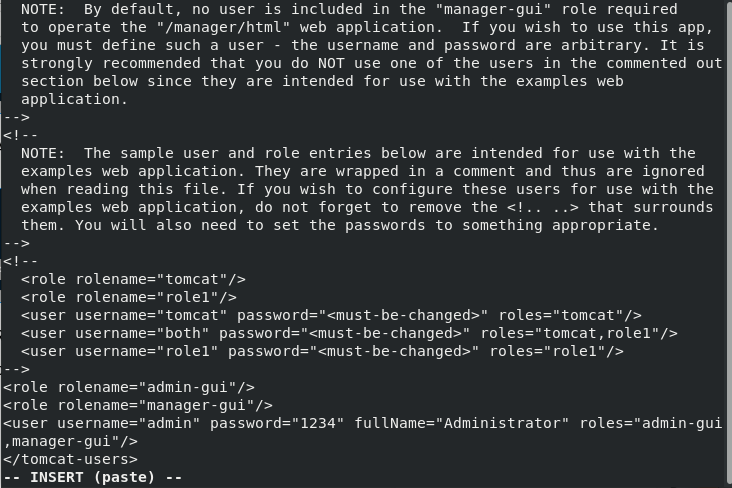
Successfully created user authentication for tomcat on CentOS.
Access the Web-Interface after you Install Tomcat on CentOS
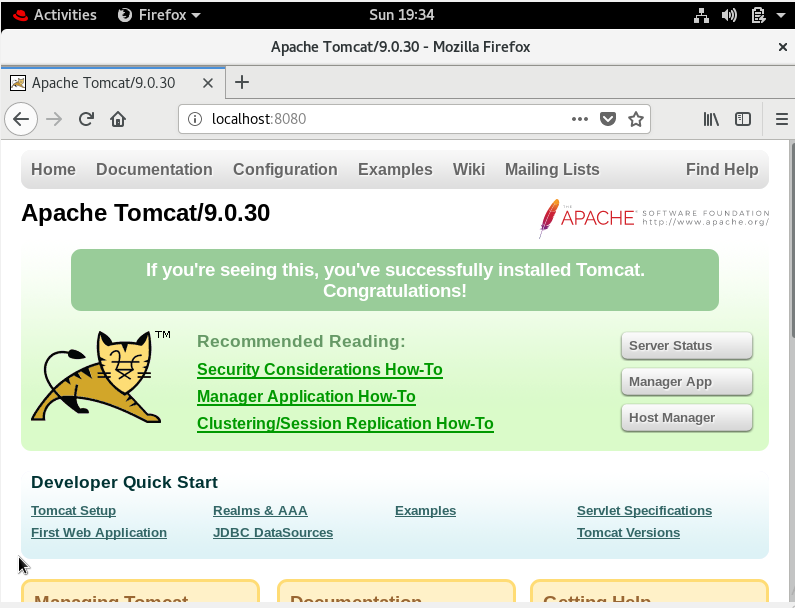
After you successfully install tomcat on CentOS and configure it, it’s time to test the installation. We had done all the basic configurations required for the tomcat server to start. To test this, do nothing just simply type the localhost or IP address of your system followed by the port number. I have described the command below:
http://localhost:8080
To access Manager interface
We have learned how to access the web interface, Let’s look at how to access the Manager interface. We have already set the username and password, hence it would ask for the user authentication details while accessing the manager interface. Use the following command given below in the web browser :
localhost://8080/manager
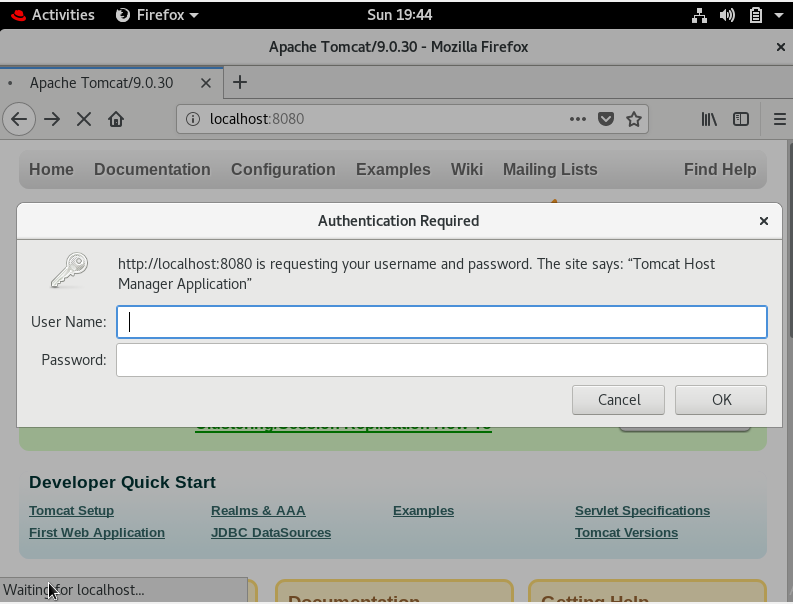
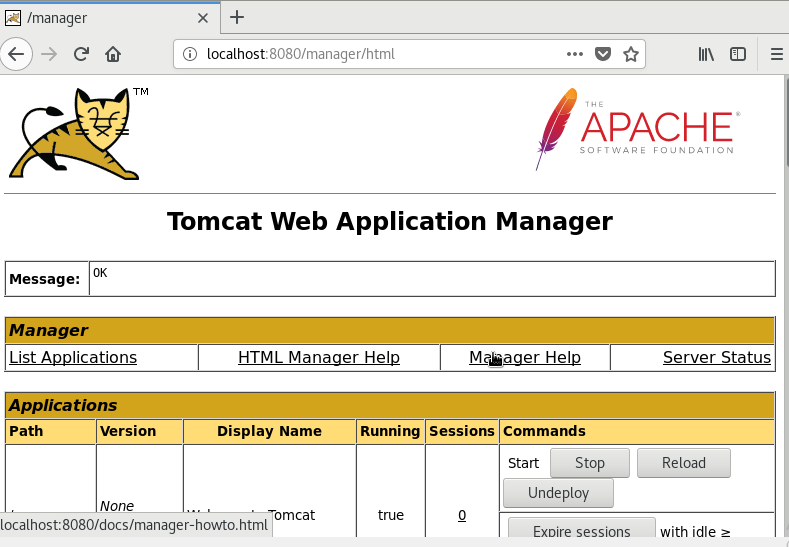
It would ask for the user authentication when you hit the above URL. Fill up the details as asked to access the Manager interface. After adding up the details, it would appear as in the image given below:
Access Virtual-Host Manager
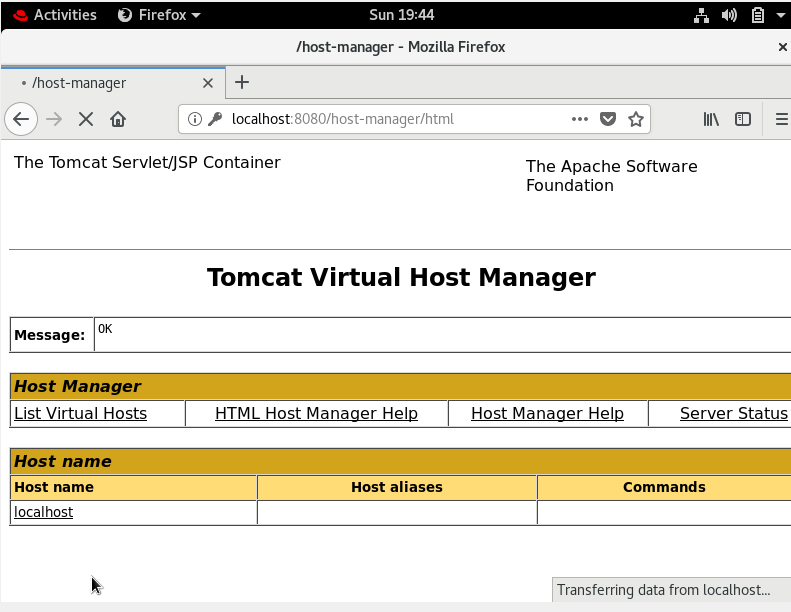
As you have accessed the Manager interface, in the same way, you can access the virtual host interface. Replace the manager by host-manager and hit it. You would see the window of Tomcat Virtual Host Manager. Use the following command given below in the web browser:
localhost://8080/host-manager
Same as above, it would ask for the authentication details, insert those details and the virtual host-manager window will appear. You would see the following outlook as shown below:
Stop the services
After successfully working on the tomcat server, if you wish to stop the services so you can use systemctl command to stop the services. I have described the command below:
# systemctl stop tomcat
This will stop the tomcat services. To verify whether the services have stopped or not, you can run the status command to check the status of the service. The command is as follows:
# systemctl status tomcat
Conclusion
That’s it. You now know how to install tomcat on CentOS. Now, you can deploy your own web applications. If face any problem, then do let us know in the comments. If you need further help or need access to the official documentation, here’s the link to the Apache Tomcat website.