
Running web development locally is convenient. But when you work on live apps, you will likely work on a remote server and require web hosting. Why not set up your personal development environment on a remote VPS and get a hang of a remove dev setup right from the get-go?
In this article, we will go through the steps of setting up a Python web development environment on an Ubuntu VPS. The steps followed can also be used to set up a development environment on your Ubuntu machine.
Steps to Setup A Python Web Dev Environment on Ubuntu VPS
Let’s now go over the exact steps to set up a web development environment on a Ubuntu VPS. This article assumes that you’ve already purchased a VPS and are now beginning to set it up.
Step 1: Log into your VPS with SSH
The first step in working with any cloud machine is logging into it. To log inside the machine, run ssh username@ip_address and then input the password of the VPS. like shown below.
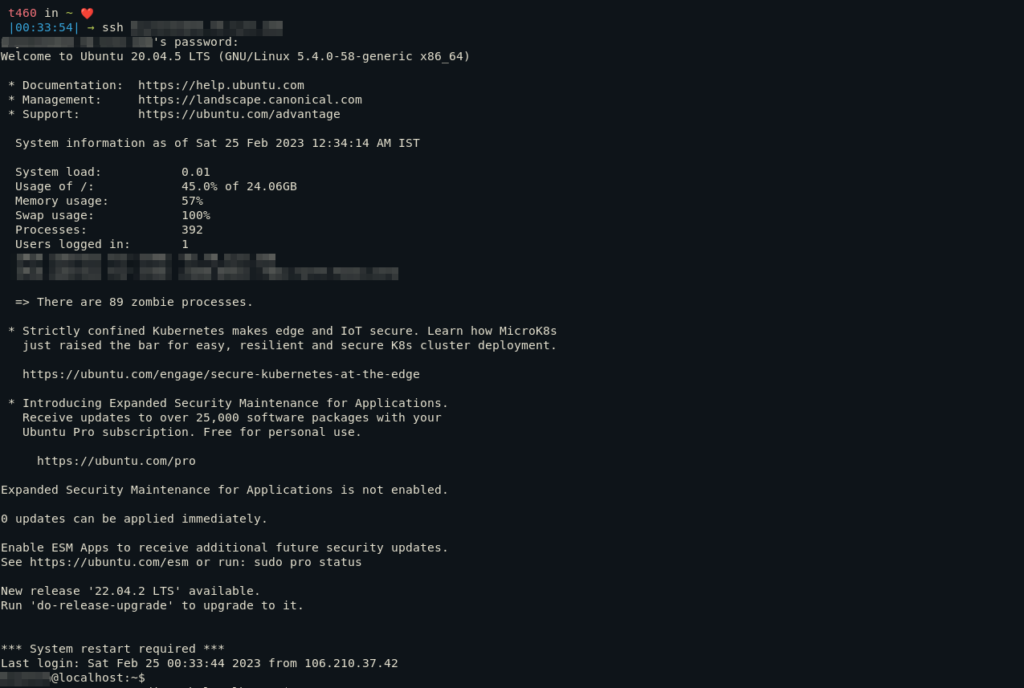
This will log you into your cloud machine and now you can get started with installing software.
Step 2: Install Git or another version control system
The most basic step to setting up development environment regardless of whether you are working with Android development or Data Science is to install Git or any other version control system such as SVN.
A lot of times git is already preinstalled on latest Ubuntu servers. To check if its installed or not, execute the following command.
git --version.
If your output is something like this, then git is already installed on your server.
git version 2.25.1
If its not installed, run the following to install Git.
sudo apt update
sudo apt install git
Now setup username and email for your local git installation using the following commands.
git config --global user.name "Your Name"
git config --global user.email "[email protected]"
Step 2. Configuring Python
Python3 is installed by default on all Linux distributions. But we still need to install pip3 to download any python packages we might need in the way.
First run the following command to check the version of Python3 installed on your server.
python3 --version
If you don’t have Python installed, you can get it using:
sudo apt install python3
Its output will be something like 3.x.z. Now install the following packages corresponding to your version number.
sudo apt install python3-distutils

Now we can install pip3 using the following command.
sudo apt install python3-pip
If your output is anything like shown below, you are good to go.

Step 3. Installing Django
For our web development environment, we will install and host the Django framework. You can install Flask if you prefer it over Django.
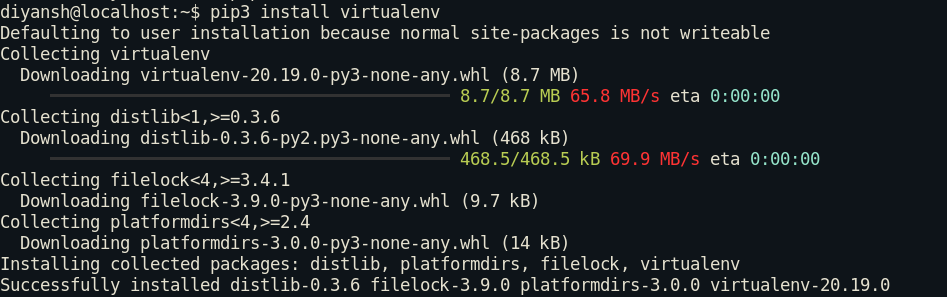
Before we can start working in Django, we need to setup a virtual environment using python which will create an isolated python environment.
This keeps the dependencies of the project separately and helps us in keeping a consistent environment throughout the course of development without any dependency conflicts.
To install Python virtual environment, execute the following.
pip3 install virtualenv
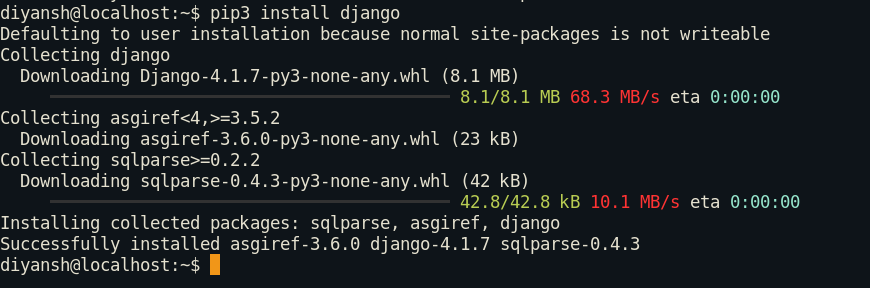
After installing virtual environment, we can go ahead and install Django similarly using this command.
pip3 install django
Step 4. Starting the Django project
Before starting with out first Django project, we need to setup a virtual environment.
virtualenv -p python3 test_project
cd test_project
source bin/activate
Now you should be seeing the name of your virtual environment in brackets. This signifies that your virtual environment is active.

Now to initialize a Django project. Run the following command.
django-admin startproject First_Django_project

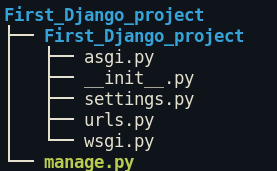
This is the directory structure of your Django project. Since the project directory contains another folder with the same name, it can get confusing sometimes.
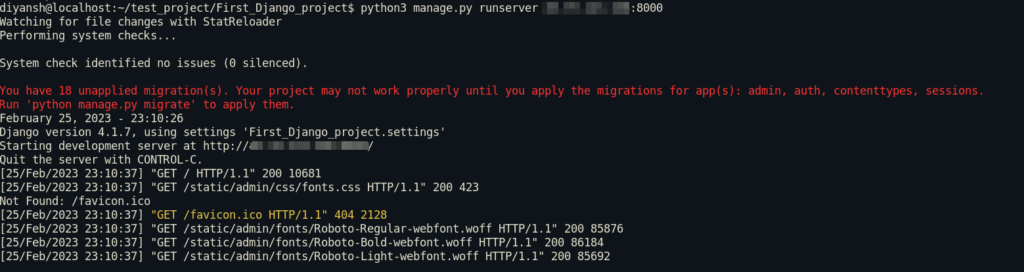
Step 5. Running the Django Webserver
In this section we will learn how to locally host your Django project while you work on it. First, we need to add our IP address as allowed hosts in settings.py. To do that open the settings.py file in Django project directory and add the following.
ALLOWED_HOSTS = ['IP_Address_of_your_VPS']
After that we need to allow a port to host the project. Run the following command to allow the 8000 port. Its standard to host your projects on 8000.
sudo ufw allow 8000
Now we can go ahead and host the development server using the following command.
python manage.py runserver <ubuntu_vps_ip>:8000
Now open a browser and go to http://<server_ip>:8000 . If you did everything right, you will see this page waiting for you.
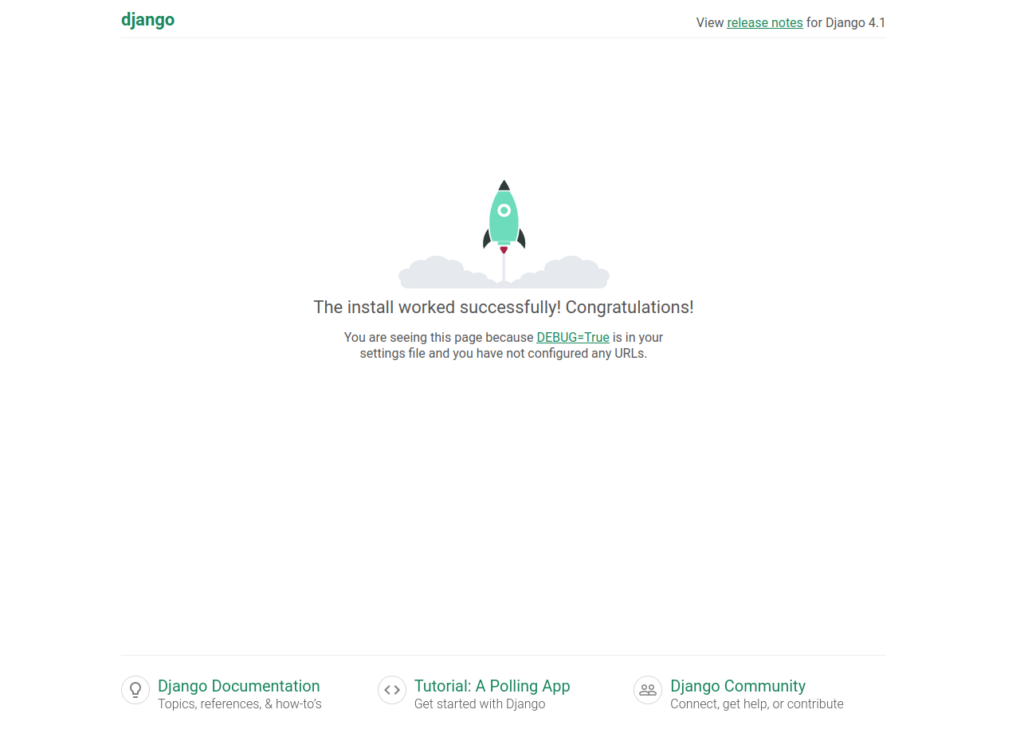
You can now begin adding code to the project folder and the changes will reflect on this remote web server page.
Conclusion
Now we have learned how to set up a basic Python web development environment. With the development server deployed, you can check all your changes quickly.
For more resources regarding Django, refer to this documentation. You can go ahead and add other stuff in it like different web development frameworks like Flask, web servers like Apache and databases like MongoDB or SQL. Thank you.