

The purpose of Apache Virtual Hosts is to run multiple websites on a single machine. It could be IP-based or Name-based.
- IP-based virtual hosting sets different directives based on IP addresses. Therefore, each host needs a separate IP address, and commonly it is used to host websites on distinct ports and interfaces.
- Name-based virtual hosting allows you to host multiple websites with the same IP address, as the server relies on the client to report the hostname in the form of HTTP headers.
Prerequisites
- Apache HTTP Server installed on a Ubuntu 20.04 machine.
(Learn how to install Apache HTTP Server on Ubuntu) - At least two domain names to test virtual hosts
- Have sudo or root privileges
Create directory structure for your websites
In this tutorial, we are using the domains example1.com and example2.com to demonstrate Apache Virtual Hosts.
We’ll start by creating directories for both the websites in /var/www , execute the following mkdir command with sudo:
sudo mkdir -p /var/www/example1.com/public_html
sudo mkdir -p /var/www/example2.com/public_html
Within these directories, there is a public_html directory, where we will keep our website files.
Since we created these directories with the help of the sudo command, they are currently owned by the root user. To grant them permissions, execute the following chown command with sudo:
sudo chown -R $USER:$USER /var/www/example1.com/public_html
sudo chown -R $USER:$USER /var/www/example2.com/public_html
Now we’ll add an index.html file with the following script in our public_html directory of both the websites which, will help us later to test out our Apache Virtual Hosts. Use your favorite editor for this purpose.
nano /var/www/example1.com/public_html/index.html
and then copy-paste the following HTML (this is basic HTML code that sets a page title, and adds two headers)
<html>
	<head>
		<title>Welcome to example1.com!</title>
	</head>
	<body>
		<center>
			<h3>Congratulations! You've have successfully reached </h3> <h2>example1.com</h2>
		</center>
	</body>
</html>
Similarly, do it for the other domain name.
Creating Apache Virtual Host files
We need to create the Virtual Host file for each domain name. Use the cp command to copy the default configuration for each domain name.
sudo cp /etc/apache2/sites-available/000-default.conf /etc/apache2/sites-available/example1.com.conf
and for our second domain name,
sudo cp /etc/apache2/sites-available/000-default.conf /etc/apache2/sites-available/example2.com.conf
Now use your favorite text editor to edit these configuration files. For the first domain name,
sudo nano /etc/apache2/sites-available/example1.com.conf
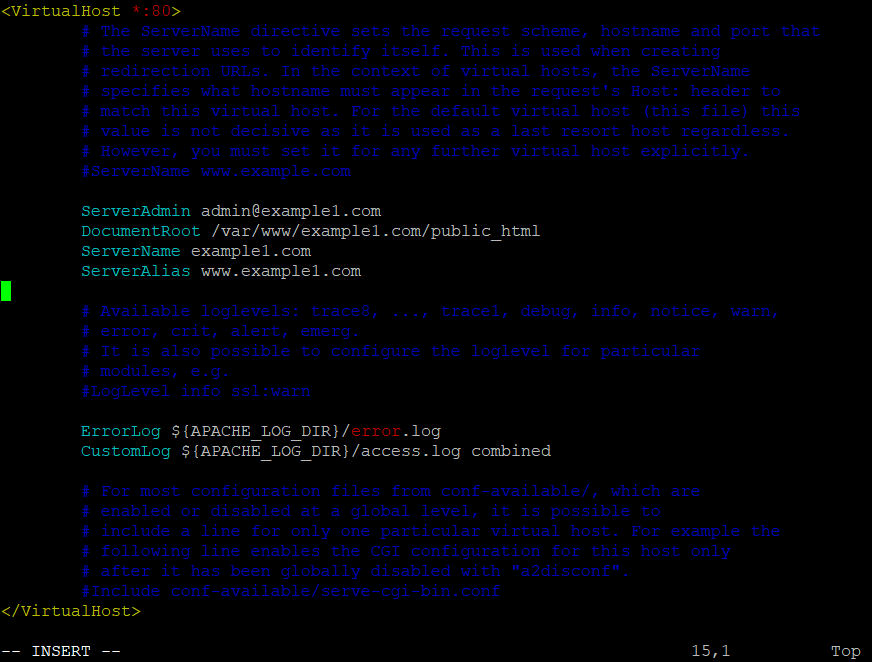
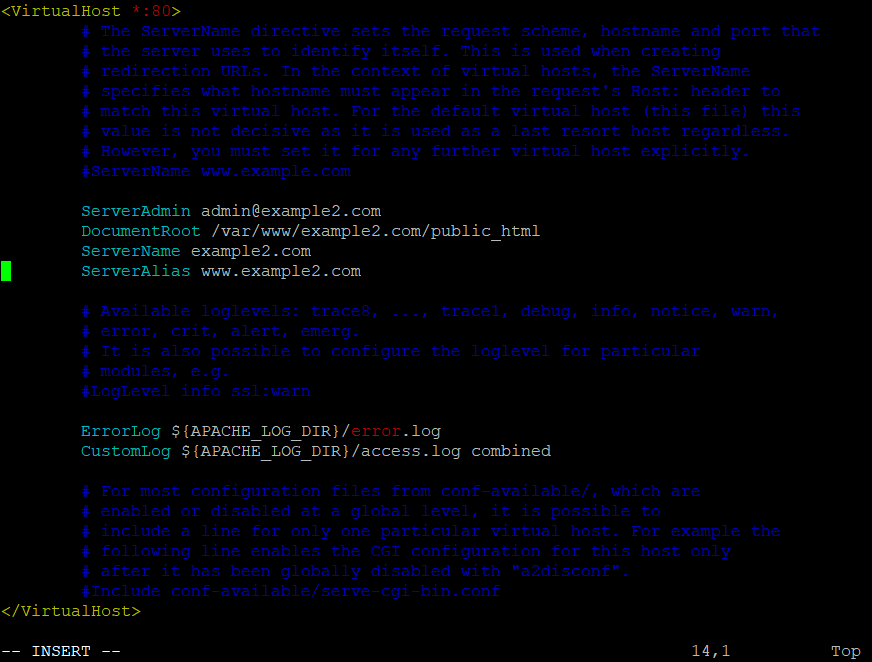
Enter administrator email for ServerAdmin, and the website root directory location for that domain name in DocumentRoot.
Just below DocumentRoot, add lines for ServerName that holds your domain name, and ServerAlias hold aliases (like www) for your domain name, as shown in the picture above.
Similarly, do it for the other domain.
sudo nano /etc/apache2/sites-available/example2.com.conf
Update configuration to enable virtual hosts
Now to enable our virtual hosts, we will use a2ensite utility. Execute the following commands to enable the websites:
sudo a2ensite example1.com
and similarly, for the other domain name:
sudo a2ensite example2.com
We all set to restart the Apache HTTP server and to activate the new configuration, execute the following systemctl command with sudo:
sudo systemctl reload apache2
Now you can verify by visiting http://example1.com and http://example2.com on your browser.

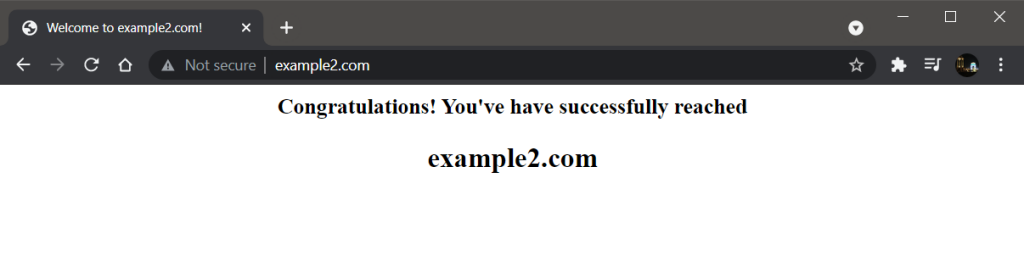
Congratulations! We have successfully set up Apache Virtual Hosts on Ubuntu.
Conclusion
In this article, we set up Apache Virtual Hosts on Ubuntu, which is very useful in serving multiple websites on the same server.
Thank you for reading! 😀