
Nginx Amplify is a free monitoring tool for Nginx and Nginx Plus. We can use Amplify to monitor web servers, track our infrastructure assets, monitor the underlying OS, databases, and many other components.
Let’s learn to use NGINX Amplify and monitor the health of our Nginx Server using the functionalities provided by it.
What is Nginx Amplify?
Nginx Amplify is a SaaS (Software-as-a-Service) product, meant for monitoring web servers, databases, infrastructure assets and various other components. It is hosted on AWS public cloud.
Amplify can also be used for various purposes like –
- Track Web Server/Application’s performance and capabilities.
- Receiving notifications when there is an issue with infrastructure.
- We can easily find performance bottlenecks, potential DDoS attacks, or server load, using its visualization related to our Nginx Server.
- Improving/Optimizing performance of our server using its recommendations and intelligent advice.
- Keep track of our systems running Nginx Server.
The various key components of Nginx Amplify are:
- Nginx Amplify Backend – It is the core system component and includes:
- Core API
- Analytics Engine
- Database
- Metrics Collection Infrastructure
- Nginx Amplify Web Interface – It is the Web Interface of Amplify that displays various metrics and data collected from the monitored system.
- Nginx Amplify Agent – An application written in Python, that runs on monitored systems and collects various metrics and data. It also sends that collected information to the Amplify backend, so it can be stored and visualized over the Amplify Web Interface.
Prerequisites for using Nginx Amplify
The prerequisites you need to have, to setup Amplify are:
- Nginx installed on your server
- ssh access to the server
If you do not have Nginx installed, head here.
Steps to setup Nginx Amplify to monitor your Nginx Server
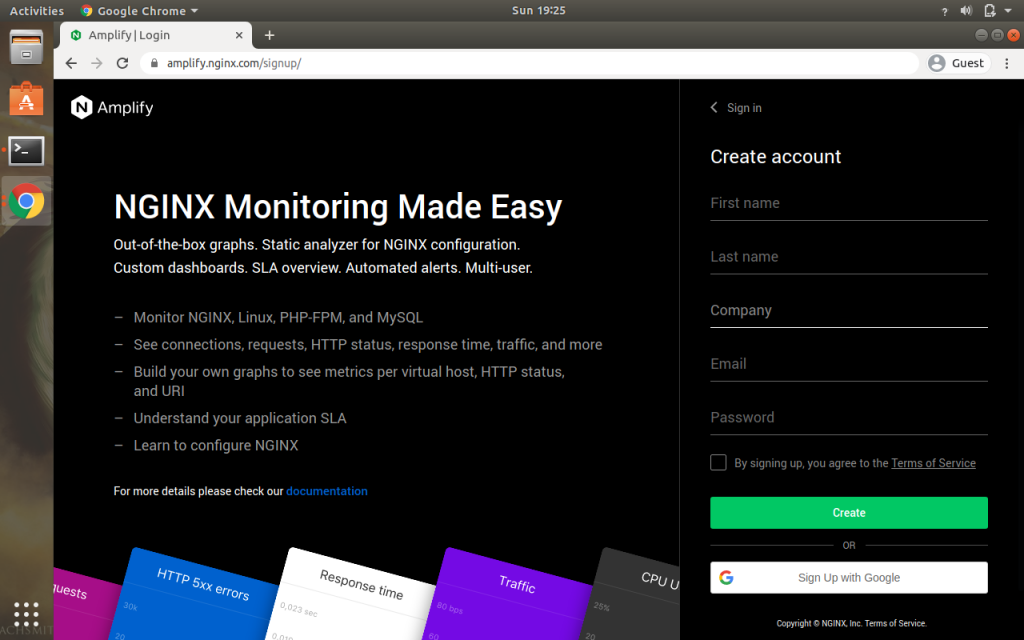
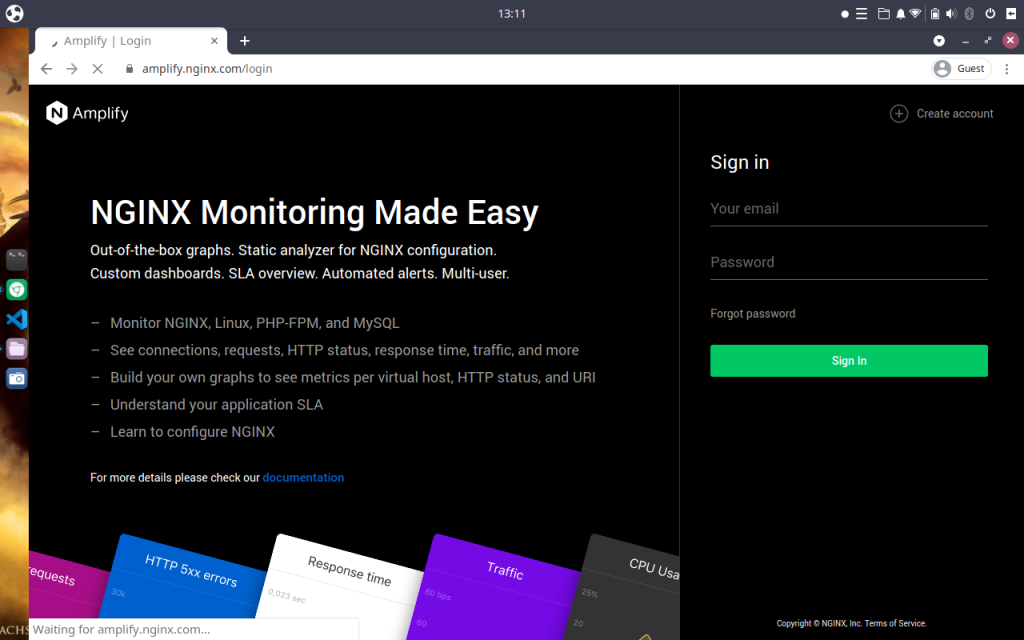
Step 1: Signup and Login your account at Amplify Website
First of all, we need to signup at the Nginx Amplify website and login into our newly created account. To create your account on Amplify website, follow this link. After filling in your details, click on Create.
After Signing-up for the account, you will also receive an e-mail verification. Accept it, and login into your Nginx Amplify Account.
Step 2: Download the Nginx Amplify Agent installation script
Once you login into your Nginx Amplify account, the following page will be displayed containing the steps to setup Amplify Agent on the system we need to monitor.
As, we can see we firstly need to log in into our server using ssh.
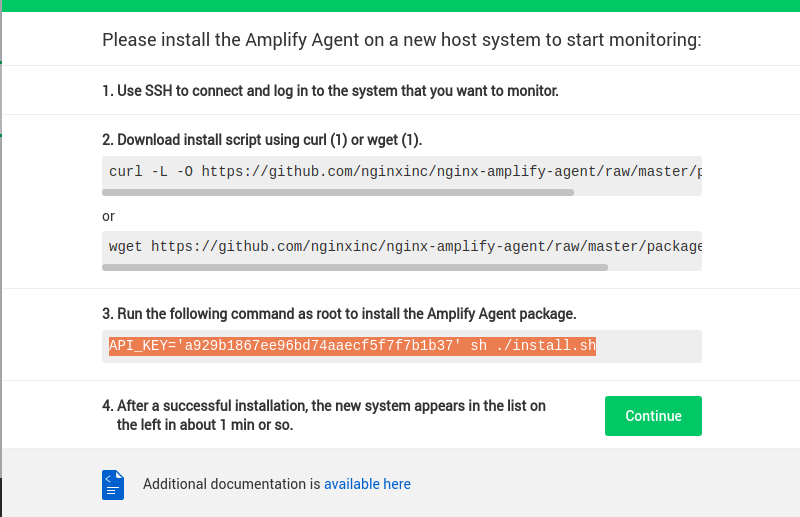
The next step is to download the script, use the curl command to download it.
curl -L -O https://github.com/nginxinc/nginx-amplify-agent/raw/master/packages/install.sh
After running the command, the output will look something like the image below.

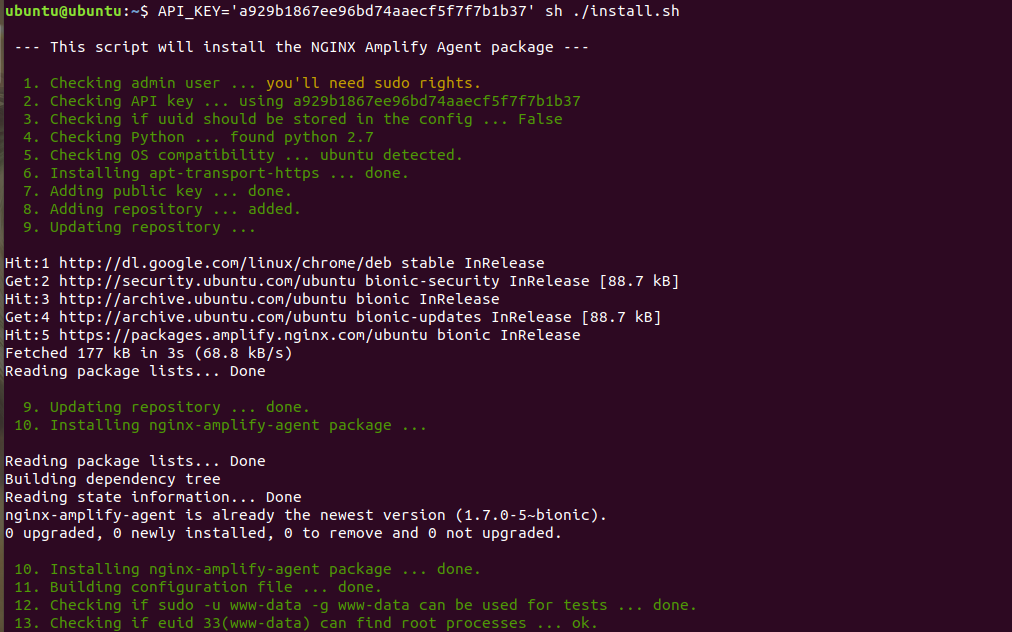
Step 3: Install the Nginx Amplify Agent using the script
Now that we have downloaded the script, we need to install it on our server.
For this step, you need to know your Amplify API key, it is unique to your account. So, head over to the instructions page we came across before and copy the command similar to the command below, and run it to install the Nginx Amplify Agent.
API_KEY='YOUR_API_KEY' sh ./install.sh
After you have run the command, the installation script will automatically install the Nginx Amplify Agent package to the server.
Step 4: Configure Nginx to visualise essential metrics
Now that you have successfully installed the Nginx Amplify Agent, click on Continue on the instructions page in the web interface of Amplify and the next page with similar instructions will appear.
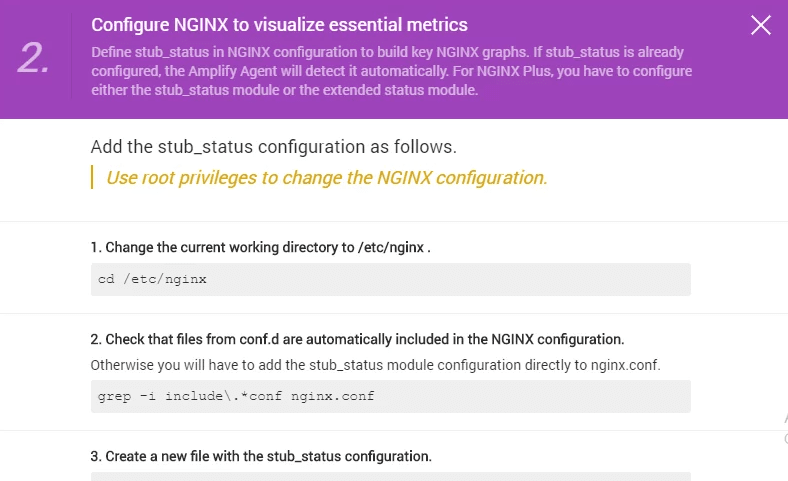
As the above image says, we need to use root privileges to change the stub_status configuration file. Firstly, cd into the nginx directory using the below command:
cd /etc/nginx
Now, check whether conf.d files are automatically added to the Nginx configuration, using the below command:
grep -i include\.*conf nginx.conf
Now, create a file named stub_status.conf in the conf.d directory, using the command below:
cat > conf.d/stub_status.conf
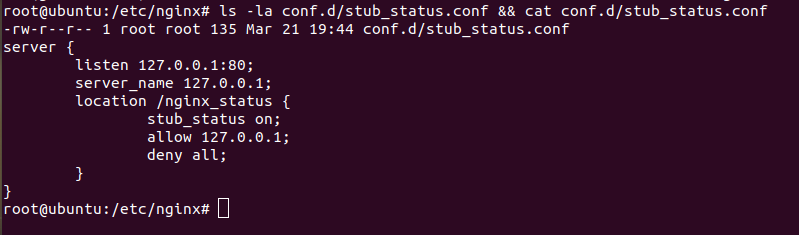
Copy and Paste the below content into your stub_status.conf file, which we just created.
server {
	listen 127.0.0.1:80;
	server_name 127.0.0.1;
	location /nginx_status {
		stub_status on;
		allow 127.0.0.1;
		deny all;
		}
}
You can verify whether the changes you have done are successfully applied or not, using the last command from the instructions page, or by simply opening the file again after changing its content.
Now, run the below command so that the changes you have done could be applied, by reloading the Nginx Server.
kill -HUP `cat /var/run/nginx.pid`
Step 5: Modifying the Nginx configuration file
The final step in setting up Amplify Agent, needs to change the Nginx configuration file located at /etc/nginx/nginx.conf , we need to modify 3 sections of the file to complete our setup.
Find the respective attributes and modify them to the given values.
In case, the attributes are commented out, uncomment them and modify them as given below.
error_log:
error_log /var/log/nginx/error.log warn;
access_log:
access_log /var/log/nginx/access.log main_ext;
log_format:
log_format  main_ext  '$remote_addr - $remote_user [$time_local] "$request" '
                       '$status $body_bytes_sent "$http_referer" '
                       '"$http_user_agent" "$http_x_forwarded_for" '
                       '"$host" sn="$server_name" '
                       'rt=$request_time '
                       'ua="$upstream_addr" us="$upstream_status" '
                       'ut="$upstream_response_time" ul="$upstream_response_length" '
                       'cs=$upstream_cache_status' ;
Once you are done with modifying the Nginx configuration file, make sure to reload the Nginx Server.
Monitor your Nginx Server using Amplify
After you have setup the Nginx Amplify Agent, move to the instruction page open in your web browser and hit Continue.
You will see that, the metrics and data starts streaming in the Amplify Web Interface, as shown below.
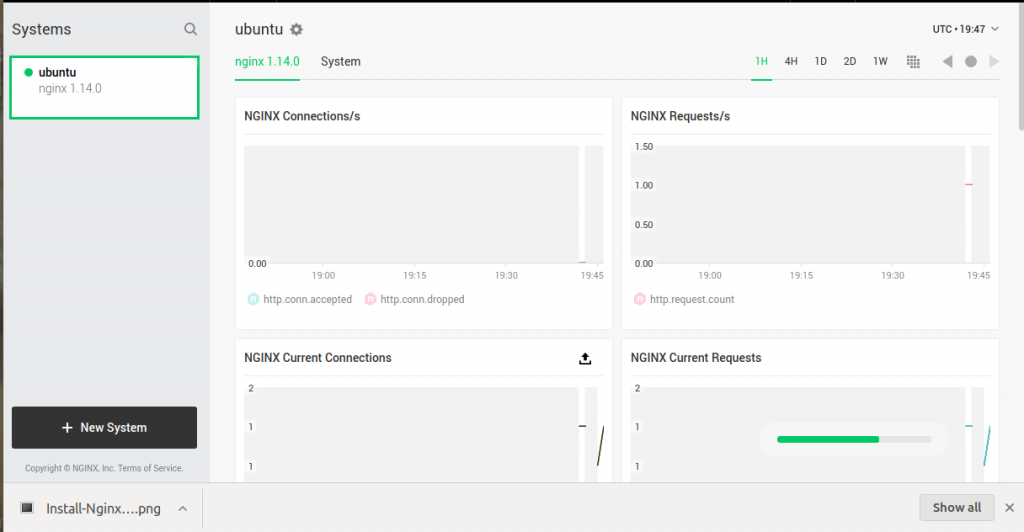
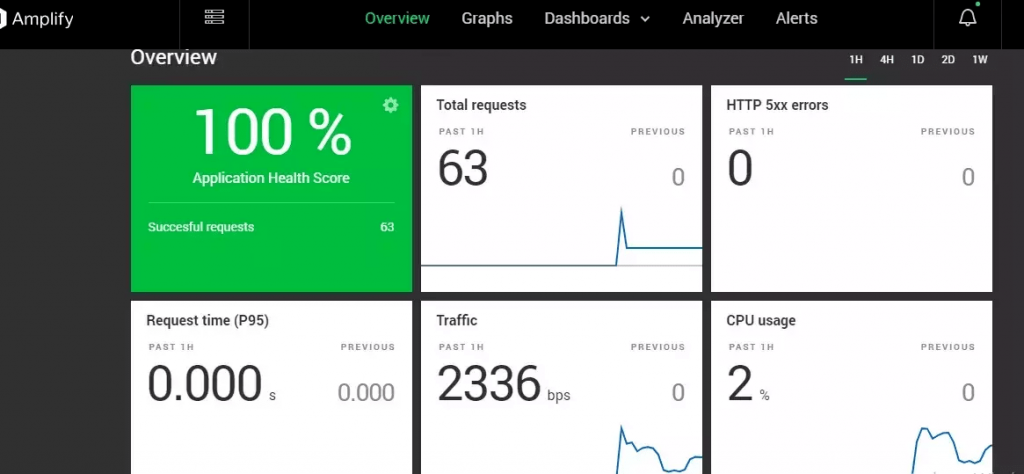
To view your server stats in a general and easy to read manner, click on Overview tab.
Now that you have setup Amplify to monitor your Nginx server, you are good to explore more.
Bonus
- For a deeper dive into Amplify, you can head over its official documentation.
- Nginx is open-source, and you can find its code here.
- Nginx Amplify Agent is also open-source, and you can find its code here.
Conclusion
In this article, we discussed Nginx Amplify, its various components, and its uses. We also discussed the step-by-step approach to setup Amplify to monitor our Nginx server and how Amplify can be used to check the overall health and metrics of our running server.