

OBS stands for Open Broadcaster Studio and is the most widely used open source software for video recording and live streaming and is available on Windows, mac OS, and Linux. It is mostly used by YouTube and Twitch streamers to stream their screen/games on various streaming websites. Yes, calling it OBS studio would be like calling ATM the ATM machine, the last word is redundant here. The Application is completely free and open source software, and it is considered a standard application for streaming-related work. Even Edward Snowden hailed it as good software and deemed its alternatives unacceptable.
In this tutorial, We will look at the Installation procedure of this application on all the major distributions, and we will optimize it for different use cases.
Installing OBS studio on Linux
Depending upon your Linux distribution, type the following commands in your Terminal:
# On Ubuntu, make sure you that you have enabled Multiverse repository, then type :
sudo add-apt-repository ppa:obsproject/obs-studio
sudo apt update
sudo apt install obs-studio
# On Debian :
sudo apt update && sudo apt install ffmpeg obs-studio
# On Arch Linux based distributions
sudo pacman -S obs-studio
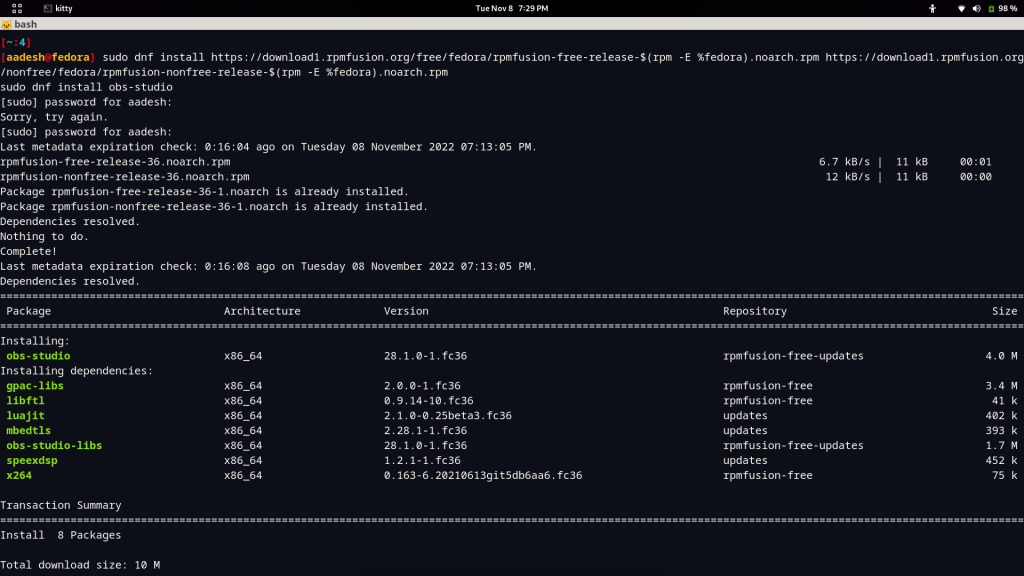
# On Fedora Workstation, Enable RPM fusion :
sudo dnf install https://download1.rpmfusion.org/free/fedora/rpmfusion-free-release-$(rpm -E %fedora).noarch.rpm https://download1.rpmfusion.org/nonfree/fedora/rpmfusion-nonfree-release-$(rpm -E %fedora).noarch.rpm
sudo dnf install obs-studio
# If you have NVIDIA card on Fedora, then also install CUDA
sudo dnf install xorg-x11-drv-nvidia-cuda
The above commands will install the latest version of OBS studio on your distribution of choice. You can also build the application from source using this guide on their official GitHub page.
Setting up Recording
When you launch this application for the first time, It will ask you to optimize it for different tasks. Here, we will discuss recording.
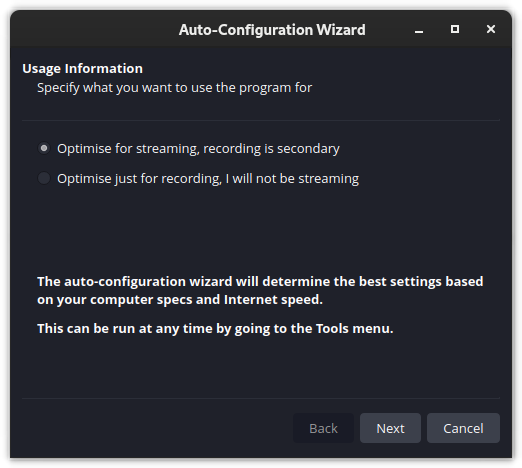
If you plan to change your mind later on, then don’t worry, you can always launch this wizard again from the Tools menu.
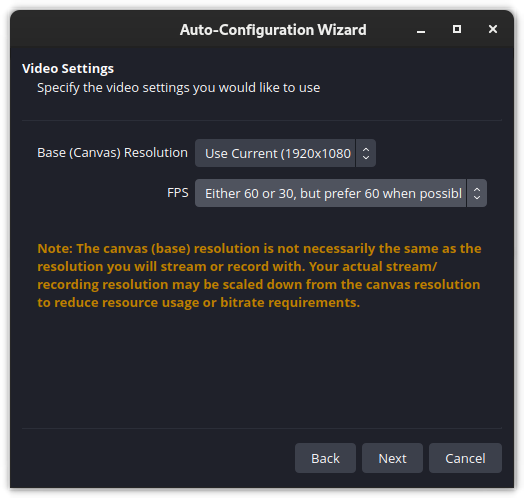
On the next screen, you can select the resolution and frame rate of the video and hit next. The autoconfiguration wizard will now automatically determine the best settings for your display and hardware.

Configuring Streaming in OBS
If you are going to be streaming to a Website such as Twitch, select optimized software for streaming
Next, the app will determine the best quality settings (resolution and frame rate) for you to use, depending on your screen and hardware.
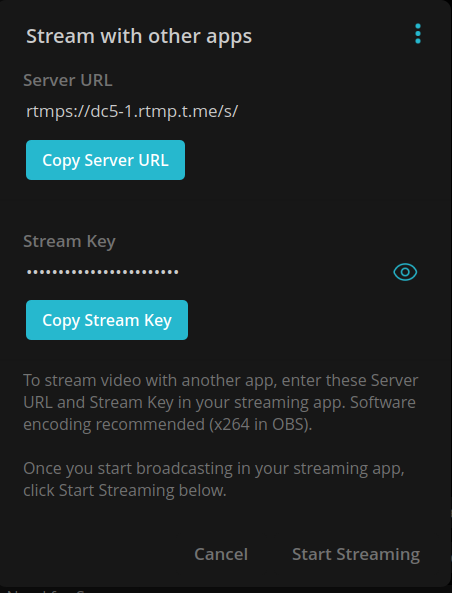
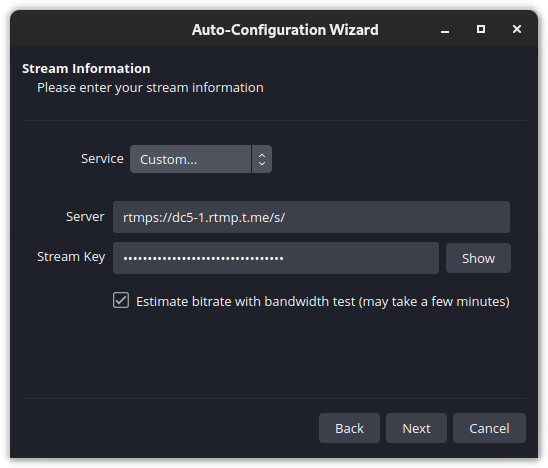
On the next screen, select your streaming service such as Twitch or YouTube, in this example, I will try to stream my screen to a private Telegram channel using Custom settings.
Adding Capture source to your Stream/Recording
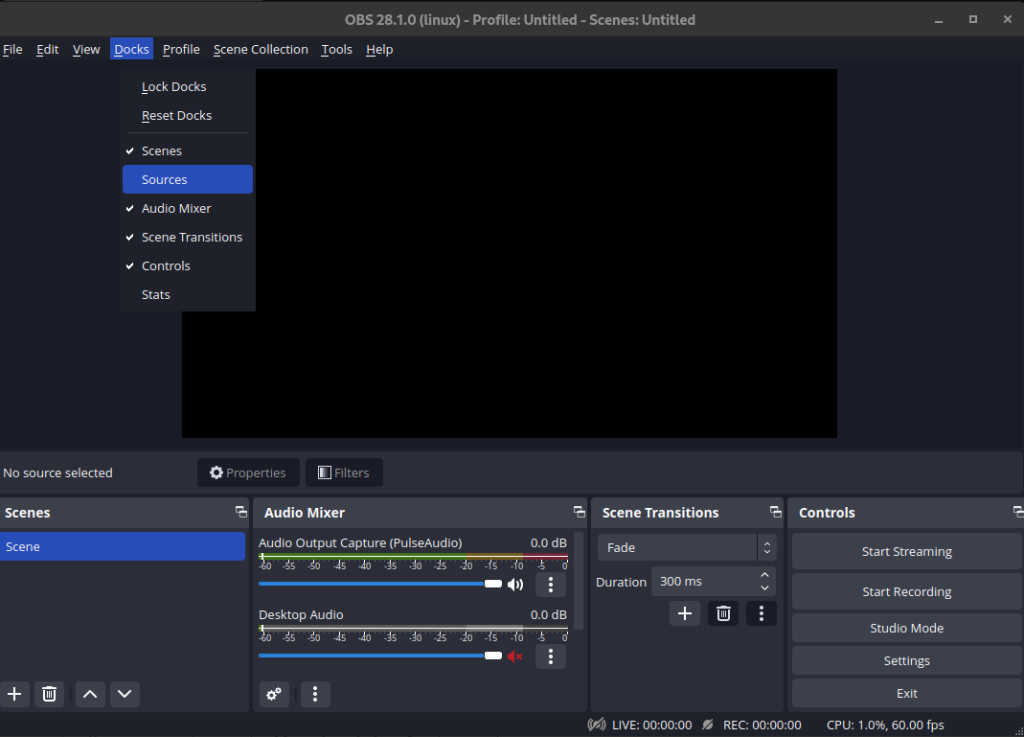
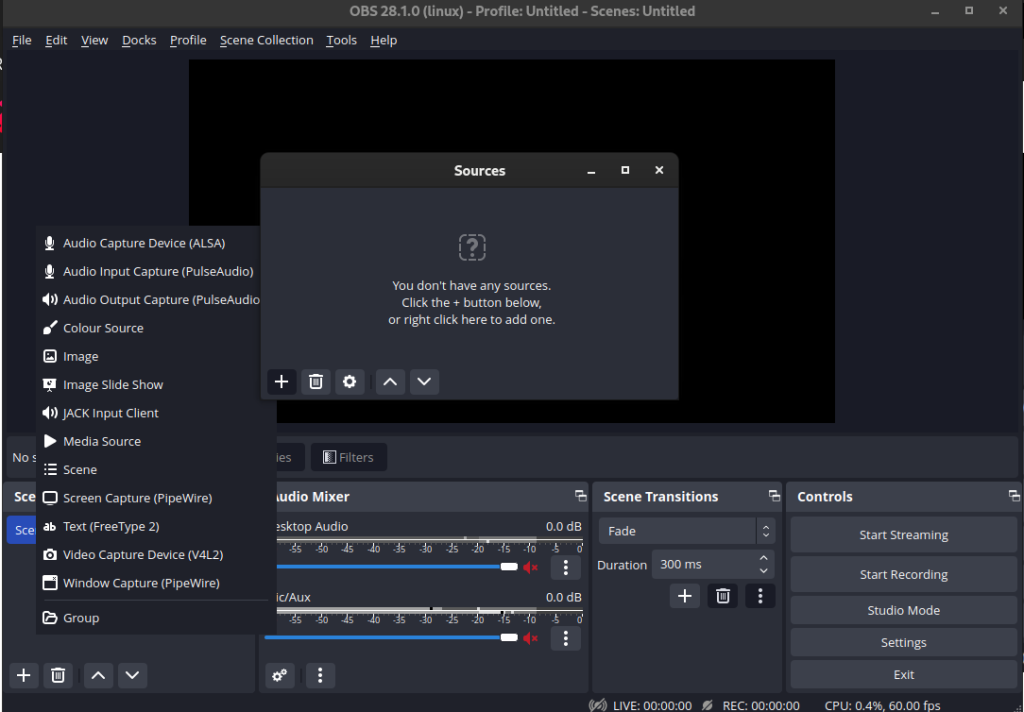
Now, let’s try adding a capture source to the software so that it can begin recording/streaming. Click on ‘Docks’ and then ‘Sources’
You can select as many sources as you want, such as multiple cameras, a video source, mics, or your entire screen. Do not forget to add an audio source, otherwise, your viewers will not be able to listen to anything.
Finally, click on the ‘Start Streaming’ or ‘Start Recording’ button and your video will start recording/streaming.

Once you are done, simply click on the ‘Stop Streaming’ or ‘Stop recording’ button.
Summary
There are various scripts available for OBS which you can add to your software to enhance your experience even more. You can add them by going to the ‘Tools’ menu and then selecting ‘Scripts’.
It is really great software and even a beginner can use it to stream to any website. Stream your entertaining gameplay on YouTube, or just talk to strangers on Twitch, the choice is entirely yours. Make sure to make good and regular content if you want to gain followers, and as always. Have fun!