

Static websites are great for blogs and minimal websites. They are significantly smaller when compared to dynamic websites and hence can be hosted using very minimal server hardware requirements. Today we will be going through a static website generator called Hugo. Hugo is written in go and is capable of running very fast. There are also a wide variety of themes given by the community over at Hugo-Themes.
Hugo allows users to write their content in markdown format and then creates static websites that you can then upload to a server to be deployed! With Hugo creating a website becomes very hassle-free. So let’s get going and start up an example website!
Installing Hugo on Linux Debian/Ubuntu Linux
Hugo is available for all three major operating systems: Linux, Mac, and Windows. First and foremost, open up your terminal window and give the following command:
sudo apt install hugo
If you are not on Linux, follow the installation directions for your OS over at this link.
Creating a website and user customization
There are several commands that come with Hugo. The first command you need to know is the command that is given to create a new website. The command syntax is as follows:
hugo new site <site-name>
This will create a new directory in the current directory with the name of the directory being the name of the site you gave. Now if you cd into the directory and list all the content you may see there are some folders created. Also a config file will be created, this is the main configuration file for your website.
The folders created are discussed below:
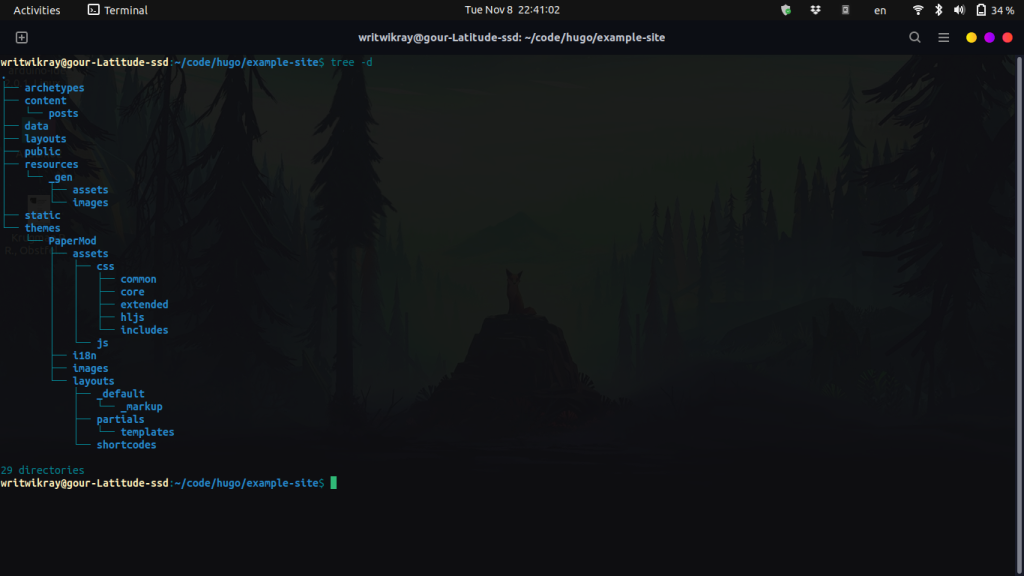
- archetypes: These are used to configure the default front matter for your pages, an example would be the title of a blog post, date of publication, etc
- content: This folder will house the main contents of your website. The content for a blogging website may be the blog posts.
- data: This will act as a mini database for your website.
- layouts: Layouts are a sort of frame that is used to generate your web pages. For example, every page on your website may have a common footer, in this folder, we can store the code for that. All parts will come together when we run the hugo command.
- static: This folder stores all the static files that will be shown on your websites. For example, you may want to share images as part of your blogs, then all the images will be stored here.
- themes: This is the folder where all the themes will be stored
Installing a theme for your site
To begin putting some content out, first, we will need a theme for our website. There are thousands of themes available on the Hugo-Themes page, and you can choose one to your own liking! Most of the time the developers working on a theme will even have an example site for you to view as a preview.
So go ahead and check out some themes for your website! In this article, we will go for the PaperMod theme. Usually, on any theme you choose, you will find instructions or an installation section.
Create a Papermod folder
For this article, we will follow the instructions given by the PaperMod Theme. First, we need to go into the folder we created:
cd <site-name>
git clone https://github.com/adityatelange/hugo-PaperMod themes/PaperMod --depth=1
This code clones the repository into our themes folder. To activate the theme we need to edit the configuration file at the root of our website’s folder.
Editing the config file
Let’s open up the config.toml file and edit it!
vim config.toml
First set the baseURl to blank and give a title of your choice in the title area. Now add the following line to set the theme for our website.
theme = 'PaperMod'
Starting the server
Now go back to the folder and give the following command:
hugo server

This will run your Hugo site as a local server on the port localhost:1313. You can check out the content of your posts this way before even building the website. This also compiles files in real-time, which means you can edit and view your website in real-time, without going back and forth!
Creating content!
As we have stated before all your content will be located in the content folder at the root of your website’s folder. The layouts folder is usually used for theme overrides. A theme comes with its own set of layouts located in the layouts folder in that theme’s layouts directory.
So whenever you want to modify the layout of your website you can either go into the theme’s layout folder and change it or copy the file over to your website’s own layout folder and then edit it. We recommend doing it the latter way, just because that way you are preserving the original file if something ever goes south.
Also, keep in mind that you store all your images in the static folder!
So let’s get started and add a new post to our site! To do that go ahead and give the following command:
hugo new posts/first_post.md
This will create a new posts folder inside your content folder and put a markdown file, which is also populated with some details that are in the archetype configuration! Everything in between the dashes that are already populated is known as the front matter and is necessary for our posts.
The actual body of the post begins after the front matter. One crucial thing we need to know is that we have to set the draft set to false in order to actually see the post! So let’s add some content and change the draft to false:
---
title: "First"
date: 2022-11-08T22:25:50+05:30
draft: false
---

Hi there!
Now go back to the root of the website and give the server command again:
hugo server
Now you can see that there is some content generated on our website! All our posts will be written using Markdown.
Conclusion
So there you go, now you can easily create your own website without touching html-css and javascript. You may want to tweak some things, for that you simply use the layouts method we have mentioned above. Also, follow the instructions given on the theme you choose. Thanks for reading!