

gh is GitHub’s official command line tool. It manages pull requests, issues, releases, and repositories from your terminal, next to the git commands you already run.
If you want to install gh cli on Linux quickly on Ubuntu or Debian, sudo apt install gh works because gh is in the Ubuntu universe and Debian main repositories. The version there can lag behind upstream, so this guide also covers GitHub’s own package repository, which always carries the current release (v2.98.0 as of August 2026).
Install gh with apt
apt resolves dependencies for you and handles updates and removals, so it is the simplest path on Debian, Ubuntu, Raspberry Pi OS, and Mint. Refresh the package index first so apt sees the latest available version.
sudo apt update
Step 1: Install from the default repositories
On Ubuntu 22.04 and later and current Debian releases, one command installs gh.
sudo apt install gh
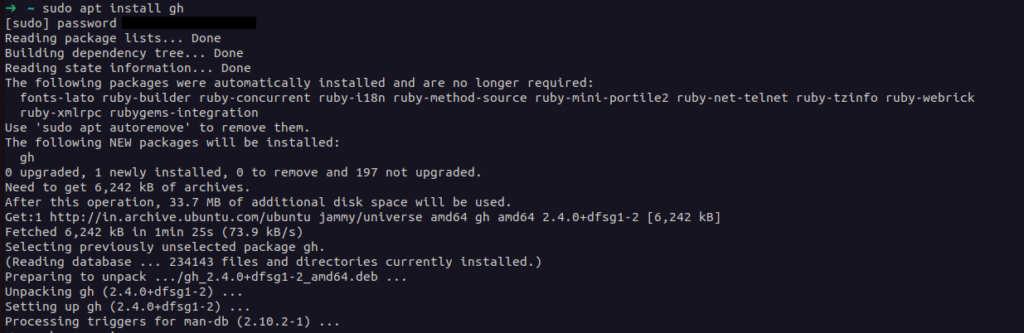
Step 2: Check the installed version
Confirm the install worked by printing the version. The command also shows the release page URL for that build.
gh --version

On this server, Ubuntu’s universe repository supplied gh 2.45.0 while the latest upstream release was 2.98.0. If you want every new release within days instead of waiting for your distro to repackage it, add GitHub’s signed apt repository once and install from there:
(type -p wget >/dev/null || (sudo apt update && sudo apt install wget -y)) \
  && sudo mkdir -p -m 755 /etc/apt/keyrings \
  && out=$(mktemp) && wget -nv -O$out https://cli.github.com/packages/githubcli-archive-keyring.gpg \
  && cat $out | sudo tee /etc/apt/keyrings/githubcli-archive-keyring.gpg > /dev/null \
  && sudo chmod go+r /etc/apt/keyrings/githubcli-archive-keyring.gpg \
  && sudo mkdir -p -m 755 /etc/apt/sources.list.d \
  && echo "deb [arch=$(dpkg --print-architecture) signed-by=/etc/apt/keyrings/githubcli-archive-keyring.gpg] https://cli.github.com/packages stable main" | sudo tee /etc/apt/sources.list.d/github-cli.list > /dev/null \
  && sudo apt update \
  && sudo apt install gh -y
After this, ordinary upgrades pick up new gh versions automatically:
sudo apt update && sudo apt install --only-upgrade gh
Install on Fedora, RHEL, and openSUSE
GitHub publishes native RPM packages through its own repository for Fedora, RHEL, CentOS, Amazon Linux, and SUSE distributions, and most of these distros also carry gh in their default repos. On Fedora or RHEL-based systems:
sudo dnf install gh
On openSUSE or SUSE Linux Enterprise:
sudo zypper install gh
Both package families are listed on the official installation page linked at the end of this guide, including the repository setup lines when your distro’s default package is missing or old.
Install gh with Homebrew
Homebrew runs natively on Linux too, and it is useful when you want the same package manager across macOS and Linux machines. Install Homebrew first if you do not have it, following the instructions at brew.sh.
brew update
brew install gh
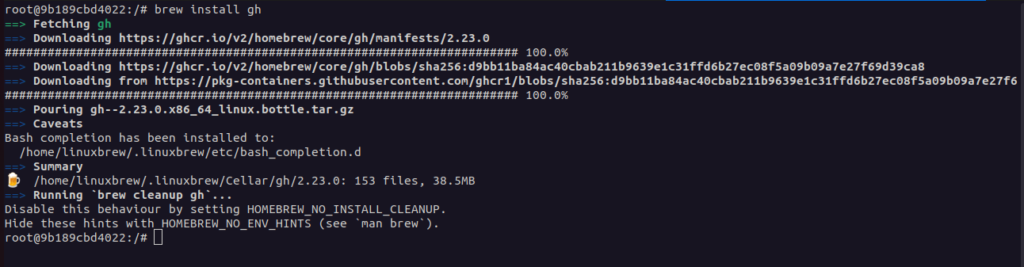
Verify the install the same way as before. Watch the spelling: gh –version, not verison, which is an easy typo to make when you type fast.
gh --version
Configure gh with GitHub
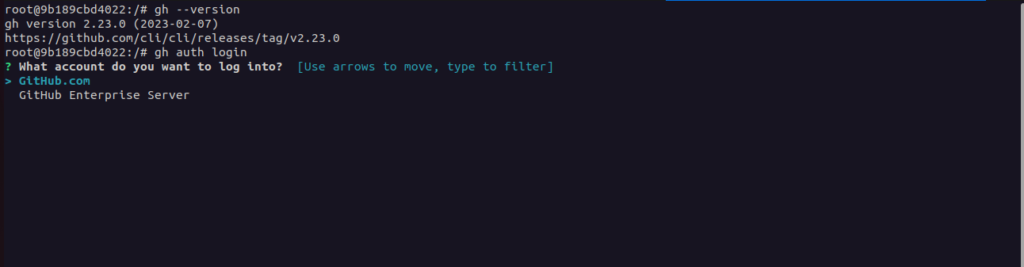
Installation alone leaves gh unauthenticated, so commands like gh pr list fail until you log in. Start the login flow:
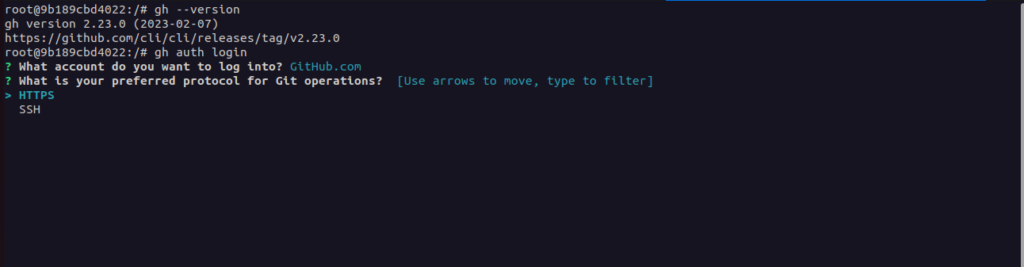
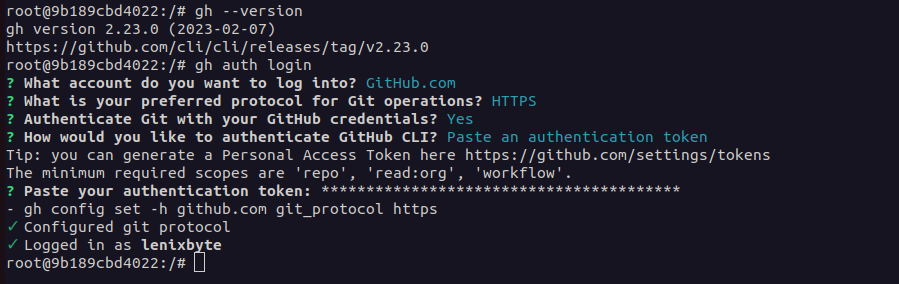
gh auth login
gh asks four questions: which account host (GitHub.com or GitHub Enterprise), your preferred protocol for git operations (HTTPS or SSH), whether to authenticate git with your GitHub credentials, and how to sign in. The interactive prompts look like this:
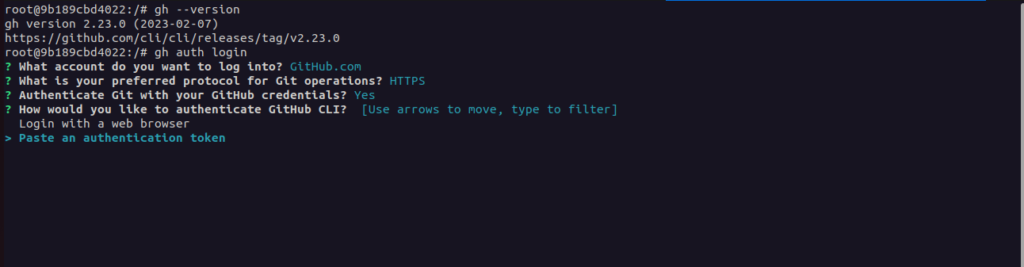
Option 1: Login with the web browser (recommended)
This is the documented default flow and needs no manual token. Choose Login with a web browser, copy the one-time code gh prints, then press Enter. gh opens github.com/login/device where you enter the code and authorize the request.
On a headless server without a browser, gh still shows the code and URL. Complete the step on your phone or another machine instead.
Option 2: Login with a personal access token
Servers behind strict firewalls, or scripts that must log in non-interactively, use a classic personal access token instead. Create one at github.com/settings/tokens: click Generate new token, give it a name, set an expiration, and select at least the repo, read:org, and workflow scopes.
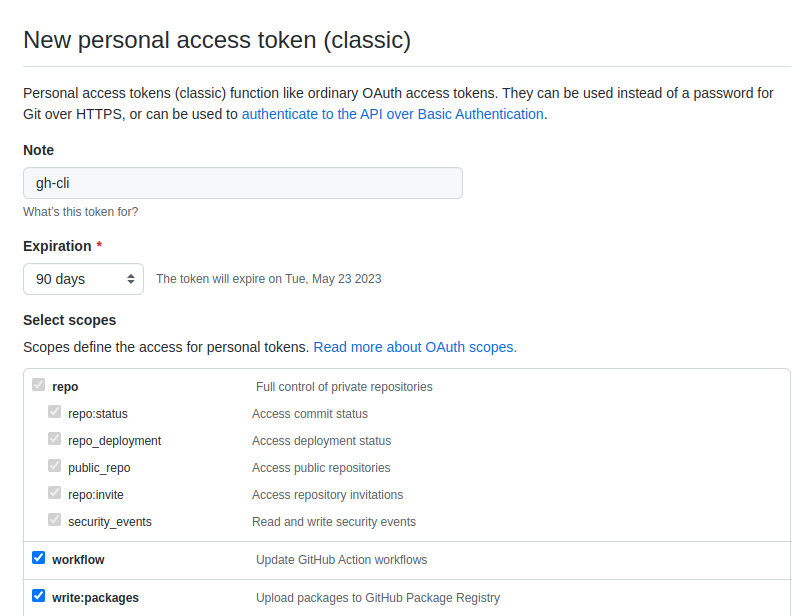
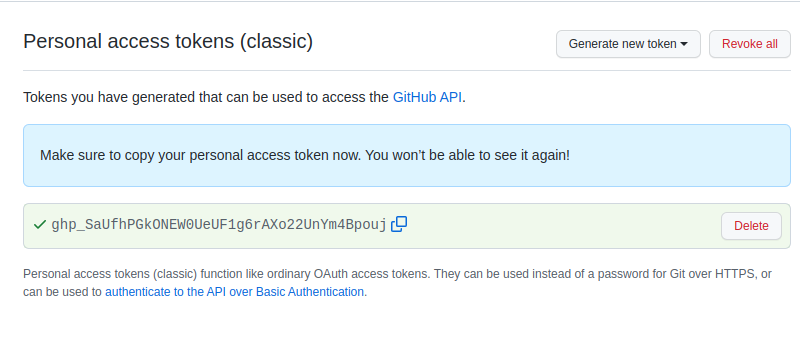
Copy the token immediately after generating it. GitHub shows it exactly once.
Pick “Paste an authentication token” in the gh prompt and paste it. gh validates the scopes and logs you in.
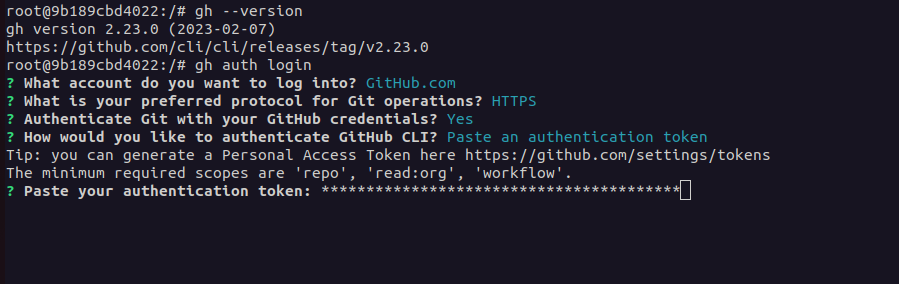
Verify your login
A successful login ends with a confirmation message, and two commands prove everything works against live public repositories:
gh auth status
gh repo view cli/cli
If a gh command fails later, rerun gh auth status before trying anything else, because it names each logged-in account with its active state and stored token scopes. That output usually separates an authentication problem from a scope or network problem.
Useful first commands after setup
Once logged in, these four commands cover most daily GitHub work from the terminal. Each one reads live data, so run them inside any cloned repository or pass –repo owner/name explicitly.
- gh issue list: show open issues, filterable with –state, –label, and –assignee.
- gh pr status: show pull requests relevant to your current branch, both opened by you and awaiting your review.
- gh pr create: open a pull request from your pushed branch and fill the title and body interactively.
- gh release create: tag a release and attach files without touching the web UI.
To see everything else, run gh help or browse the full manual at cli.github.com/manual. You can also shorten repeated commands permanently with gh alias set, for example turning gh pr checkout into gh co.
Difference between gh & git
Git and gh solve different problems, and mixing them up causes most early confusion. Git is the distributed version control system that tracks commits and branches locally. gh is a client for the GitHub platform specifically: pull requests, issues, releases, gists, and Actions exist only on GitHub, so only gh can touch them.
In practice they complement each other. You clone and commit with git, then review, merge, and manage issues with gh. If you are new to git itself, start with our guide to installing git on Linux, and if you prefer a graphical interface, GitKraken covers the visual workflow.