

DataGrip is a cross-platform IDE that provides an environment to manage the databases by handling the queries, on Microsoft Windows, macOS, and Linux operating systems. It is an important tool for database management developers.
It also supports a lot of engines including MySQL, PostgreSQL, MS SQL Server, Oracle, Sybase, DB2, SQLite, HyperSQL, MongoDB, Apache Derby, and H2 etc. It also comes with an editor that contains features like auto-completion, analysis, and navigation to help you modify SQL code.
Features of Jetbrains DataGrip
- Explore tables and their relationships using E-R diagram.
- Handles all the data manipulations: edit, search, import, and export.
- Smart code completion, code inspections, error highlighting, quick-fixes are all built-into the application.
- We can run scripts without opening them with the help of run configurations.
- This IDE offers you with a customizable interface with multiple available themes, so you can set it up according to your preferences.
- This application also supports a lot of language, so you won’t have a problem with localization.
- This application offers a 30-day trial period for free so you can figure out whether you like this IDE enough to buy the subscription.
Installing DataGrip: The Database management IDE
There are multiple ways through which we can install the latest version of DataGrip on our Linux PC. We will discuss all these installation steps one by one.
- From the official tarball file from DataGrip website
- And installing with the Snap package Manager
So let’s get started!
Method 1: Downloading tarball file from DataGrip website
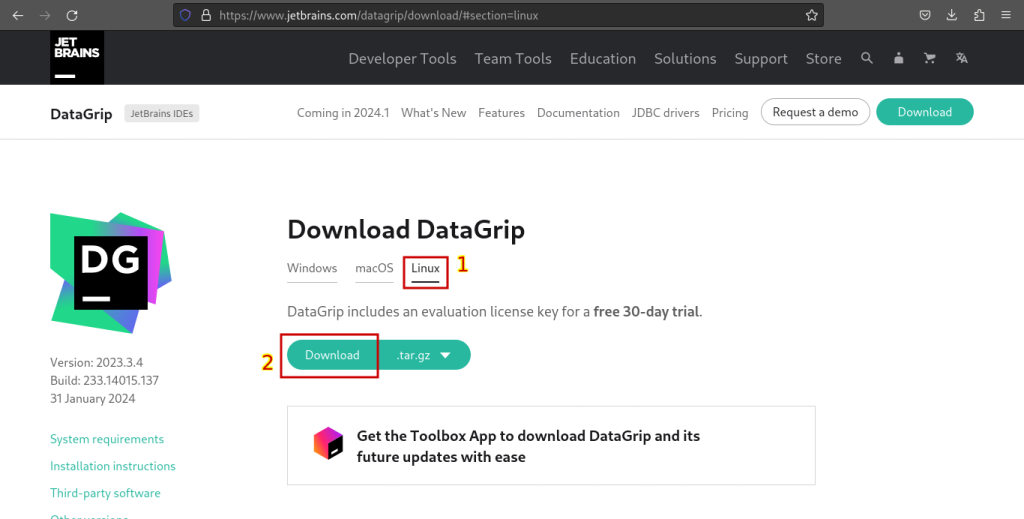
Open your browser and visit the official Jetbrains DataGrip website. And click on Download button as indicated below.
Right now, we want to install it on Linux, so click on Linux tab and click on Download to download the latest tarball file, as of July 2024, it is version 2024.1.5.
After downloading the above file, we have to decompress it. Open your Terminal, and run the following command:
cd Downloads/   #change into downloaded file directory
sudo tar -zxvf datagrip-2023.3.4.tar.gz -C /opt/   #decompressing
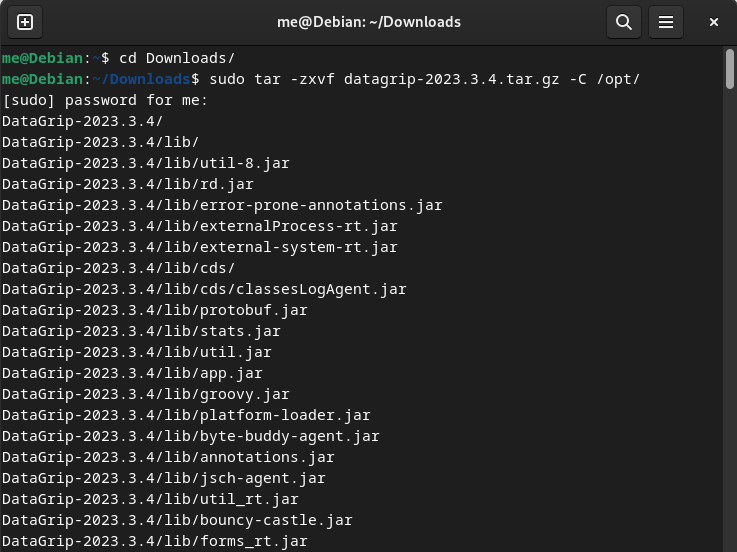
Here, we are decompressing the tarball file into a recommended /opt/ directory. Also, make sure to rename the above-mentioned script, as any future version of the application can have a different name.
After this step, skip to the Configuring DataGrip section at the bottom.
Method 2: Installing Datagrip using Snap package on Linux
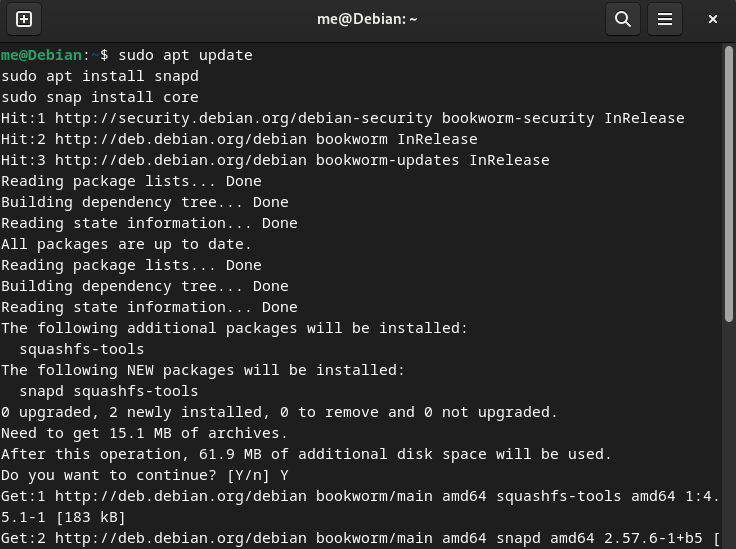
Again, if you don’t have installed snap on your Linux PC, follow this guide and install using the commands according to your OS. Note that if you are using Ubuntu, snaps are preinstalled on your system. For Debian, type the following in the command line:
sudo apt update
sudo apt install snapd
sudo snap install core
Now, to install DataGrip using snap:
sudo snap install datagrip --classic
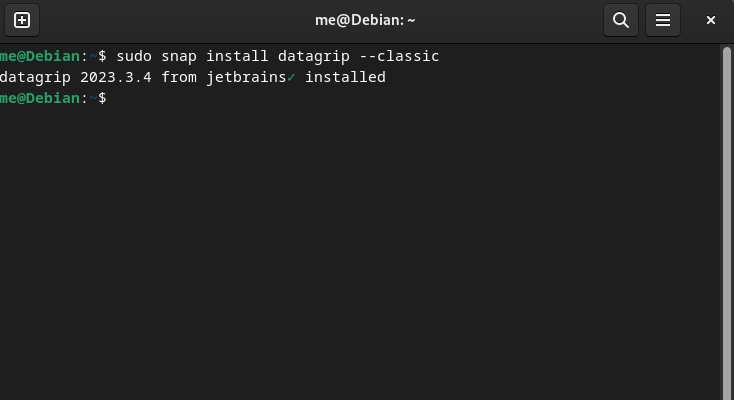
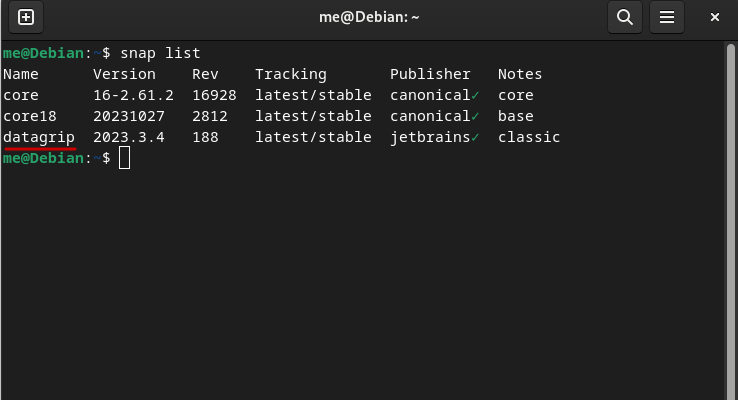
DataGrip has installed using snap on our PC. We can check all the installed snap application using below command:
snap list
Now, we have successfully installed Jetbrains DataGrip on our system! Now let’s set up the application as per our needs.
Configuring DataGrip
Now, we have to launch the application as mentioned below:
- From the grid/Menu, if installed via Snap
OR
- Or, if you have installed the application via the tarball method, then run the datagrip.sh script present in the extracted directory.
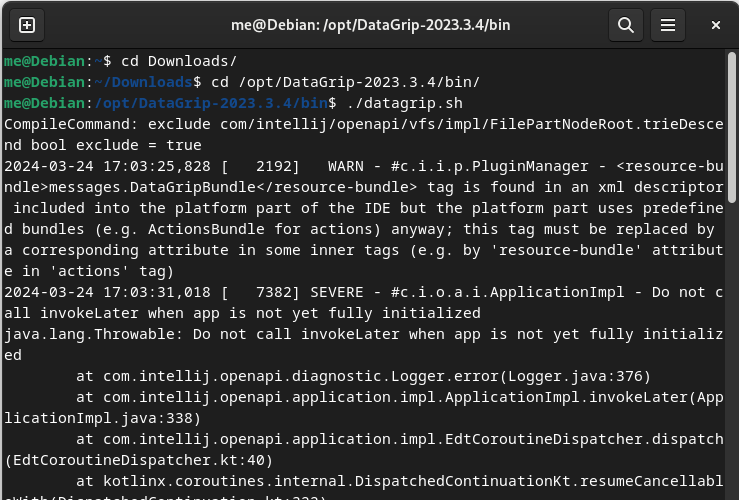
Change into /bin directory of decompressed directory. And execute datagrip.sh script to run DataGrip.
cd /opt/DataGrip-2023.3.4/bin/ #change into decompressed /bin directory
./datagrip.sh                  #run datagrip.sh script
A DataGrip window will open up and ask for you to log in to your account. You can also directly start your free Trial from here.
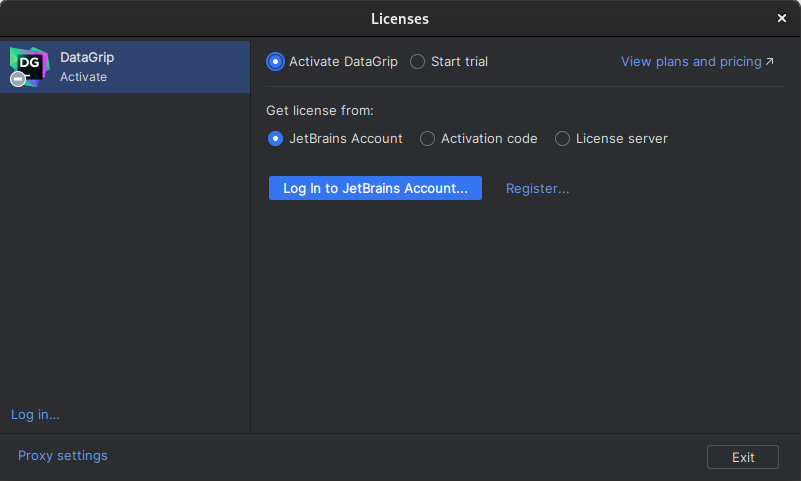
You can Log In with an existing account or create a new account.
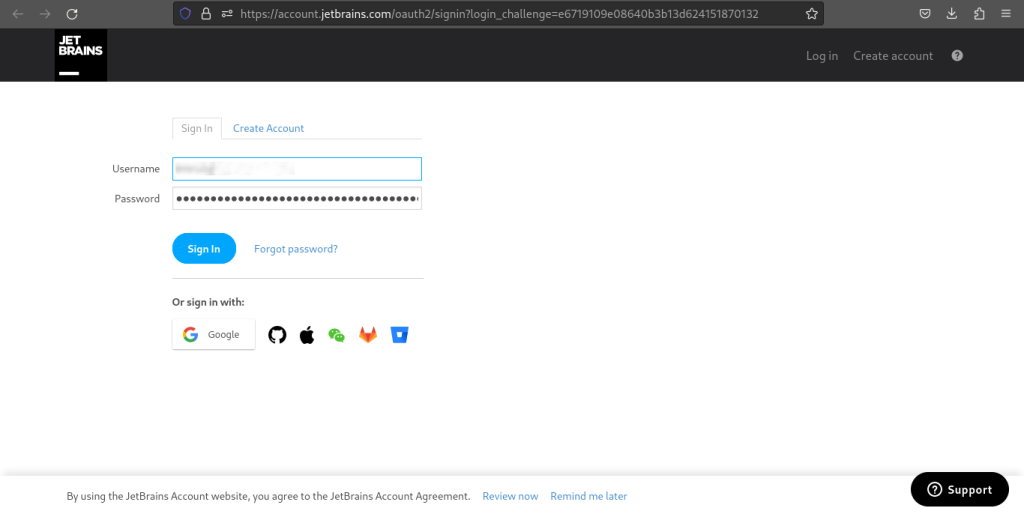
After successfully, logging in, close the browser window, and you will be logged into your account.
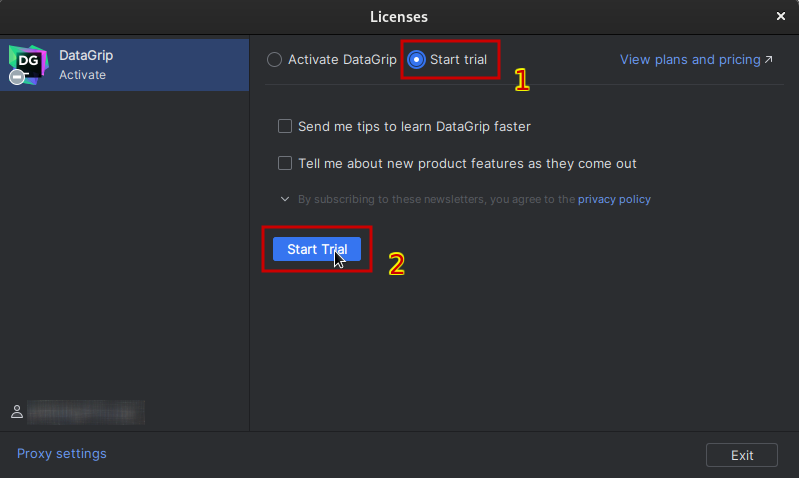
Click on Start trial radio button, followed by Start Trial button. This will start your 30-day trial period.
Now, you can create a project.
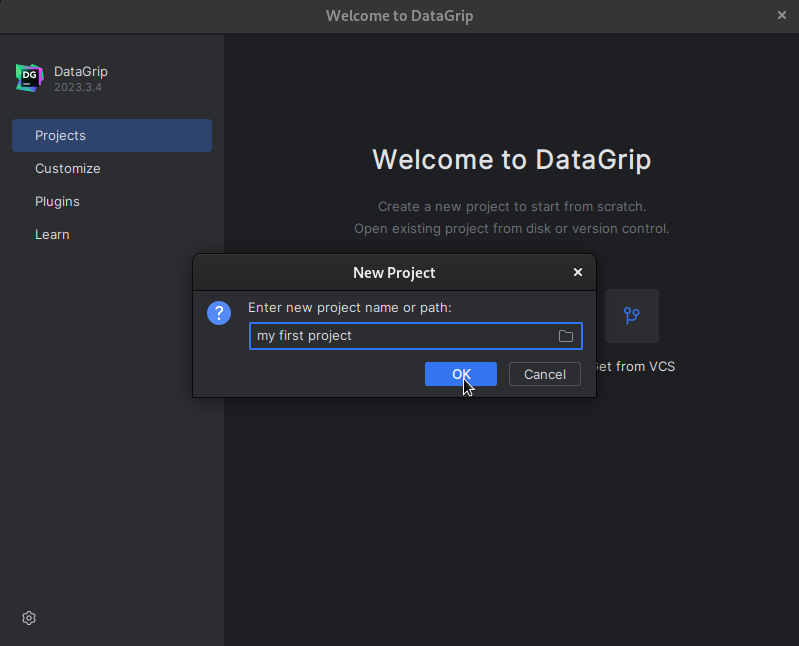
Finally, we have successfully launched a project and can start working on it by adding data source etc.

Conclusion
In this module, we discussed DataGrip which is a cross-platform multiple engine database management IDE, and how to install it on our Linux system. We installed DataGrip on our Linux in two different ways, one way by using tarball file, secondly with snap package manager.
It’s great that Jetbrains provides Linux support for all of its applications, and thus makes it easier for people to switch from any other Operating System to the FOSS one. New users won’t have to hunt for a new IDE and learn everything all over again, they can just use the familiar development platform and begin right where they have left off.
Also Read
- How to Install and Use IntelliJ IDEA Ultimate on Linux?
- How To back up Single and Multiple MySQL Databases?
- How To Install Linux Apache Mysql Php (LAMP) On Ubuntu
- How To Install Pycharm In Ubuntu Linux?
- Official Documentation of Datagrip.