

In this modern IT world, developers and programmers can’t rely on text editors or notepads for writing code. A suitable IDE that provides a comprehensive suite of code editors, testing, and debugging tools is needed. IDEs simplify the coding process and increases the productivity of developers.
Starting with essential prerequisites, we walk you through the installation process, either via snap package manager or by using the Toolbox App. We also cover unique features that set the Ultimate version apart from the Community edition, such as support for multiple programming languages, popular frameworks, and integrated tools like an HTTP Client and database tools. Get your system ready and maximize your development efficiency with IntelliJ IDEA Ultimate.
Prerequisites for Installing IntelliJ IDEA Ultimate on Linux
- It supports a lot of programming languages than the community edition like Cython, Ruby and JRuby, PHP, Go, SQL, JavaScript, TypeScript, Haml, Slim, Liquid, CSS, Sass, SCSS, and Less.
- Supports – Spring Security, Spring Boot, Spring MVC, Spring Integration, Java EE, GWT, Liquid, Go Template, Qute, Mustache, Angular, Node, Next, Vue, and many more.
- It supports build tools like npm, webpack, Gulp, Vite, Phing and many more.
- The embedded terminal enhances developer convenience.
- It also features an integrated HTTP Client and database tools.
- The syntax highlighting makes the code easy to read and legible.
- IntelliJ Idea Ultimate has automatic code completion and code suggestions according to the context of the code you’re typing.
- Maintaining different versions of your applications can be hard. Therefore IntelliJ has integrations with Version control services like Git, Github, Subversion, Mercurial, etc.
- For deployment of your applications, IntelliJ has integration with Docker, Kubernetes and Java application servers.
- IntelliJ lets you search your codebase for variables, functions, class names and other content as well.
- IntelliJ Idea Ultimate has support for Issue tracking and settings synchronization which is not available in the community version.
- You can change the theme of your IDE according to your liking.
Prerequisites before Installing IntelliJ Idea Ultimate on Linux
Some of the prerequisites you need to consider before installing IntelliJ Idea Ultimate are:-
- You should check if your Linux distro is supported by IntelliJ Idea Ultimate. Some of the popular Linux distros supported are:- Ubuntu, CentOS, Debian, and RHEL.
- Installation requires administrative privileges. So you should have sudo or root access to your system.
- Ensure GLIBC version 2.27 or later is installed.
- The system should meet the hardware requirements of IntelliJ Idea Ultimate. The minimum hardware requirements are:-
- A Modern CPU.
- 4 GB of RAM. It is recommended to have at least 8 GB of RAM.
- Minimum 3.5 GB of free storage space.
- 720p monitor.
A more powerful system is recommended for optimal performance.
Step-by-Step Installation of IntelliJ IDEA Ultimate on Linux
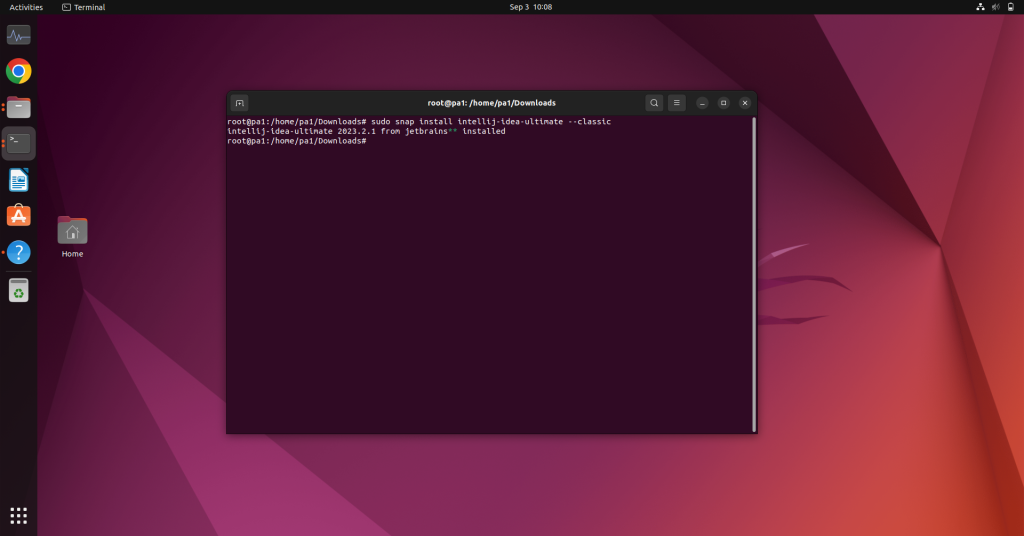
We’ve listed three major ways to download and install IntelliJ Idea Ultimate on Linux. The first and most convenient way is to use the snap package manager. If snap is installed and configured in your system then you can use the following command:-
sudo snap install intellij-idea-ultimate --classic
This will install the stable build, but if you want the EAP build you can use the following command:-
sudo snap install intellij-idea-ultimate --classic --edge
Installing IntelliJ Idea Community on Linux using Toolbox App
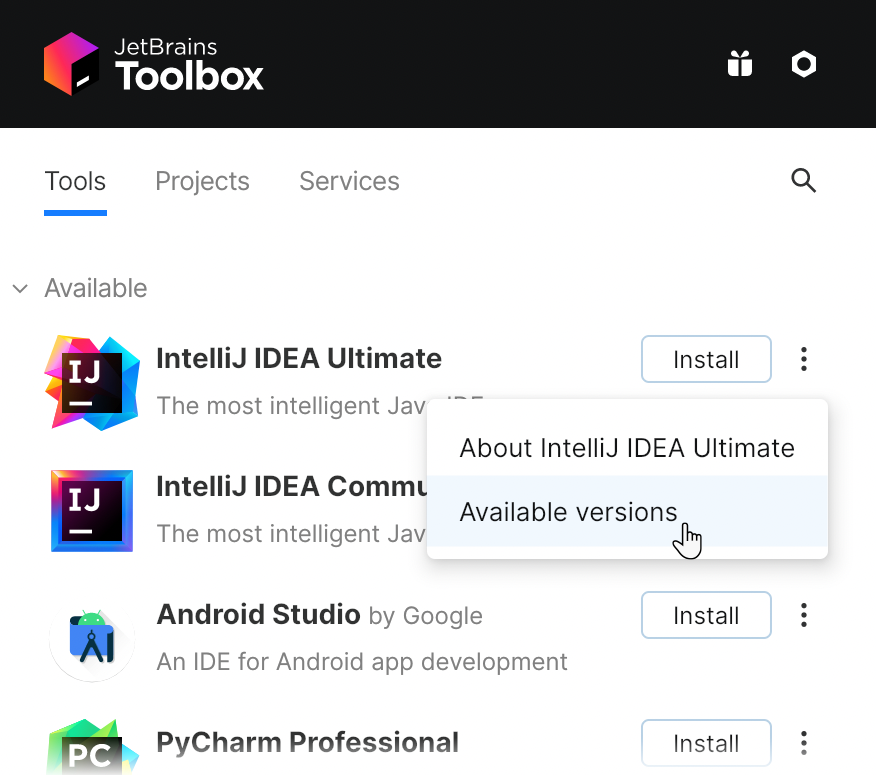
ToolBox App contains all the IDE of JetBrains. We can first download the Toolbox App from the official site. From the Toolbox App, we can install IntelliJ Idea Ultimate. The steps to do so are:-
- Download the .tar.gz file from the Toolbox App web page.
- Then Extract it using the following command:-
sudo tar -xzf jetbrains-toolbox-1.17.7391.tar.gz -C /<directory_name>
The directory should support file execution. Generally, the default directory is opt or home but you can choose according to your preference.
- Execute jetbrains-toolbox to run the Toolbox App.
- Select IntelliJ Idea Ultimate from the list and go through the installation process.
Tarball Installation Method for IntelliJ IDEA Ultimate
You can also install IntelliJ Idea Ultimate without the Toolbox App. The standalone file can be downloaded and installed from the following steps:-
- Download the IntelliJ Idea Ultimate standalone .tar.gz file for Linux from the official site.
- Extract the downloaded file using the following command:-
sudo tar -xzf ideaIU-*.tar.gz -C /<directory_name>
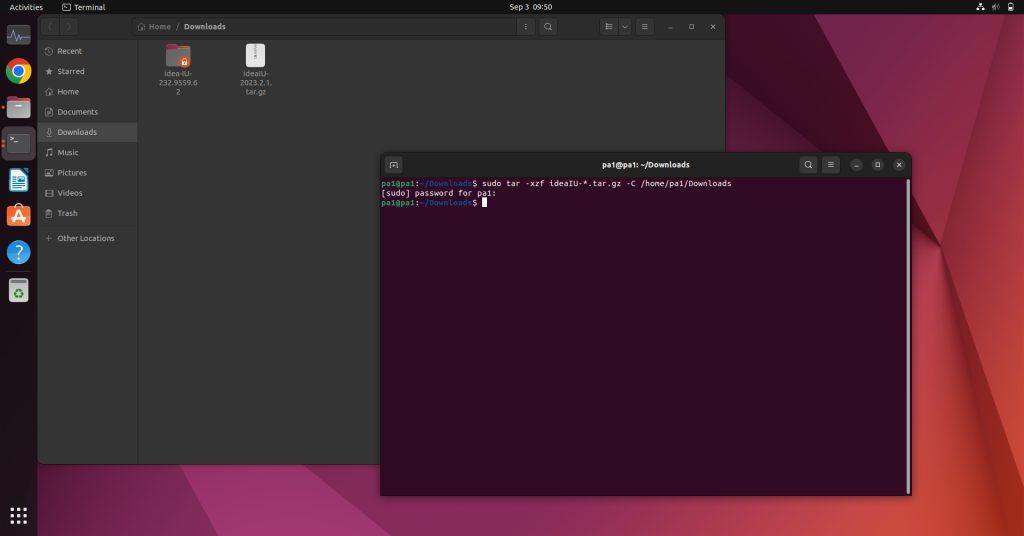
The directory should support file execution. The default directory is opt.
- To run the installation wizard execute the idea.sh script.
- Go through the installation setup and the IDE will be installed.
Setting Up and Maximizing Features in IntelliJ IDEA Ultimate
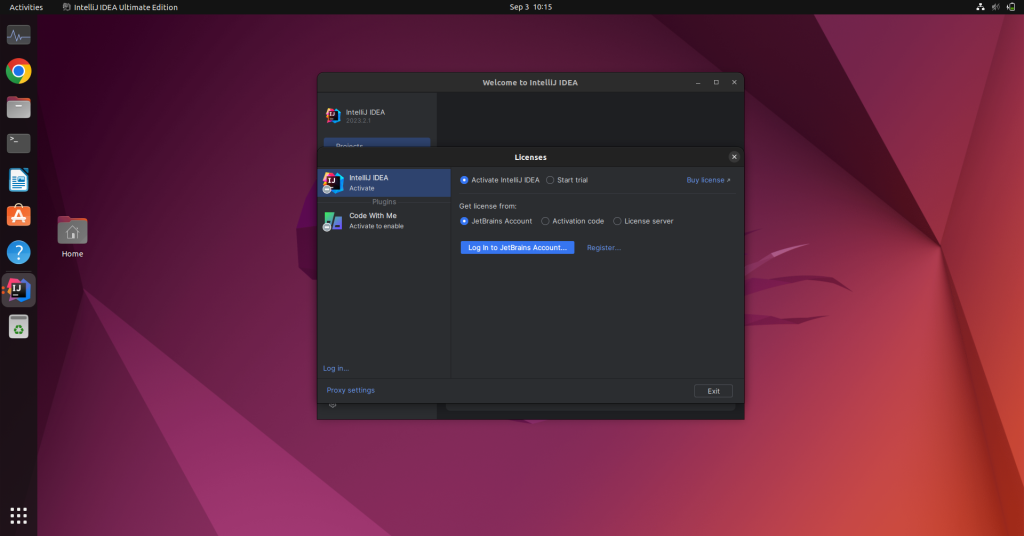
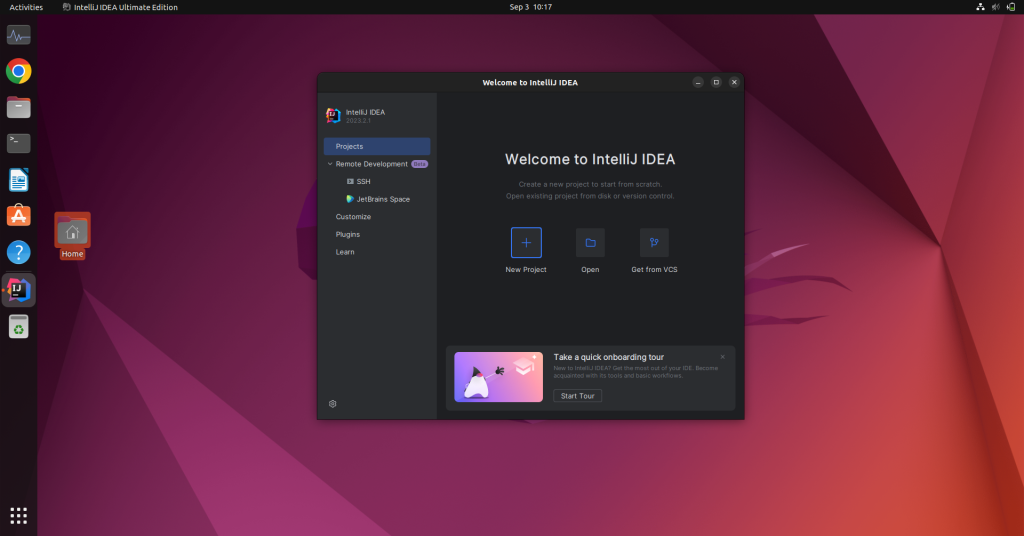
Open the IntelliJ Idea Ultimate from the Applications menu or through the terminal. You’ll be prompted to import configuration settings, if you’ve them select those or use the do not import settings option. Enter the licence settings and log in or use the free 30-day trial.
The welcome screen would look as follows. You can configure the Remote development, customise the settings and install plugins. If you’re a beginner you’ll be using the New Project option.
Configure the New Project according to your preference. You can change the name, directory, build platform, and language and can also choose a template. it has support languages like SQL, HTML, JavaScript, Typescript and more which were not in the community version. It also supports more frameworks than community versions like Angular, Next, Vue, Node, React and more.
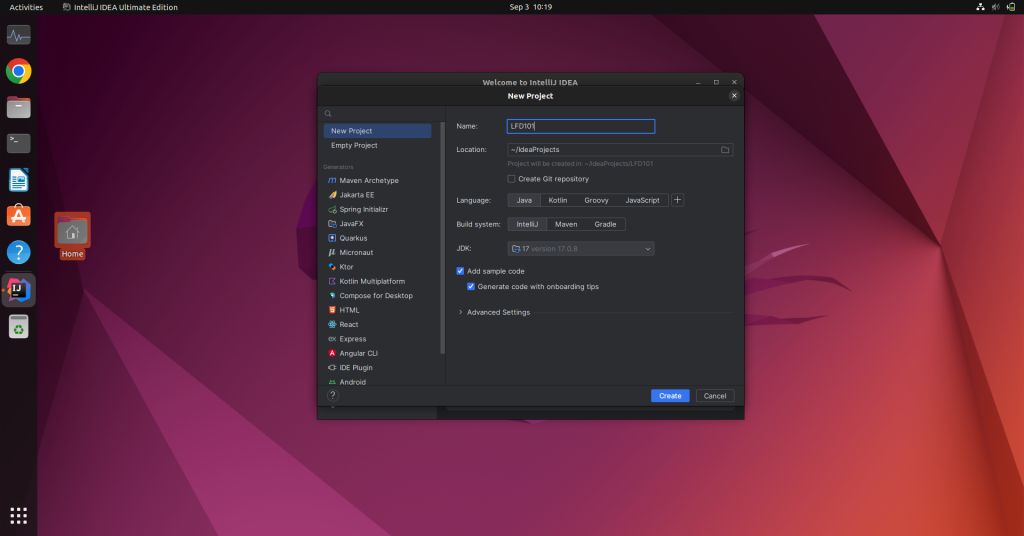
After configuring the settings, click on the Create button. And your New project will be created. The workspace looks as follows.
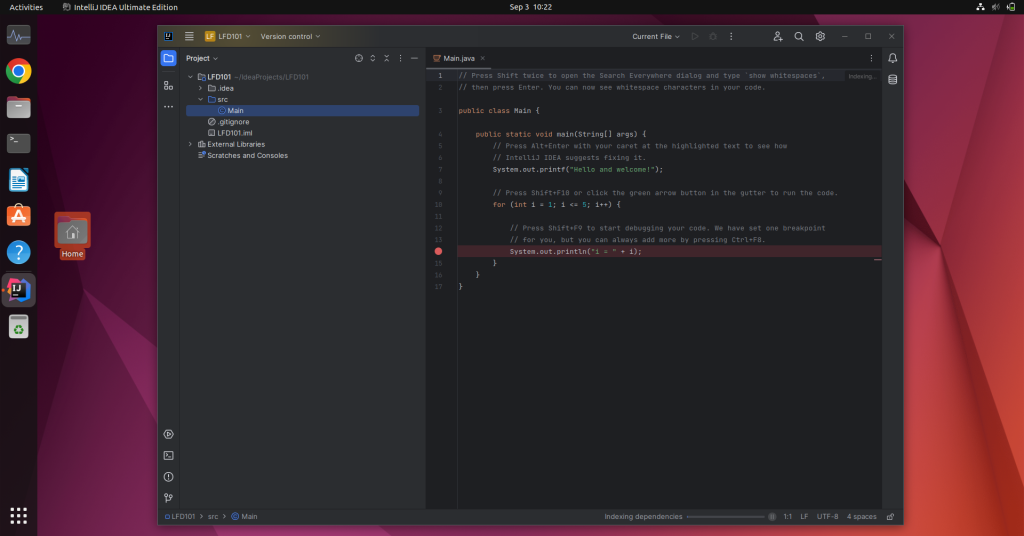
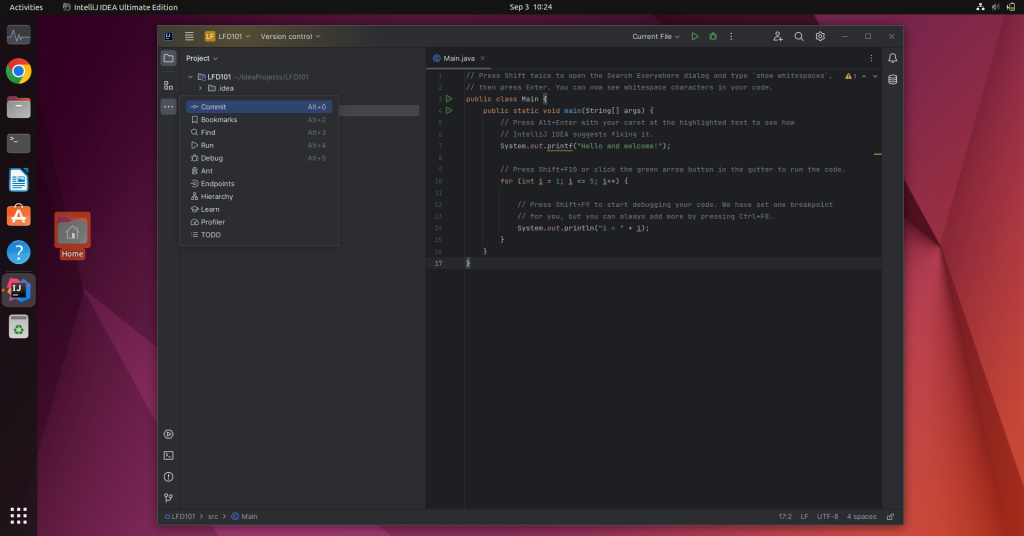
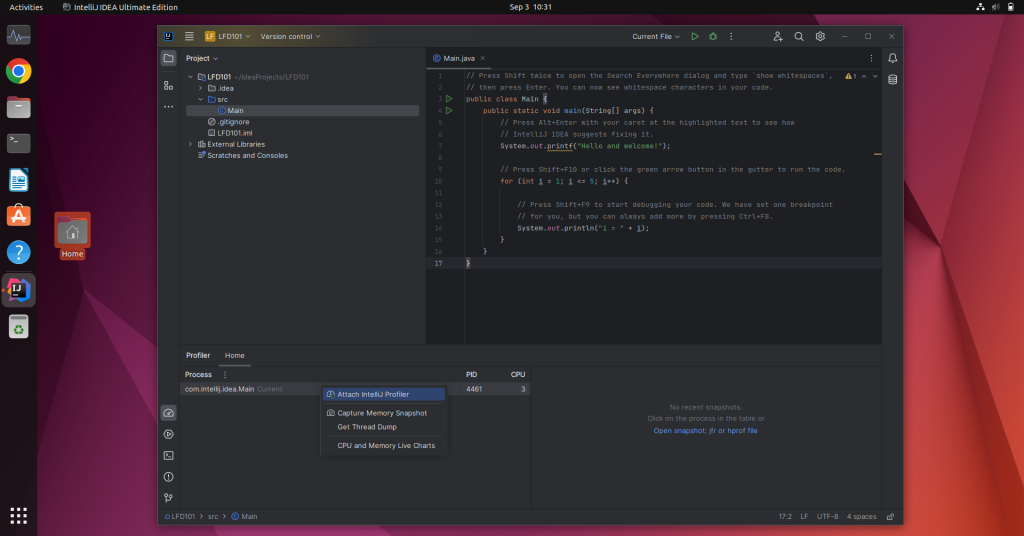
You can manage the directories, folders and files from the left tab. The coding window is on the right. To get a list of tools click on the three dots on the left panel. It’ll show you tools like find, run, debug, etc.
The Ultimate version features a dedicated profiler tool that lets you monitor the performance and give insights into your application.
Note: Environment variables must be set up to use the profiler.
Wrapping Up and Future Prospects
IntelliJ Idea Ultimate has been updated and upgraded a lot since it was first released in 2001. Several performance improvements and bug fixes were done. The latest major upgrade even had support for AI assistants which could make the developer’s job easier and more efficient. It also supports Java 18 and Kotlin 1.8.
Over the years, IntelliJ IDEA Ultimate has evolved into a powerful IDE with capabilities that far exceed its initial release, integrating cutting-edge technologies like AI and supporting the latest versions of Java and Kotlin.
Are you ready to leverage IntelliJ IDEA Ultimate’s advanced features to supercharge your development workflow?