
DevOps engineers often need to make CI/CD pipelines, build processes, and test cases. If the build pipeline is done manually then it’ll be a very tedious process. DevOps engineers or backend engineers often use automation tools to build and deploy applications.
Apache Ant is an open-source automation tool primarily used for building and deploying Java applications. It utilizes XML configuration files to define build tasks and their dependencies. This guide walks you through the prerequisites for installing Apache Ant on Linux, the methods for installation—including package managers like Snap and APT, as well as manual installation—and how to verify the installation. It also provides a brief tutorial on using Apache Ant for your projects.
Some of the use cases of Apache Ant:-
- Compiling source code
- Running unit tests
- Documentation generation
- Creation of JAR files
- Packaging of applications for different environments
- Deploying packages to different environments
- CI/CD with the help of version control integrations
Some of the features of Apache Ant are:-
- It supports a wide range of desktop platforms provided the platform supports Java.
- It can perform custom tasks and execute scripts as well. The tasks are listed in the XML configuration build file. Some of the Apache Ant can perform are executing code, copying and deleting files or compiling code.
- Ant executes the listed tasks in the correct order due to its dependency management feature.
- Apache Ant leverages multicore systems and parallel processes due to this builds are fast and performant.
- It has integrations with third-party services and applications like IDEs, version control systems and other plugins.
- You can use conditions during the build process to control it. There are built-in conditions as well as options to create your own.
Prerequisites for Installing Apache Ant on Linux
The following things should be taken care of before installing Ant on Linux:-
- Java should be installed in your system. Many features do not work if only JRE is available. The JDK version should be 8 or later. The Apache Ant team recommends OpenJDK. To check if Java is installed in your system, run the following command in the terminal:-
java --version
- Update your package repositories and system drivers as well.
- Sudo or root access is necessary to install Ant on the system.
- A stable internet connection for downloading Ant.
Methods for Installing Apache Ant on Linux
You can install Apache Ant through various methods. Package managers like snap or apt can download it. Or you can download it from the official site, extract it, and install it on your system. We’ll cover most of the methods. You can choose any method you find convenient.
Installing Apache Ant from the snap package manager
The Ant package is available on the snap repository. If snap is installed in your system, you can use it to install Ant by the following command:-
sudo snap install ant --classic
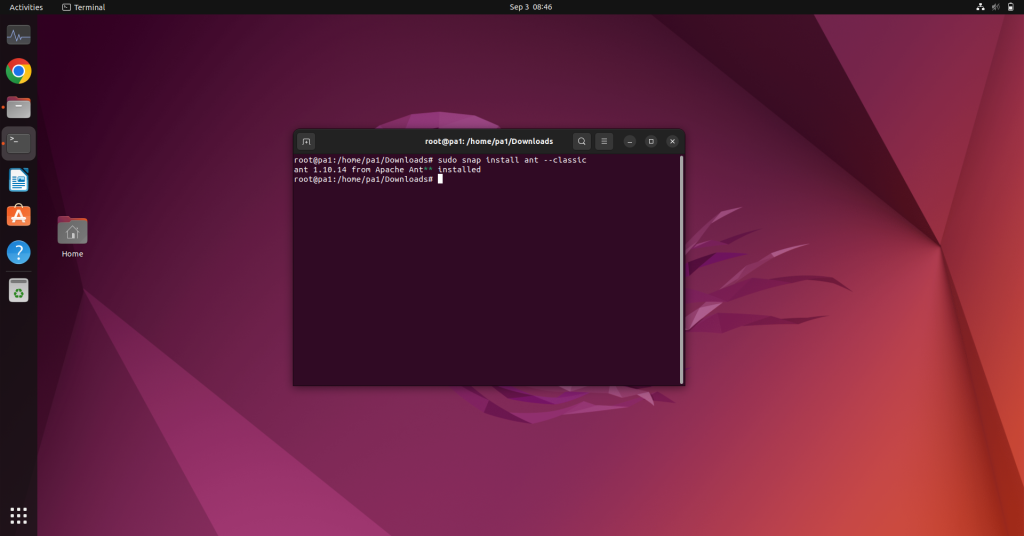
The last update as of writing this article was in January 2023. So there are chances it may not be the latest version of Ant.
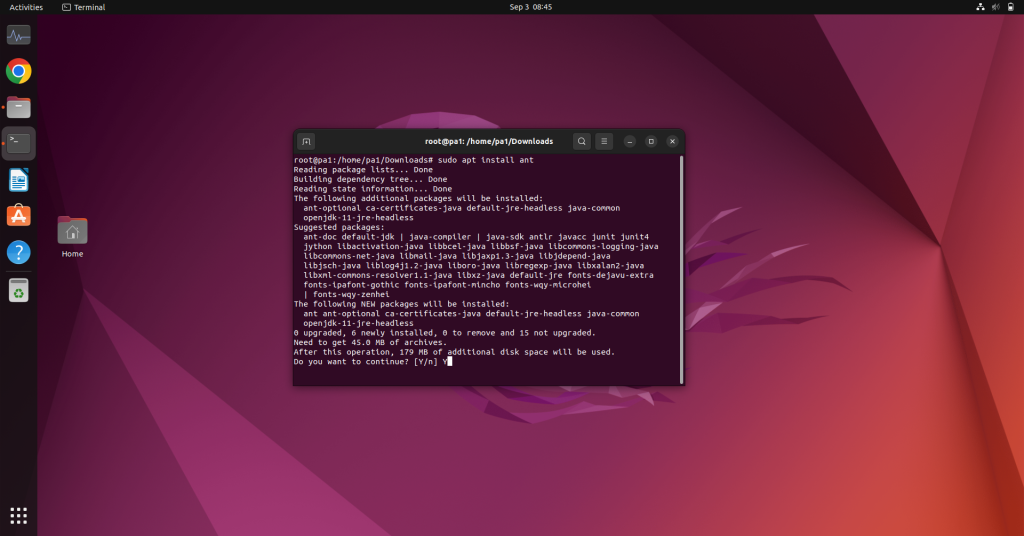
Installing Apache Ant from the apt package manager
The apt package manager is usually available in Debian-based systems like Ubuntu. You can use apt to install Ant using the following command:-
sudo apt install ant
Installing Apache Ant manually from the website
The method is a little complicated compared to using package managers like apt. But through the following steps, you’ll be easily able to download Ant:-
- Open the official website and download the .tar.gz file of Ant.
- Open the terminal in the directory where the file is downloaded and execute the following command:-
sudo tar -xvf apache-ant-1.10.13-bin.tar.gz -C /usr/local
Remember to change the 1.10.13 to the correct version when you download the zip file.
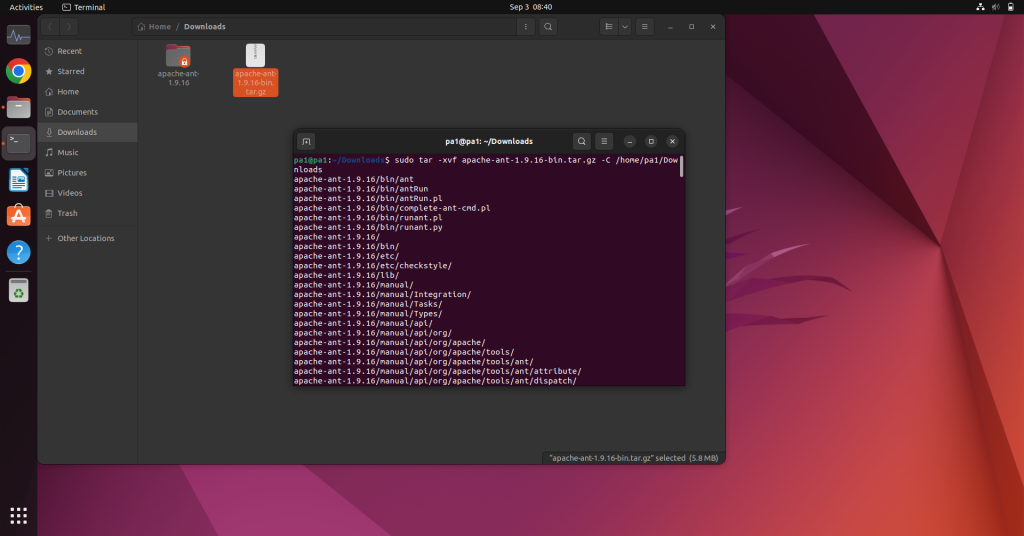
Change the version according to the file name.
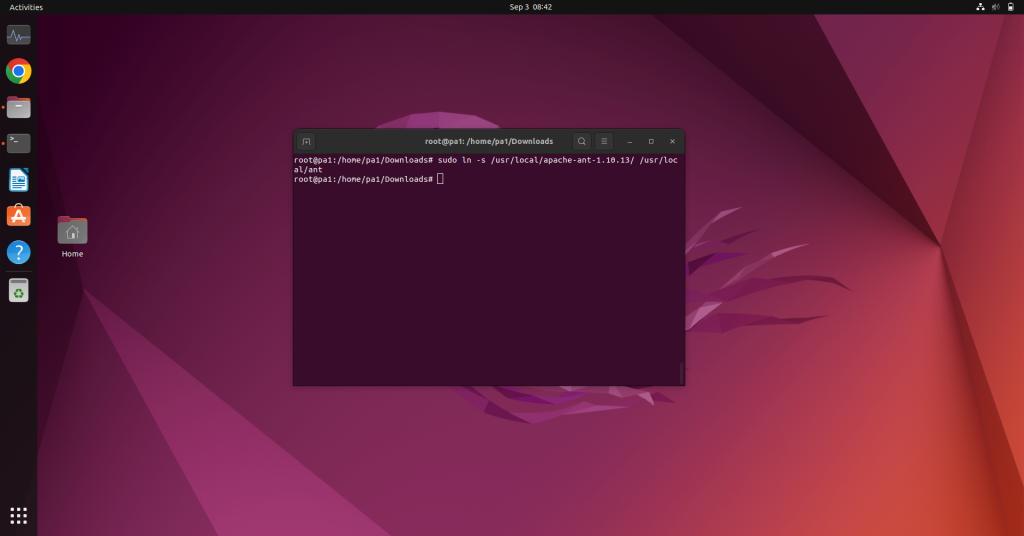
- Create a symbolic link for the destination folder by the command:-
sudo ln -s /usr/local/apache-ant-1.10.13/ /usr/local/ant
- Now we need to set up the ANT_HOME environment variable. To do so use the following command:-
sudo vim /etc/profile.d/ant.sh
In the file, add the following:-
export ANT_HOME=/usr/local/ant
export PATH=${PATH}:${ANT_HOME}/bin
That’s it. The installation process and setup are done. Now you can use Apache Ant on your system.
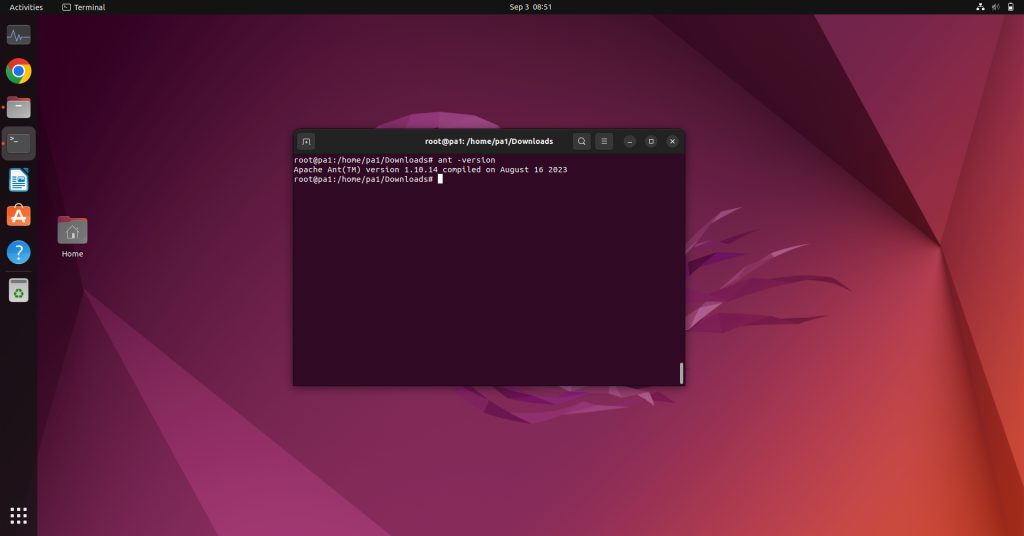
Verifying Apache Ant Installation
You can use the following command to check if Apache Ant is installed:-
ant -version
Using Apache Ant: A Brief Guide
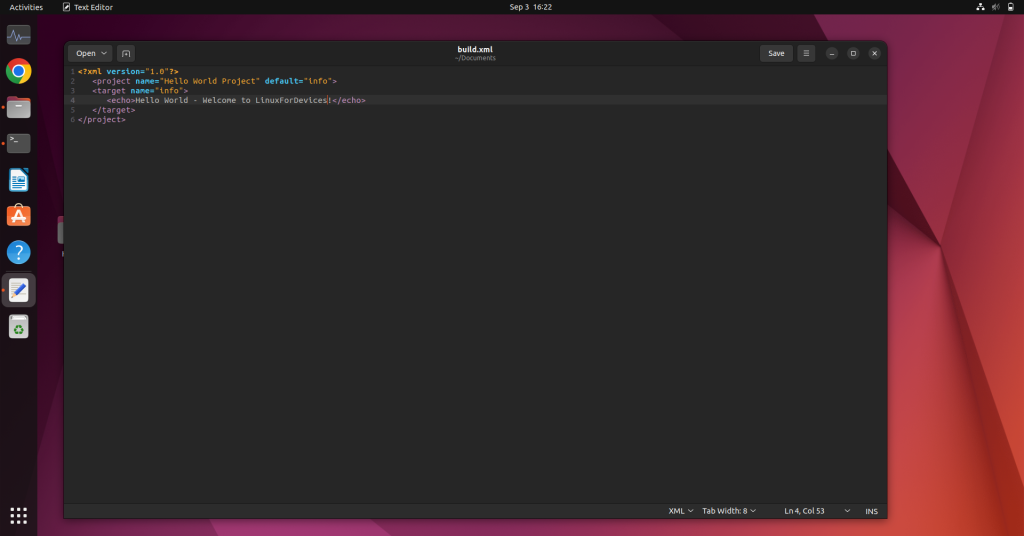
Apache Ant requires the knowledge of programming. The Apache Ant works using a build.xml work in your project directory. We’ve provided a sample example below.
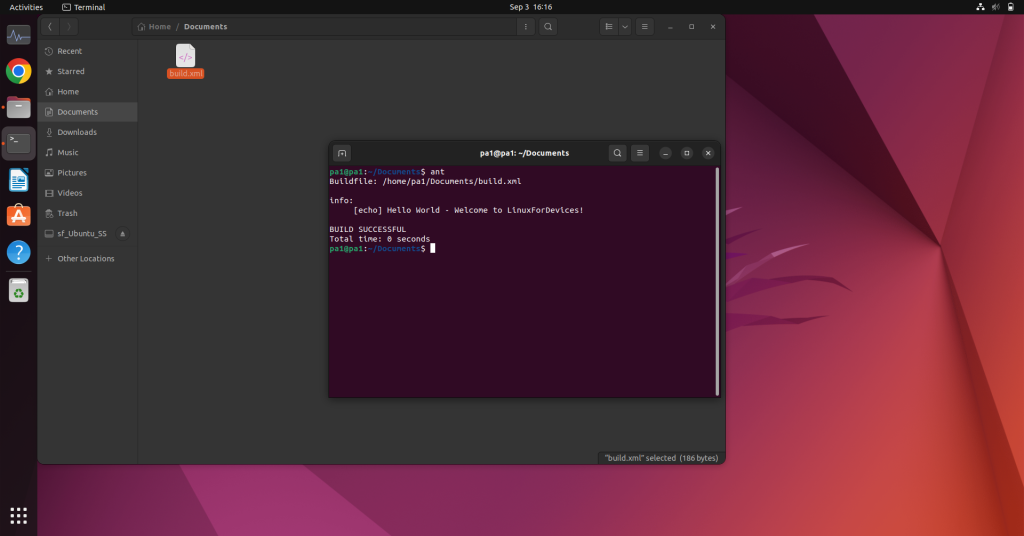
To run the file, open the directory in the terminal. Use the command ant, by default it’ll look for a build.xml file. And then run the tasks and jobs inside it.
To learn more about the uses and methods we recommend reading the official documentation or learning from tutorials.
Wrapping Up: Why Apache Ant is Important for DevOps
Apache Ant offers a robust set of features for automating build and deployment tasks, making it an indispensable tool for DevOps and backend engineers. Whether you choose to install it via a package manager or manually, understanding its capabilities can streamline your workflow significantly. What other automation tools are you considering to enhance your DevOps practices?