

In this tutorial, we will learn how to install Gradle on Ubuntu. Before we begin with the installation process, let’s first understand what Gradle is?
Every framework and Job is created to solve a specific problem. so what kind of problem does Gradle solve? Gradle is used to build applications. What an application consists of? Java Source code, Java byte code, XML files, Graphic and audio files, directory structures. All contained within a complicated directory structure. Therefore, it pretty difficult to build a deployable application. Here comes the Gradle!
What is Gradle?
The framework which solved the problem of building and deploying the application once we have written it. It does two things:
- Build deployment artifacts themselves: Files such as Java source and class files, XML and configuration files, graphic and audio files and additional file resources are considered as artifacts. Once the code is written, Gradle itself builds the artifacts.
- Manage the dependencies: The open-source Java libraries you use in code are considered as dependencies. These are already built in the Java packages. Gradle plays a crucial role in managing dependencies.
The Gradle API is designed in Groovy Language i.e. the variant of Java programming language. For more detail knowledge, check the Gradle Official Documentation
Steps to install Gradle on Ubuntu or Debian Linux
Let’s understand how to install Gradle on Ubuntu. We’ll walk through the complete steps and by the end of this tutorial, you’ll have Gradle installed on your Ubuntu system.
1. Update the repositories
The first step is to update the packages to their latest version. The apt update command is used to download the list of the packages from the repositories that need to be upgraded while on the other hand, apt upgrade command is used to install the latest version of the packages currently installed on the system.
We are often used to apt-get command but Folks, there is a difference between apt and apt-get command. Let’s have a look at the command below:
sudo apt update && apt upgrade
2. Install Java package
Gradle is a build tool that is based on Java. Therefore, it’s important to install Java in the system. Gradle works on Java 8 or higher versions of the Java. Check the tutorial on how to install Java in Ubuntu and follow the steps as stated in the tutorial. We have already installed the latest version of Java.
Before installing the Java package, check once which version of Gradle you are going to install.
- For example, if you are installing Gradle 6.2.2 version so you need to install Java version between 8 and 13. It doesn’t support Java version 14.
- If you want to install Gradle version 6.3, it supports the Java 14 version.
You can see the differences folks. Check the Gradle Official Documentation to check the compatibility of Gradle versions. I have already installed Java version. Let’s have a look at the command to check the version:

3. Install Gradle on Ubuntu
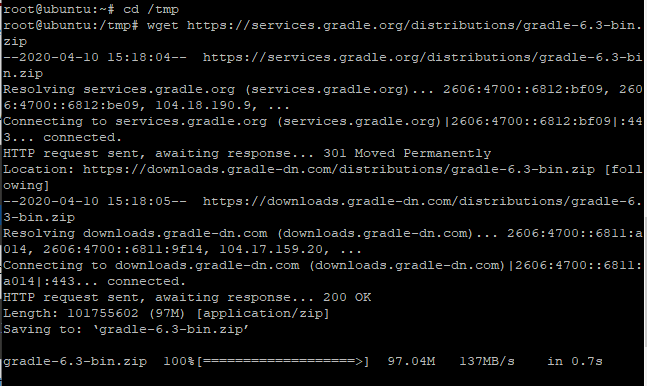
Once the installation of Java is done, we need to install the Gradle package on Ubuntu. We are installing the latest version of Gradle. Use the wget command to install the Gradle. To get the latest version of Gradle, check the Gradle Installation page. While reviewing the documentation, check for the complete, with docs and sources package of Gradle. Copy the link by right-clicking on the complete option in the download section of the Gradle documentation.
Let’s have a look at the command below. But before this, don’t forget to change the directory.
cd /tmp
wget https://services.gradle.org/distributions/gradle-6.3-bin.zip
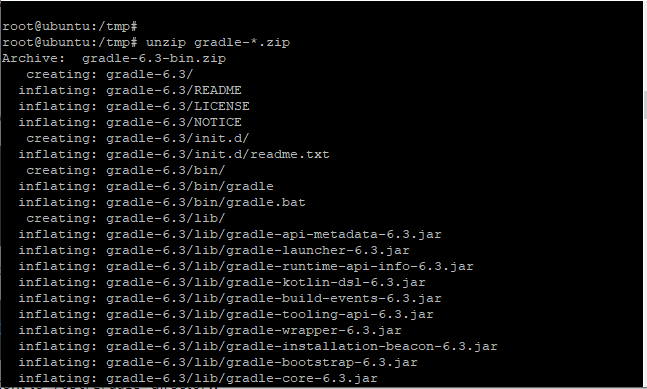
4. Extract the package using unzip command
The next step is to extract the package. We will use the unzip command. If you don’t have the unzip command installed on your system, check the tutorial on Zip and Unzip commands for better understanding. You have two options, either unzip the package then copy the contents to the /opt/Gradle directory or directly unzip it to the /opt/Gradle directory.
We will unzip the package and copy the contents to the /opt/Gradle directory. Let’s have a look at the command below:
unzip gradle-*.zip
Once its done, copy the contents to the /opt/Gradle directory using cp command in Ubuntu. To do so, type the following command in terminal:
sudo mkdir /opt/gradle
sudo cp -pr gradle-*/* /opt/gradle
Note that, these above commands will be performed in the tmp directory only. Change the location after you have copied the package.
5. List the files in Gradle
We can also check the list of files in Gradle. It is not the necessary step, it’s just to check whether the contents have been successfully copied or not. Use the ls command to list the files. Let’s have a look at the command below:

You can check the list of files as displayed above.
6. Set the environment variables
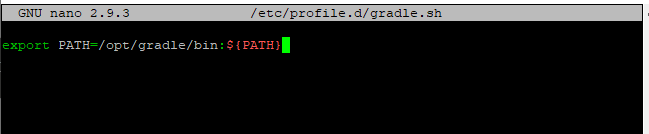
If you were able to follow through the Java installation tutorial correctly, you would already have the environment variables set for Java and we’ll only have to add the required paths for Gradle. We’ll create a file named gradle.sh in the /etc/profile.d/ directory as shown below:
sudo vi /etc/profile.d/gradle.sh
Paste the following path in the file :
export PATH=/opt/gradle/bin:${PATH}
Make sure to save the changes and exit. Use “:wq” to save and exit the editor.
The next step is to change the permissions using chmod command. The chmod command changes the access mode of the file i.e. to permit it to read or write. To do so, type the following command on the terminal:
sudo chmod +x /etc/profile.d/gradle.sh
Now we need to initialize the environment variables that we set for Gradle in our current environment. This can be done using the source command as shown below.
source /etc/profile.d/gradle.sh
That’s it! You are done with the installation.
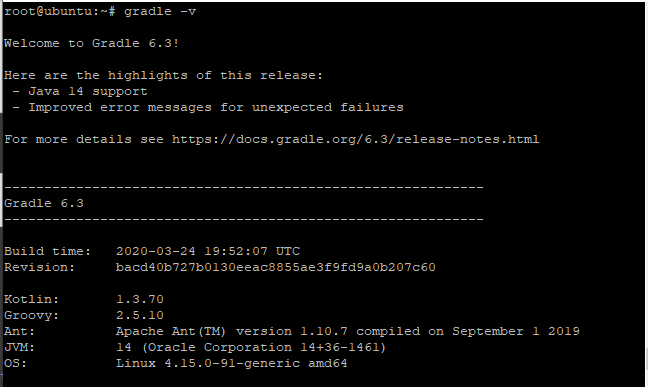
7. Check Gradle version
If you want to check the details of Gradle, use version command to check the version of the Gradle. This also verifies that Gradle has been successfully installed in the system. Let’s have a look at the command below:
gradle -v
Conclusion
That’s it. We have successfully learned how to install Gradle in Ubuntu. I have described all the necessary commands used in the installation process. If you face any issues, feel free to reach us! Do let us know in the comment section.