

In this tutorial, we will learn how to install Dropbox on Ubuntu. Dropbox is a personal cloud storage service that allows you to store up to 2GB for free, and offers plans for upgraded storage.
Difference between Google Drive and Dropbox?
You might be thinking, both are the online cloud storage devices then what’s the difference between Google Drive and Dropbox. Let’s have a look :
- Support system: Google Drive only supports Windows and Mac OS while Dropbox supports windows, mac as well as Linux too. This is an advantage for DropBox.
- Storage space: Talking about the storage space, Dropbox only offers 2 GB of storage while Google Drive offers 15 GB of storage to upload the files and folders. After using the provided space, you have to sign up for a storage upgrade.
Let’s install Dropbox on Ubuntu now.
Install Dropbox on Ubuntu through the command line
Here, we will use the basic commands to install the Dropbox. We have to simply download the package and extract it. For more details, check the DropBox Official documentation. Let’s have a look at the steps below:
Download & extract the package
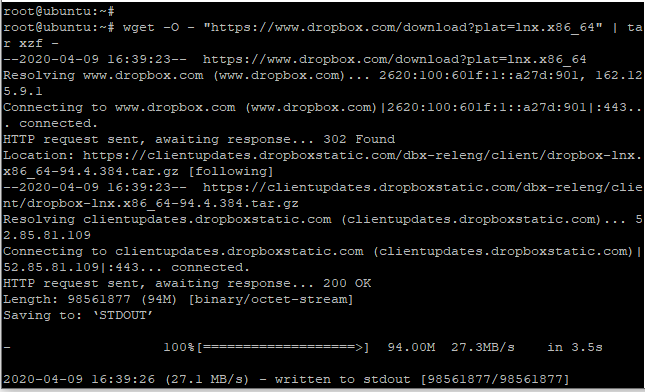
Here, we will download the package as well as extract it. We will use the wget command to download it. For extracting the package, we have two options either use tar command with wget command or use it separately. Let’s have a look at the command below:
For 64-bit installation use :
wget -O - "https://www.dropbox.com/download?plat=lnx.x86_64" | tar xzf -
For 32-bit installation use:
wget -O - "https://www.dropbox.com/download?plat=lnx.x86" | tar xzf -
Here, we have combined both the commands. “|” operator is used to combine the commands. Therefore, it will be downloaded as well as extracted in the system.
Start the Dropbox daemon
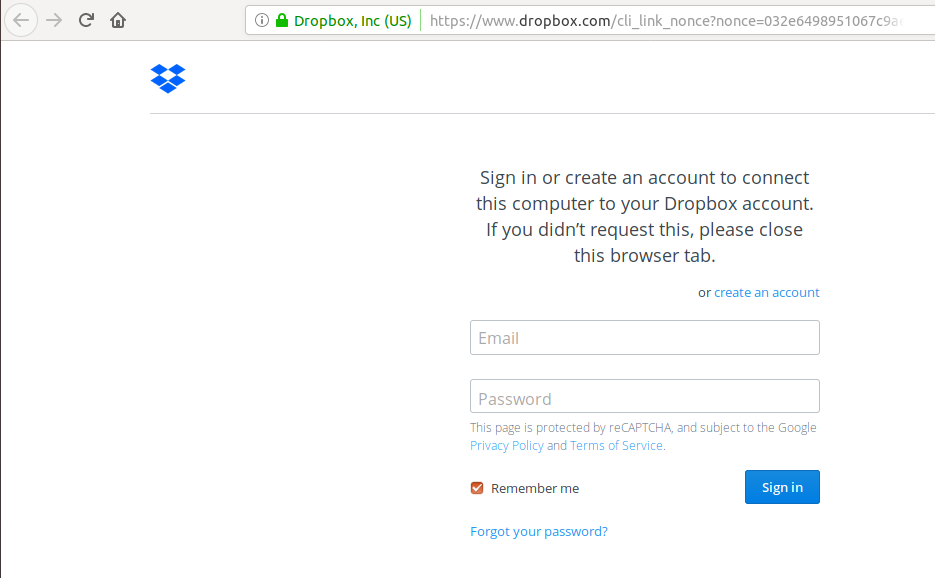
Let’s start the service. When you run the command given below, you will receive a personal link. Just copy and paste the link over the browser. Create an account. After creating the account, it will create the Dropbox folder in the system. It will show the following output on using the command as given below:
~/.dropbox-dist/dropboxd

Open the browser with the same link and add up the credentials as shown below:
Install the Python Scripts
Here, you need to install the Dropbox CLI. These are the scripts that verify the binary signatures. Make sure, you have installed python in the system. If not, check the tutorial on how to install Python in Ubuntu. Similarly, we will use the wget command to install the package. Let’s have a look at the command below:
sudo wget -O /usr/local/bin/dropbox "https://www.dropbox.com/download?dl=packages/dropbox.py
Now, we’ll make the file executable with the chmod command.
sudo chmod +x /usr/local/bin/dropbox
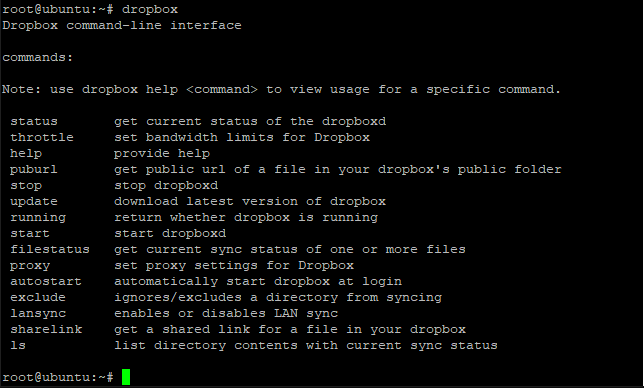
Available Command Options for the dropbox Command
Once you successfully install Dropbox on Ubuntu, it’s time to explore some of the command options that are available for you to work with. Just use the dropbox command in the terminal and will see the list of the various other commands displayed. Let’s have a look at the command below:
dropbox
Install Dropbox on Ubuntu with GUI
Here, you don’t need to remember any of the commands. Just download the .deb package from the site and make your account to use it further. Don’t worry, we will discuss each and every step in detail. Let’s have a look at the procedure on how to install Dropbox through GUI.
Download the package
The first step is to download the package from the official site. Select the version based on the OS architecture of your system i.e. 32-bit or 64-bit operating system. The file downloaded will be of .deb extension. Check for the different versions of the Dropbox package on Dropbox Official Documentation. Select the appropriate version and download it as shown below:
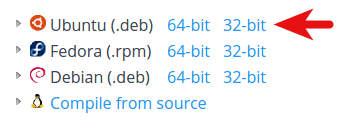
I have downloaded 64-bit Dropbox package.
Install the dropbox.deb package on Ubuntu
After downloading it, open the file explorer of the system, and if you’re working on Ubuntu, simply double click the file. Of you can right-click the file and use the “Open with software install” option.
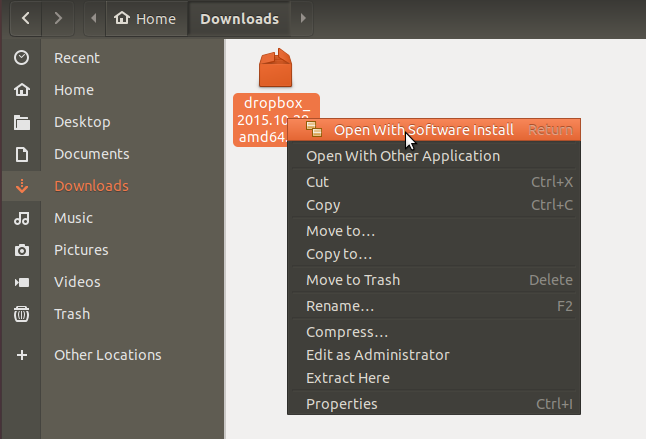
Select the option as described above. The following window will appear.
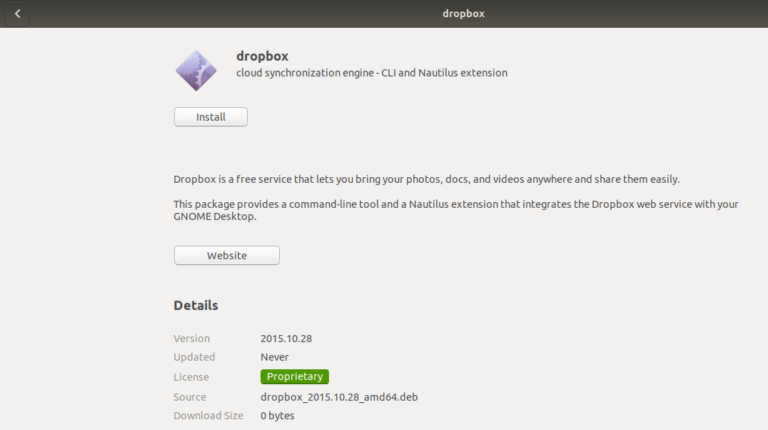
Click on the install button. It will start installing but still, you need to access the Dropbox interface. After installation, you will be prompted with another dialog box which will instruct you to start Dropbox as shown below:
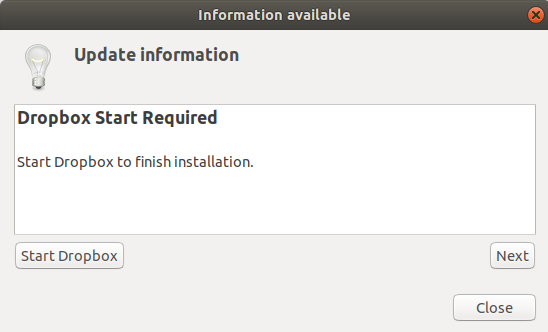
Click on the start Dropbox option. Another dialog box will appear notifying the necessary details i.e. to install the Dropbox UI tool. Respond it with OK for the further installation as shown below:
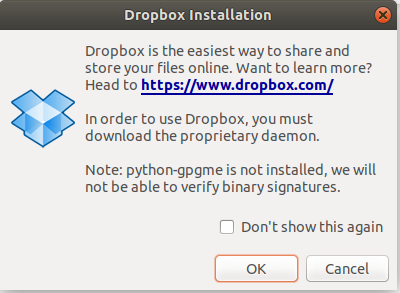
The next step is to sign in to Dropbox.
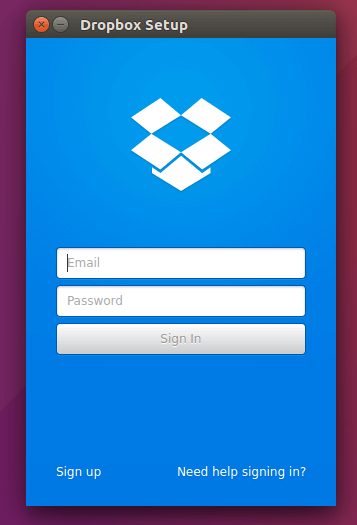
Therefore, you are done with the installation process! But wait, Folks, if you aren’t able to sign in to the Dropbox that simply means that it isn’t verifying the binary signatures. Therefore, you need to install python-gpgme. It is the package that helps to verify the binary signatures. Let’s have a look at the command below to install it.
sudo apt install python-gpgme
Uninstall the Dropbox
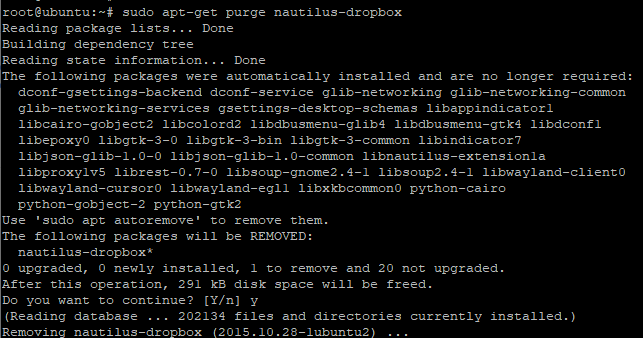
We have successfully learned how to install Dropbox on Ubuntu. Below, I have described the command to uninstall the package. We will use the purge command to remove the package. Let’s have a look at the command below:
sudo apt-get purge nautilus-dropbox
Conclusion
We hope that all your concepts are cleared. We have successfully learned how to install Dropbox in Ubuntu. If you face any kind of issues, do let us know in the comment section. Feel free to reach us!