
In this tutorial, we will learn how to install and secure phpMyAdmin on Ubuntu.
Do you want to handle the database easily through GUI? or do you want to handle the database through any external tool? Folks, you are in the right place. This can be done using the phpMyAdmin software tool.
What is phpMyAdmin?
phpMyAdmin is the software tool used to handle the MySQL database. MySQL database is the most popular open-source database. Check the tutorial on how to install MariaDB on Ubuntu as MariaDB is a lighter replacement for MySQL. phpMyAdmin is a popular free open-source tool for organizing the MySQL database with a web interface.
We can create, drop, alter, insert and perform pretty much all the operations on a MySQL database by using the web interface only. No need to open the command line for MySQL. For more details, Check the phpMyAdmin Official Documentation.
Steps to Install and Secure phpMyAdmin on Ubuntu
Let’s learn how to install phpMyAdmin in Ubuntu 18.04. Just follow the steps as stated below.
1. Update the repositories
Running apt update command will download the list of the packages from the repositories and updates it to get the information of the latest versions of the packages while on the other hand, apt upgrade command is used to install the new versions of all the packages installed in the system. Folks have a look at the difference between apt and apt-get command.
Let’s have a look at the command below:
sudo apt update && apt upgrade
2. Install the LAMP stack
Once you are done with the upgrading of the repositories, the next step is to install the phpMyAdmin package. We’ll also require the LAMP stack to be installed.
LAMP stack is the collection of Linux Apache, MySQL, and PHP. Before installing the phpMyAdmin package, it’s important to install the LAMP stack and configure it. Check how to install the LAMP stack here. There are two ways, either we can install each package separately, or just use a simple command to install all of them at once.
We will be using a single command to install the LAMP stack. To do so, type the following in the terminal:
sudo apt install lamp-server^
During the installation process, you will be prompted to the window as shown below:
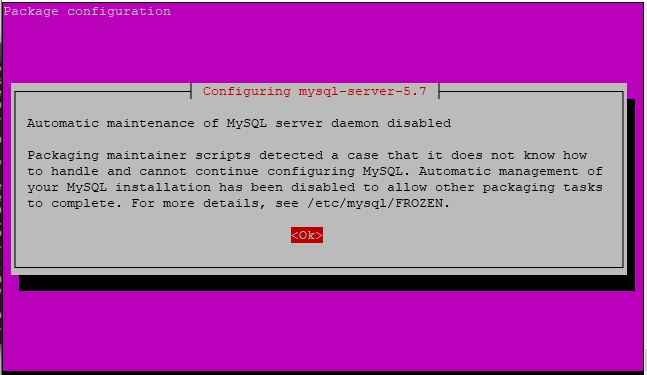
The message pop-ups notifying to respond OK to configure the database automatically. Therefore, the LAMP stack has been downloaded successfully.
3. Install phpMyAdmin package
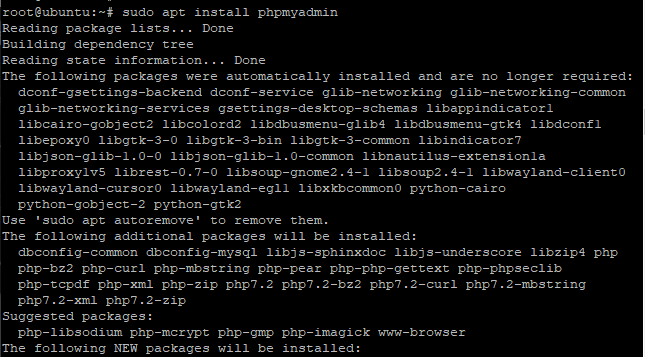
As of now, we have installed the LAMP stack in the system. The next step is to install the phpMyAdmin package. We will use apt install command to download and install the package from default Ubuntu repositories. We are using the apt package management system. Let’s have a look at the command to install phpMyAdmin.
sudo apt install phpmyadmin
You will be prompted to confirm the installation process. Respond to it with Y and proceed with the installation process. During the installation process, you will be asked for confirmation regarding the Apache web server and MySQL installation. Firstly, it would ask to select the default web server as shown below in the image.
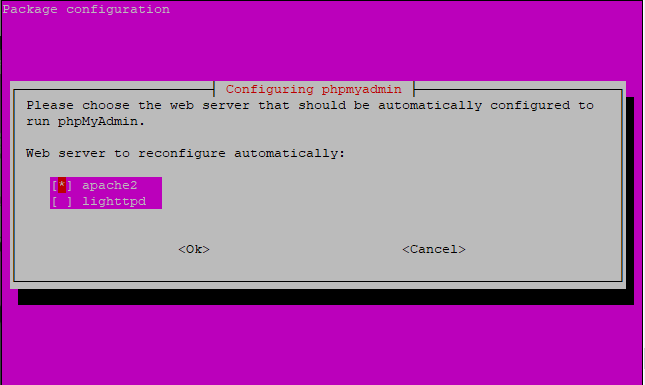
I’m opting for the apache2 webserver but feel free to select lighttpd if required. To select the option, press the space bar at apache2 and enter “*” as shown in the above image. Press OK to proceed further. You will be prompted to another dialog box as shown below:
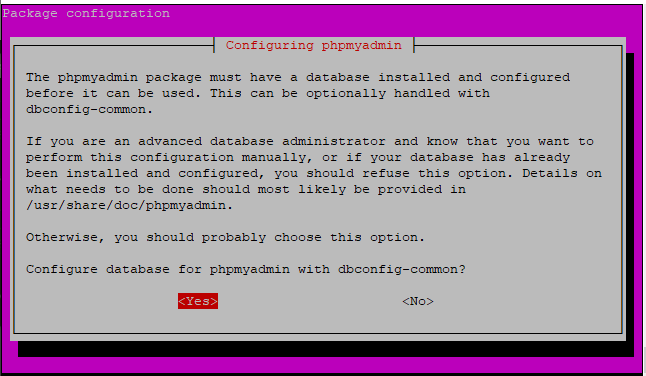
You will be asked whether to configure the database for phpMyAdmin or not. Respond the same with YES and further add the password for the MySQL database as shown below:
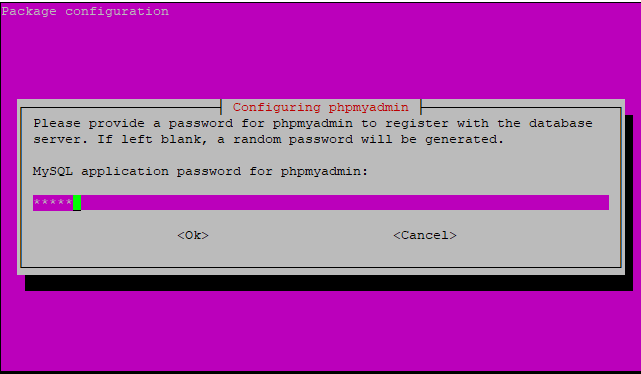
Add the password and proceed with OK. The phpMyAdmin will be successfully installed in the system. Folks, we need to restart the Apache2 service again. Why? To apply the changes properly we need to restart the server using restart command as given below:
sudo systemctl restart apache2
4. Database configurations
You might be aware of Unix_socket authentication. While login into the MySQL database, the root user can use the operating system credentials when connecting to the MySQL. These credentials can be used when you don’t have set the authentication of the database. For more details, you can check the Authentication Plugin – Unix Socket documentation.
The credentials provided by the operating system aren’t secure therefore, you need to create another user and grant all the privileges to the user over the database. We need to use some queries in MySQL. Let’s have a look at the queries given below:
sudo -u root mysql -p
> create user 'Vaishali'@'localhost' identified by '12345';
> grant all privileges on '*' to 'Vaishali'@'localhost' with grant option;
>exit
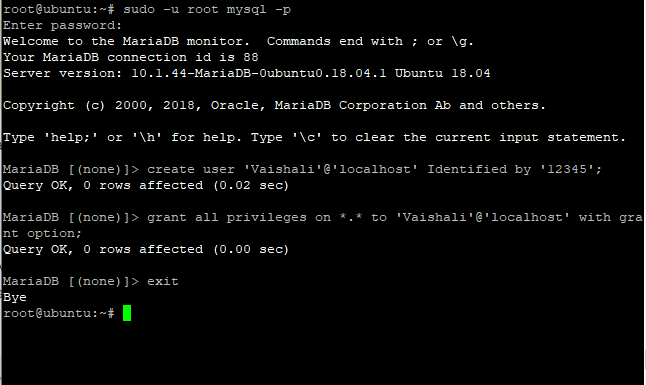
Change the password as you want. Remember these details as to when you will log in to the phpMyAdmin interface, you have to add up the user credentials the same as you created in the database.
Basic phpMyAdmin Configurations
By default, phpMyAdmin is not secure. Therefore, you need to make it secure. How to do that? We need to set the password for the user to login to the phpMyAdmin. For this, we need to allow access to .htaccess which is a configuration file that allows access to the user to log in to phpMyAdmin.
We need to enable the htacces file by editing phpMyAdmin.conf located in etc/apache2/conf-available directory. Add the AllowOverride All below DirectoryIndex as shown in the code. This would help in setting up the htpassword for phpMyAdmin. Let’s have a look at the code below:
sudo nano /etc/apache2/conf-available/phpmyadmin.conf
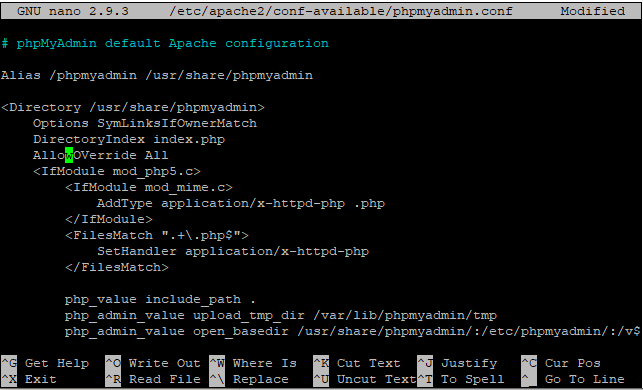
You can see that I have added AllowOverride All below the DirectoryIndex. Save the changes using Ctrl + O and responding yes to it. Press Ctrl + X to exit the editor. Note that, you can use any editor either sudo nano editor or vi editor. It depends on you.
1. Configure htaccess file
Earlier, we had enabled the htacess to override. The next step is to create the file. Create the file named .htaccess in /usr/share/phpmyadmin directory. You can use either sudo nano editor or vi editor. We have to the following code as shown below in the file. Don’t worry, I will explain the significance of the code. Let’s have a look at the command below:
sudo nano /usr/share/phpmyadmin/.htaccess
Add the following code in the file:
AuthType Basic
AuthName "Restricted Files"
AuthUserFile /etc/phpmyadmin/.htpasswd
Require valid-user
What does it mean?
- AuthType: You can guess from the word itself i.e. Authentication type. This type of authentication file is used to verify the password.
- AuthName: This is the name of authentication dialog box. The message you set will be displayed at the password prompt.
- AuthUserFile: this gives the location of the password file. You can see that we have mentioned the location of the file /etc/phpmyadmin/.htpasswd.
- Require valid-user: You might have understood the significance of this line of code. The authenticated users are only allowed to access the phpMyAdmin.
You are using nano editor so save the changes using Ctrl + O. I hope the concept is cleared.
2. Set the password
The next step is to set the password using htpasswd file. The location we described earlier i.e. AuthUserFile .htpasswd will be located in /etc/phpmyadmin/ directory. You can simply add the username or the additional user. On proceeding with the command, you will be asked to enter the password and retype it as for the confirmation. Let’s have a look at the command below:’
sudo htpasswd -c /etc/phpmyadmin/.htpasswd user
Note that -c option is used to create the new file. When you will be entering the phpMyAdmin browser, you will be asked to enter the login credentials. Remember the credentials.
Getting Started with the phpMyAdmin interface
Before accessing the interface, we need to restart the Apache2 web server again. Why? Because we did the changes in the configuration files. Therefore, use the restart command to restart the service. You can also check the status of the service by status command. Let’s have a look at the command below:
sudo systemctl restart apache2
sudo systemctl status apache2
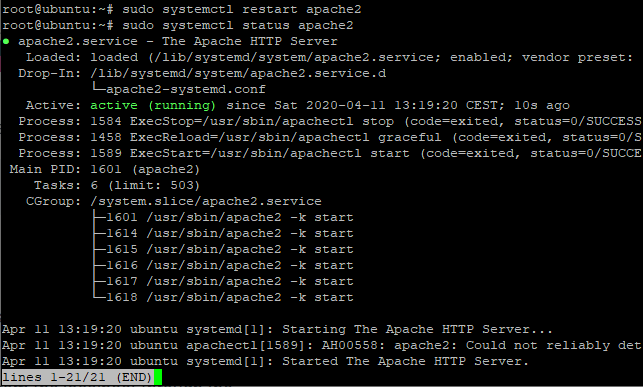
You can check the status as active highlighted in the above section.
We are at the last step of the installation i.e. to access the phpMyAdmin web interface. This will be accessed using the server IP address. Let’s have a look at the command below:
http://Server_IP_address/phpmyadmin
You will be prompted to the authentication dialog box, where you need to add the credentials as entered while creating the htpasswd in the previous step. The dialog box will appear as shown below:

Add up the details, proceed further with the sign-in option. In the next step, you will be asked to add the user credentials created while doing MySQL configurations. Let’s have a look at the image below:

Add the user credentials and you will be logged in to the phpMyAdmin dashboard. Let’s have a look at the dashboard below:
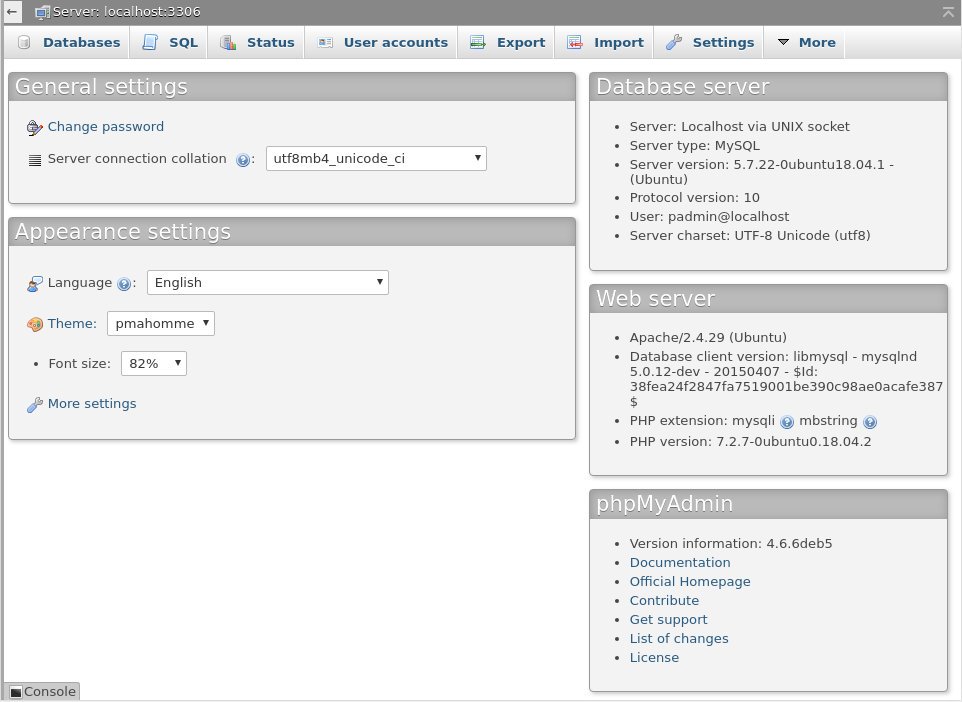
That’s it! You are done with the installation process.
Uninstall phpMyAdmin
As of now, we have successfully learned how to install and secure phpMyAdmin on Ubuntu. You need to use just one command to uninstall the package. We will use the apt purge command to remove the package. Let’s have a look at the command below:
sudo apt-get purge phpmyadmin
Conclusion
Folks, we have successfully learned how to install and secure phpMyAdmin on Ubuntu. If you face any issue during the installation process, do let us know in the comment section. Feel free to reach us!