

In this article, we’ll learn to install cmake on Linux. CMake is a cross-platform open-source meta-build system that can build, test, and package software. It can be used to support multiple native build environments including make in Linux/Unix, Apple’s Xcode, and Microsoft Visual Studio.
How to Install CMake on Linux?
If you are to work with CMake on Linux, you’ll probably need a C/C++ compiler and the make build system, since CMake generates ‘Makefiles’ on Linux. A Makefile contains the steps for compiling the program and generating a binary file. The installation steps for these tools depend on the distribution.
There are two main methods through which Cmake can be installed.
1. Using Package Managers like apt/dnf
Note: Installing this way, the version of CMake installed will generally be an older one.
For Ubuntu, Debian and their derivatives
We can obtain information of a package and its dependencies using the apt command. Doing that for cmake, type the following command:
apt show cmake
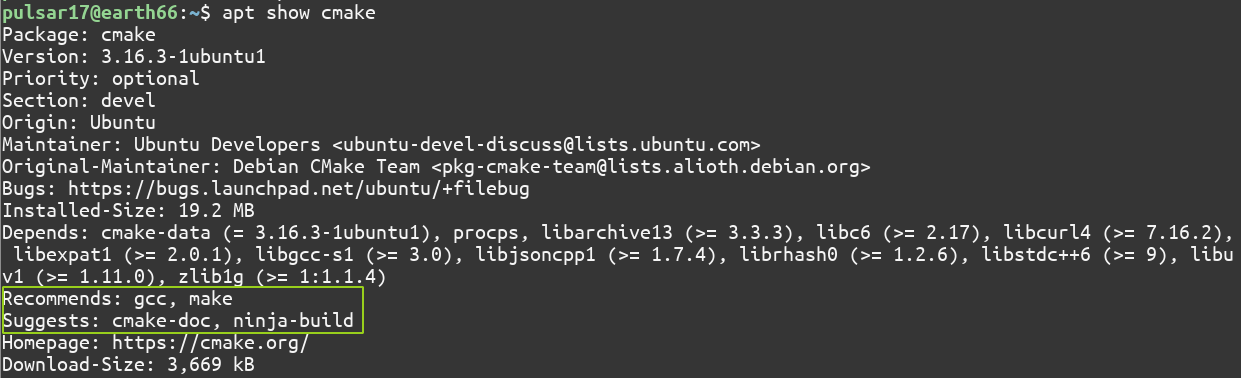
As is highlighted in the screenshot above, cmake recommends installing gcc (GNU Compiler Collection) and make. It also suggests some packages which are optional. You’ll need to install g++ if you’re working on a C++ project.
To install this package and dependencies on Debian and Ubuntu based distributions, type:
sudo apt install cmake g++ make
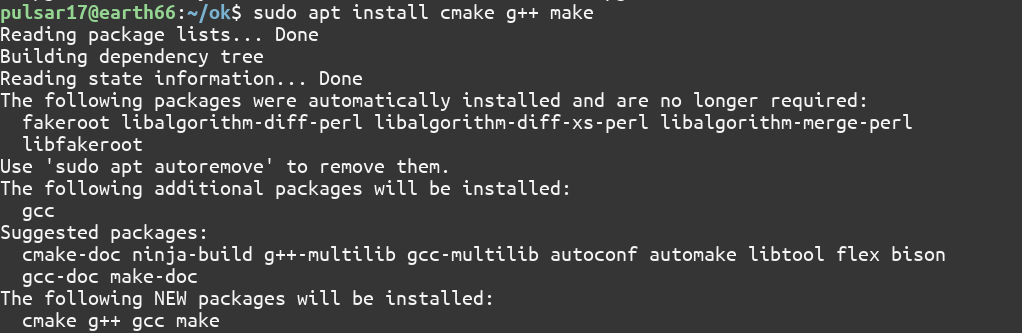
Note that while installing these packages, the gcc package is also installed.
For Fedora/CentOS (RedHat based distros and their derivatives)
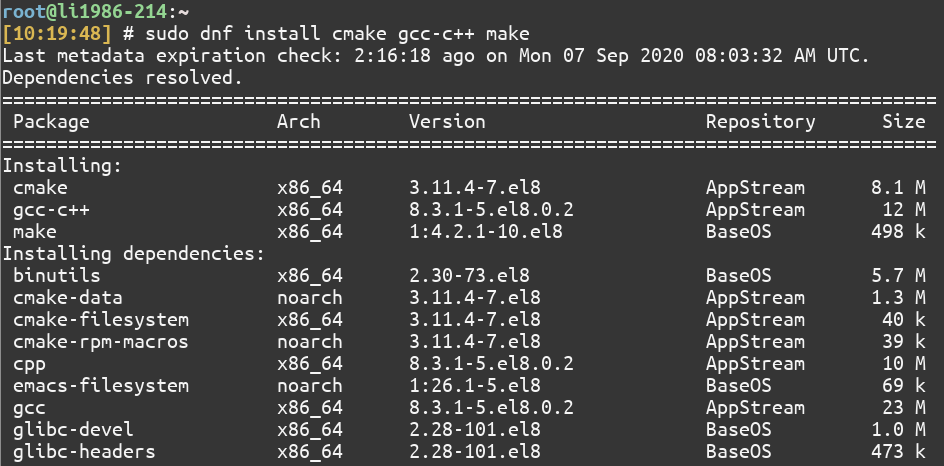
To install cmake, g++ and make using the dnf command, type:
sudo dnf install cmake gcc-c++ make
2. Using CMake’s Official Website
Kitware’s official website has two options to download CMake on Linux as of now:
- A shell script (
.shfile) - A
.tar.gzarchive
Installing through either of them will get you the latest CMake version. You’ll still need a compiler (gcc/g++) and make. You can install them using the package manager. For Ubuntu/Debian based distros, type:
sudo apt install g++ make
For Red Hat Based distros, type:
sudo dnf install gcc-c++ make
For CentOS 8 based systems, we’ll be using the shell script. You can either download the script by clicking on the .sh file link on the website or by using the wget command :
wget https://github.com/Kitware/CMake/releases/download/v3.18.2/cmake-3.18.2-Linux-x86_64.sh -O cmake.sh
Note: The link is for the latest version of CMake as of writing this article and may change in the future.
It is in general a good idea to inspect scripts before running them. To do that, you can open it in the editor of your choice. Using the nano editor to open it:
nano cmake.sh
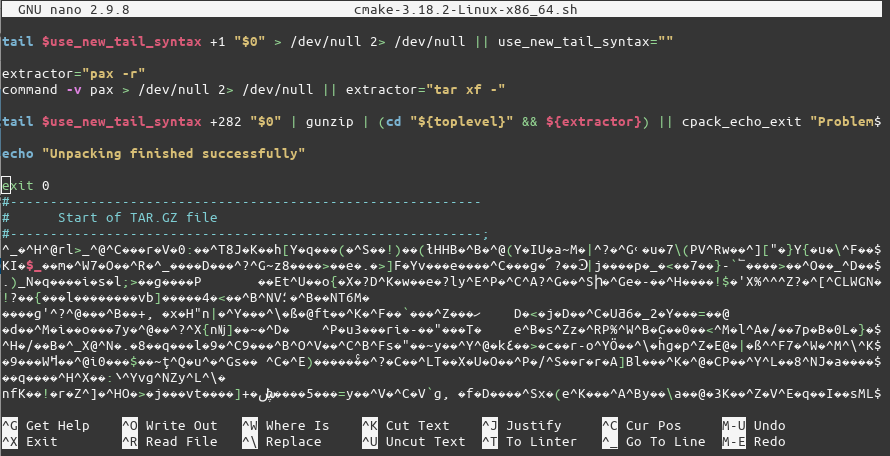
Going through the script, it also contains the .tar.gz archive for the CMake binary. Hence, it’s size (~40MB). The script acts like a ‘self extracting archive’. Now that we’ve inspected the script, we can run it from the current directory using:
sudo sh cmake.sh --prefix=/usr/local/ --exclude-subdir
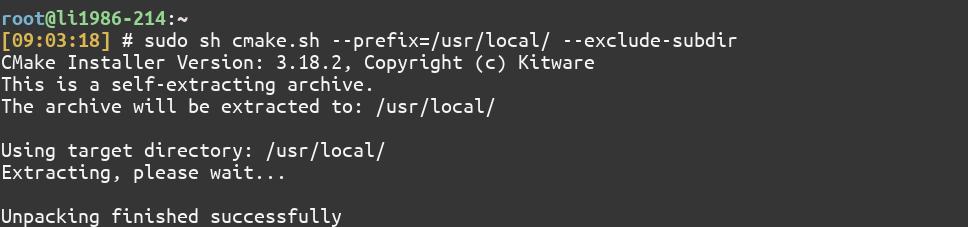
The above command will install cmake globally for all users to /usr/local/bin and the exclude-subdir option is to get rid of the extra folder that is produced while extracting the .tar.gz archive.
(You need the tar command as the script uses it. If prompted tar: command not found, install it by typing sudo dnf install tar)
To verify the installation, you can run the following commands in your terminal:
cmake --version
Also, cmake will not be managed by the system package manager when installed this way. To update cmake you’ll need to repeat this process for any new versions.
A Sample CMake project
We’ll create a simple C++ Hello World program which uses CMake. Let’s start by creating a different directory for our project. Using the mkdir and cd commands:
mkdir projectzero; cd projectzero
Currently, the directory is empty. We’ll now create a C++ source file named hello_world.cpp which, as the name suggests, will print just Hello World!
You can use the editor of your choice. I’ll be using nano:
nano hello_world.cpp
#include <iostream>

int main() {
std::cout << "Hello World!" << std::endl;
return 0 ;
}
Now we’ll create a CMakeLists.txt file (with this exact capitalization) which is required by CMake:
nano CMakeLists.txt
The root directory of the project (~/projectzero in this case) must contain a CMakeLists.txt file. Each line in a CMakeLists.txt file has a command.
The CMakeLists.txt file for this project is quite trivial and will only contain these three lines:
cmake_minimum_required(VERSION 3.18)
project(MyProject VERSION 0.0.1)

add_executable(hello hello_world.cpp)
It’s a good practice to have a separate build directory for executables. So, let’s do that:
mkdir build
The project structure looks like this now:

To run cmake we need to change into the build directory:
cd build
cmake ..
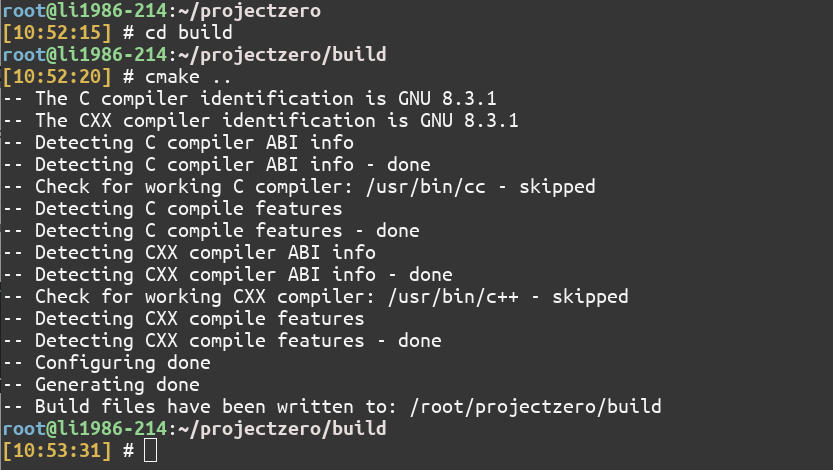
The .. is an alias for the parent directory and tells cmake to find the CMakeLists.txt file in the parent directory. If you see CXX anywhere while working with CMake, it refers to C++ as CXX.
Running cmake .. generated the configuration files for CMake in projectzero/build. We can list the contents of the build directory using the ls command:

Now we can generate the binary file simply by typing:
cmake --build .

Run the executable by typing:
./hello

Congratulations on building your first CMake project. You can find more such beginner-friendly projects on this GitHub profile.
Conclusion
In this article, we learned how to install this tool on Linux and created a simple demo program using CMake. CMake is a very useful tool for C/C++ development. You can find more information about CMake in its documentation.