
The installation for MySQL on Debian will be through the APT repository. Now there is a default MySQL server installation and one that is offered by Oracle through their software repositories. We’ll take the official route by first adding Oracle’s sources first and then installing the MySQL server.
How to Install MySQL on Debian/Ubuntu
Before we can begin the installation we have to add the official repositories to the apt sources. Unlike how we manually configured our sources in the Python installation tutorial, we don’t have to manually edit any files here. There’s a package that Oracle provides which autoconfigures everything for you. How we do add the sources? Let’s look into that right now.
MySQL offers the .deb package to be downloaded on the Community Downloads Page – https://dev.mysql.com/downloads/repo/apt/. For convenience, I’ll link to the latest package here in the article.
1. Adding The MySQL Repositories
Let’s begin with downloading the .deb package that we talked about in the previous point. We’ll be using the wget command so open up a terminal and enter the below command.
root@HowLinux:~# wget https://dev.mysql.com/get/mysql-apt-config_0.8.14-1_all.deb

Now you should have the mysql-apt-config package download. Let’s run the ls command to see if it’s done.

Great! Now we need to install this package. Since we’re using the apt package manager, compared to the apt-get package manager, apt combines all the functionalities under one command. Let’s install the .deb package using the apt command.
root@HowLinux:~# apt install /root/mysql-apt-config_0.8.14-1_all.deb
We’ve specified the entire path but if the package is in the same directory, you can write just the package name too. Once you hit enter, if the package is not already installed in your system, you should get the following screen.
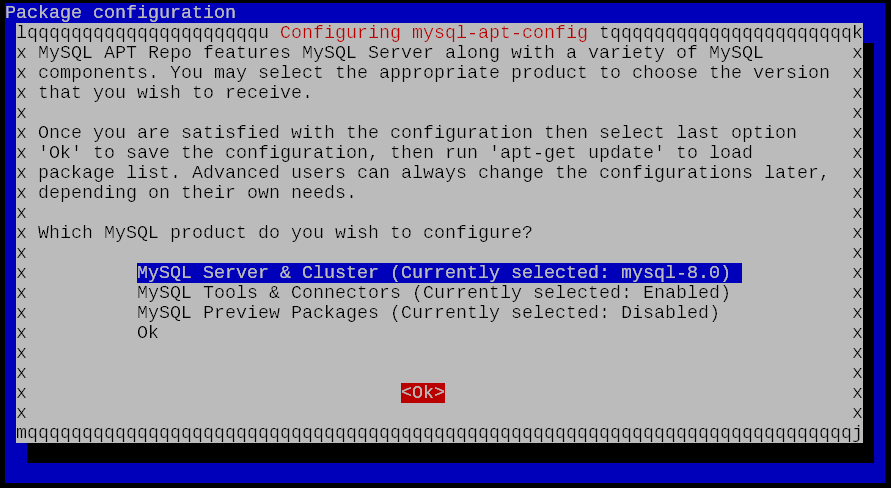
Once you’ve selected the packages, then highlight the “Ok” that you see in the above list of 4 options, and then press the tab key to highlight the <Ok>, and begin the installation.

2. Installing The mysql-server Package
Now that we have our packages updated, let’s run the apt update and then install the mysql-server package.
root@HowLinux:~# apt update
root@HowLinux:~# apt install mysql-server
While the MySQL server installation is processing, you’ll be presented with another installation screen like the one above. This will allow you to set up the password for the root user and other options for our database setup. Go through the installation and select the options that you need. Once done you should have the MySQL server installed on your system.
3. Starting and Stopping the MySQL Service
Let’s check if MySQL is already running. We’ll do this with the use of the service command in Linux.
root@HowLinux:~# service mysql status

In case it says active (running), you can move on to logging in MySQL. If not, let’s start the service. In case you’re looking to stop an active MySQL service, you can use the stop command as shown below.
root@HowLinux:~# service mysql start
OR
root@HowLinux:~# service mysql stop
4. Logging Into MySQL
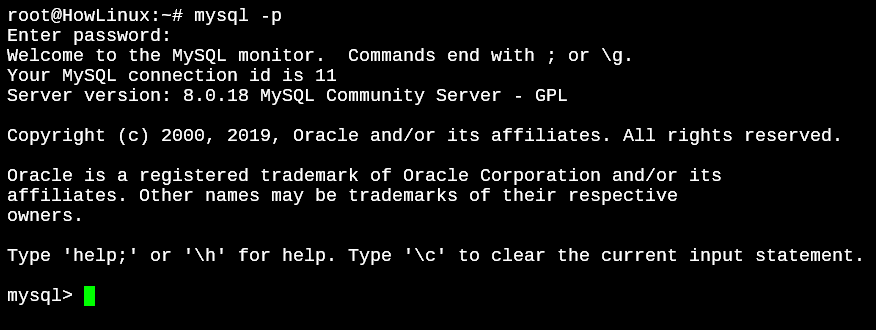
Since we have no database and no users other than the root user, we’ll just type in mysql -p in the prompt and it will allow us to enter the root password that we set up in the previous step when we were installing the mysql-server using the apt command.
root@HowLinux:~# mysql -p
Enter password:
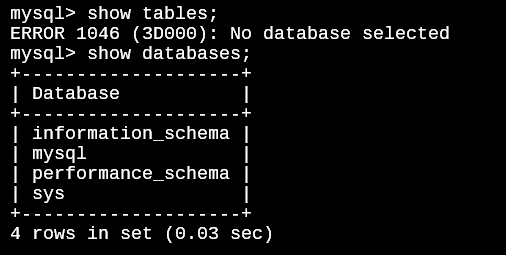
Play around with the MySQL server now. You can create databases, tables, users, schemas, indexes, and a lot more. By default, you’ll have a few system default databases.
Conclusion
That’s it now! We have our very own MySQL server installed on our system. For future updates to the package, all you’d need to do is to update the apt repository using apt update and then run apt upgrade. The mysql-server package will be upgraded to the latest one automatically without you needing to go through this entire process again.