
The DNF command (Dandified yum) is the next-generation version of the traditional YUM package manager for Red Hat based systems. It is the default package manager for Fedora 22, CentOS8, and RHEL8. It is intended to be a replacement for YUM. It does Package Management using RPM and libsolv (maintained by OpenSUSE).
dnf command Basic Usage
The general syntax of dnf command is
dnf [options] <command> [<args>...]
Available commands include install, search, query, etc.
args can be a package name, a group name, or subcommand(s) specific to the ‘command’.
Note: To install and remove packages, you need to have sudo privileges. Since I am already root (which is not a great idea but works for the purpose of demonstration), I won’t be prepending any command with sudo. But keep in your mind that you must prepend sudo while installing and removing packages.
Managing packages using the dnf command
Let’s now see how we can use the dnf command to install/remove/query packages on our RedHat based system.
1. Search and Install packages with dnf
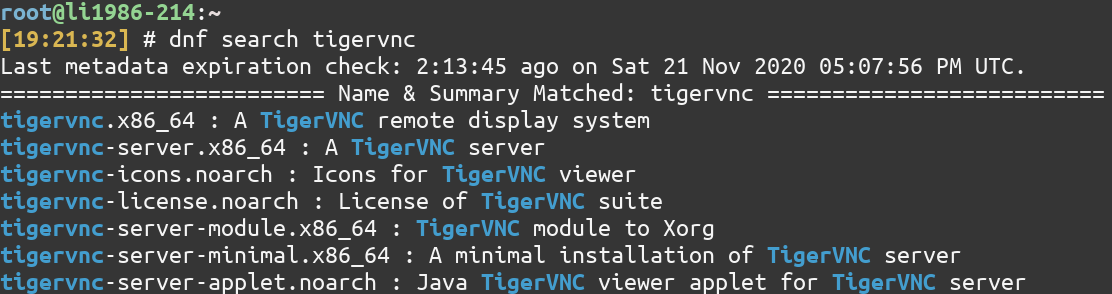
Let’s install the TigerVNC Server using the dnf command. But you may not know the exact name of the software package. It’s better to search for the package first.
You can use the search command of DNF for searching packages.
dnf search tigervnc
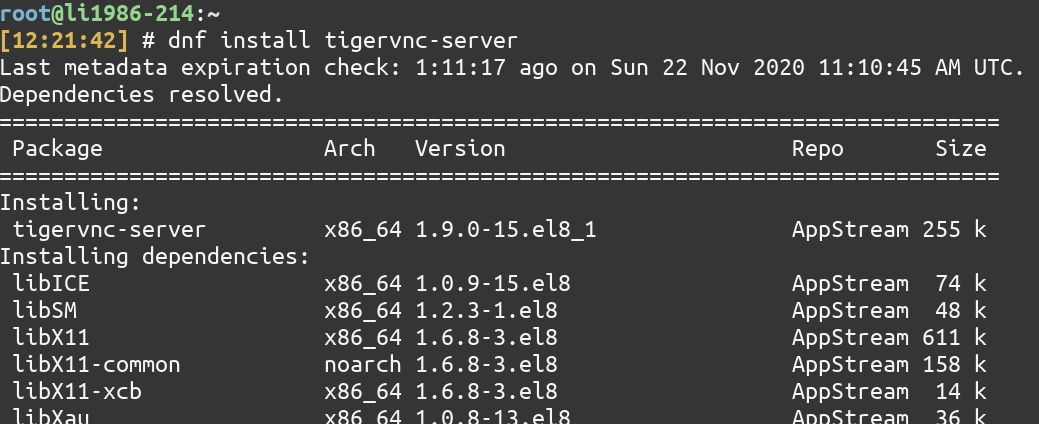
Once you know the exact package name (without the architecture part, here x86_64), you can use the install command of DNF for installing that specified package. This command will also refresh the metadata of all the rpm packages.
dnf install tigervnc-server
2. List information about a package
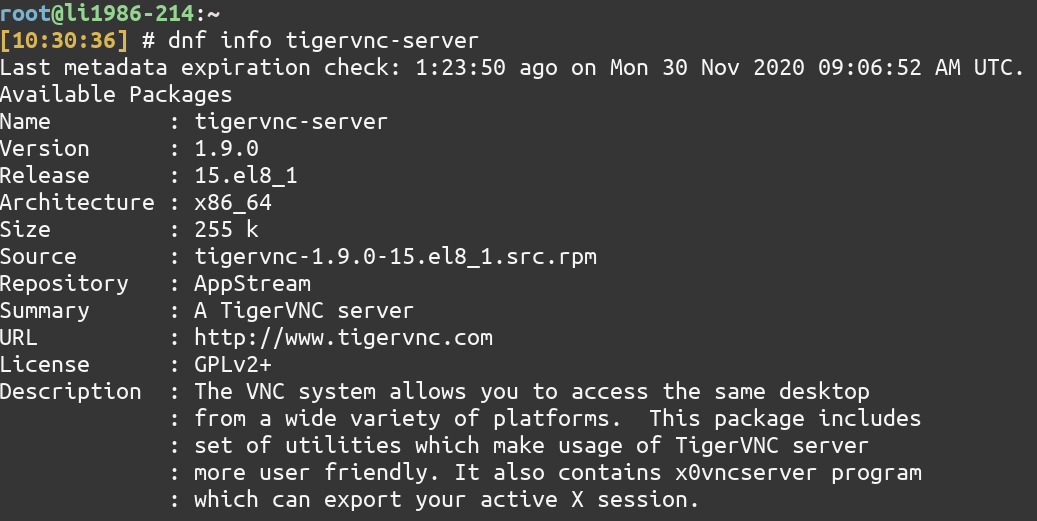
To list more information about a Linux package, use the info command of DNF.
dnf info tigervnc-server
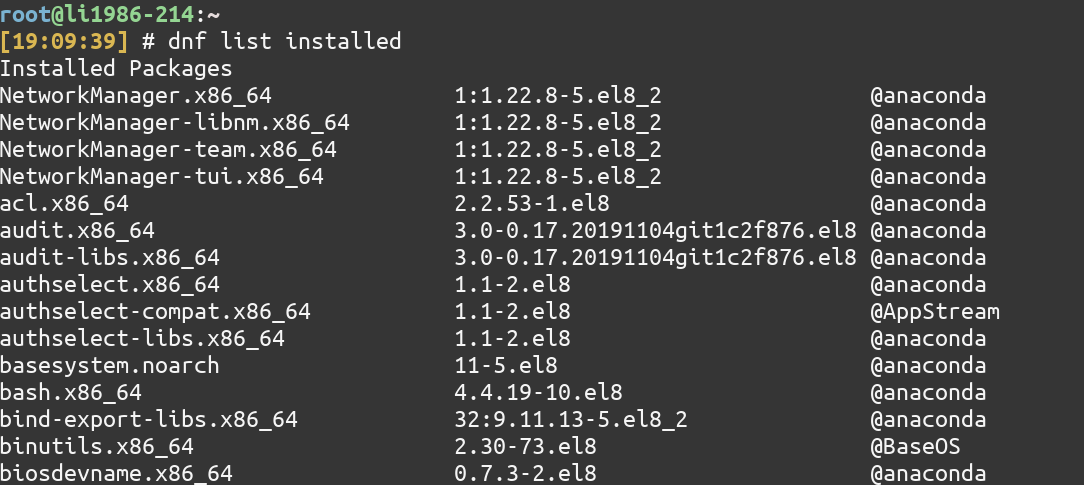
3. List installed packages
To see the list of installed packages, you can use the list installed command of DNF.
dnf list installed
Combined with the grep command, you can search whether a particular package is installed or not as follows
dnf list installed | grep bash

If it didn’t produce any output, it means that the package is not installed. In that case, if you want to install the package, use dnf search to know the exact package name and then dnf install the package.
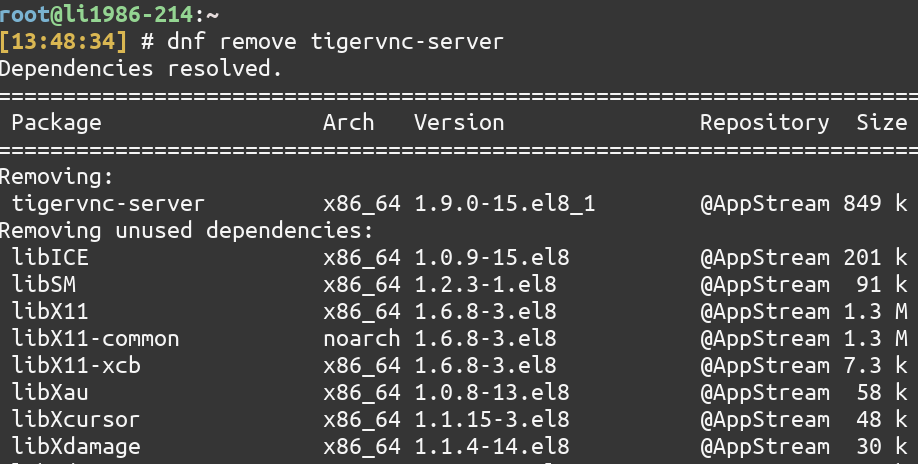
4. Remove packages
To remove a package, use the remove command of DNF.
dnf remove tigervnc-server
To remove all unneeded packages that were originally installed as dependencies, use the autoremove command
dnf autoremove

In my case, there were no unneeded dependencies. So running autoremove had no effect.
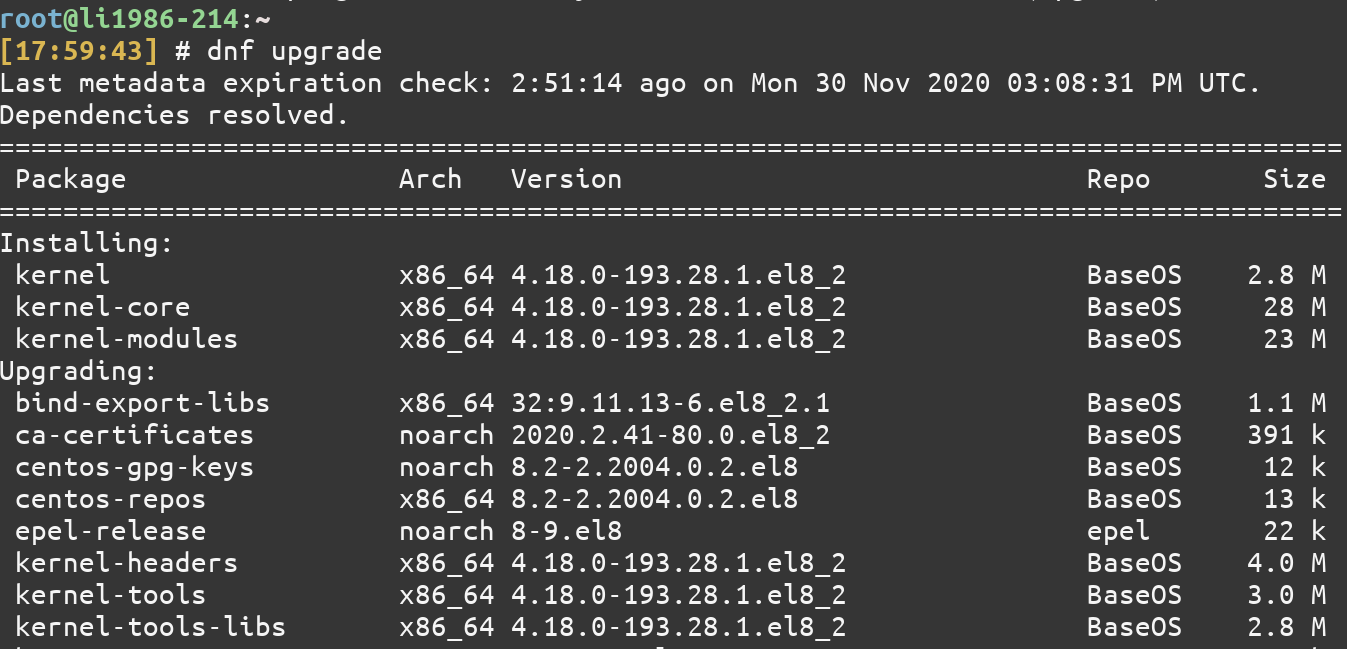
5. Update packages
To upgrade all the packages that can be upgraded, use the upgrade command
dnf upgrade
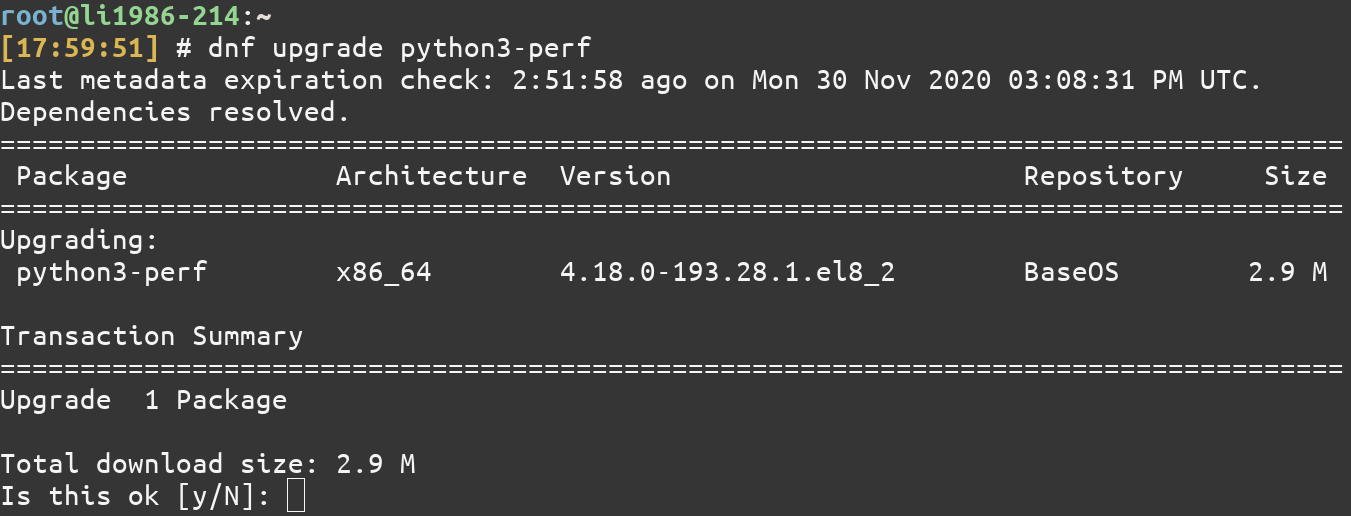
To upgrade a specific package, just add the name of the package, for example
dnf upgrade python3-perf
6. Search and Install package groups
Package groups are just multiple packages under a single name. These packages groups can be a whole server GUI, Security Tools, Administration Tools, etc. To see the list of groups, you can use the group list command of DNF.
dnf group list

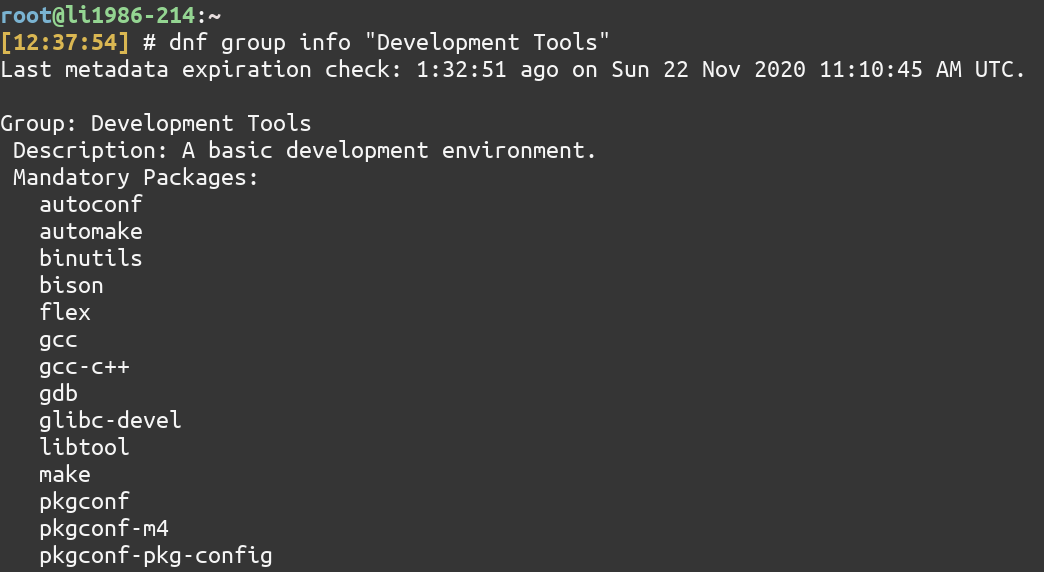
To know which packages are there in a group package, just use the group infocommand and give the name of the package. For “Development Tools” package, type:
dnf group info "Development Tools"
Note: You need to enclose the Group Package Name which has multiple words in quotes(” “). Even if the Group package name is a single word, it is recommended that you use quotes.
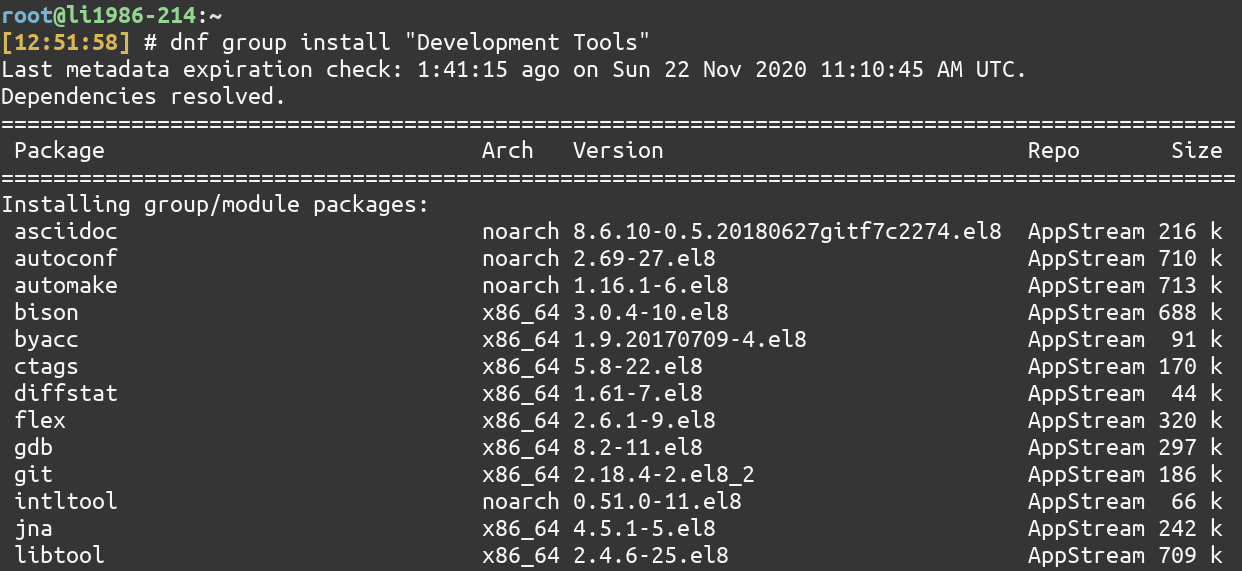
Let’s install the Development Tools Group package using the group install command.
dnf group install "Development Tools"
7. List of all available or enabled dnf repositories
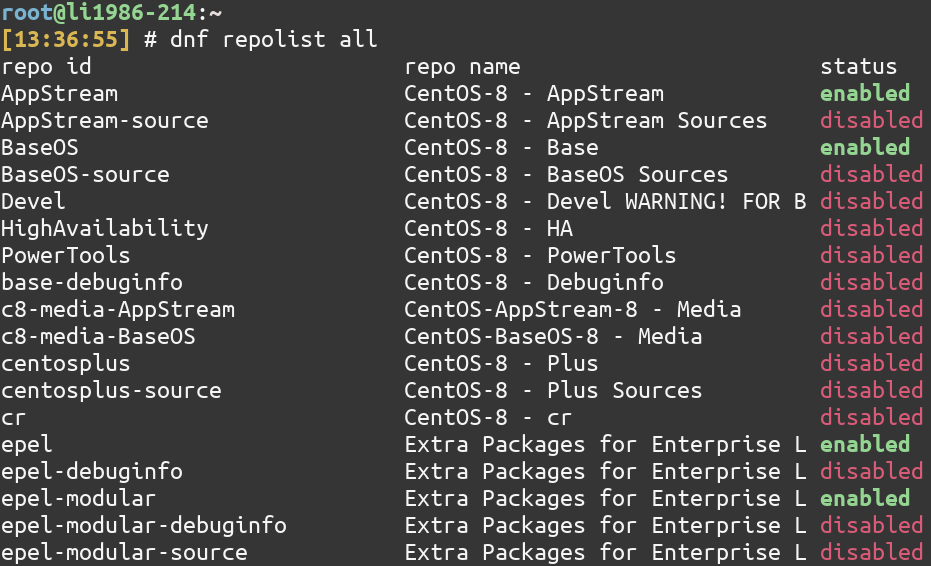
To list all the available repositories using the dnf command, type
dnf repolist all
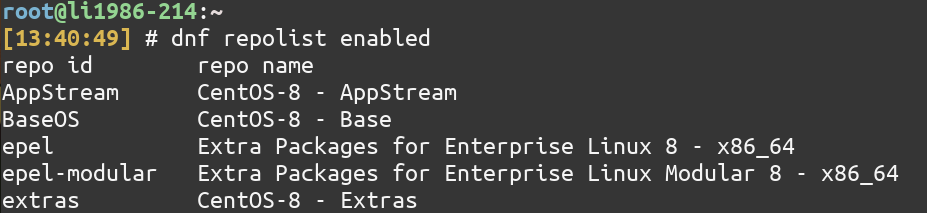
To list all the enabled repositories, type
dnf repolist enabled
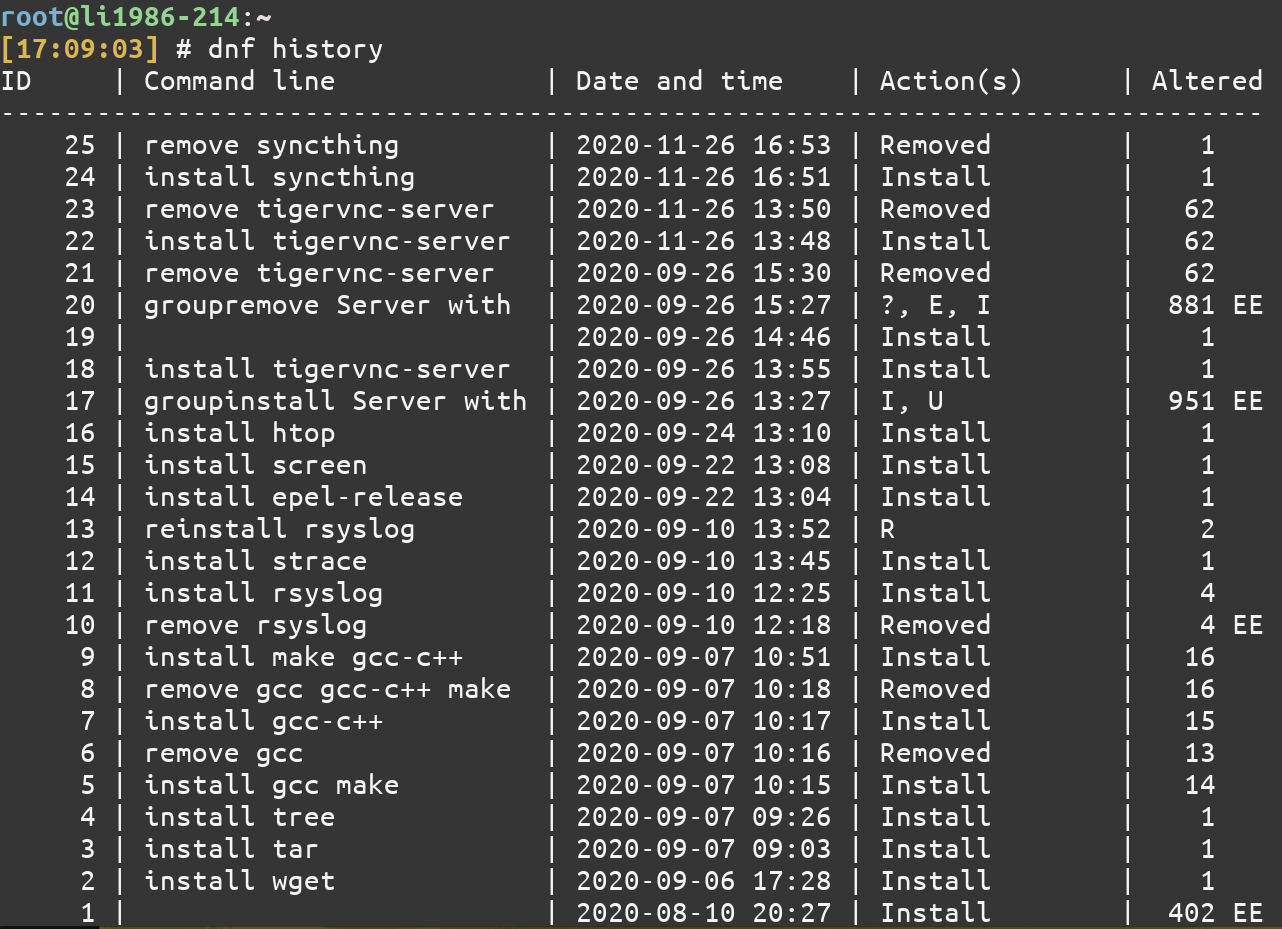
8. View history of installation/removal of packages
Sometimes, viewing your DNF command history is a good idea, especially if you want to repeat the installations on a different system. History can be viewed using the history command of DNF.
dnf history
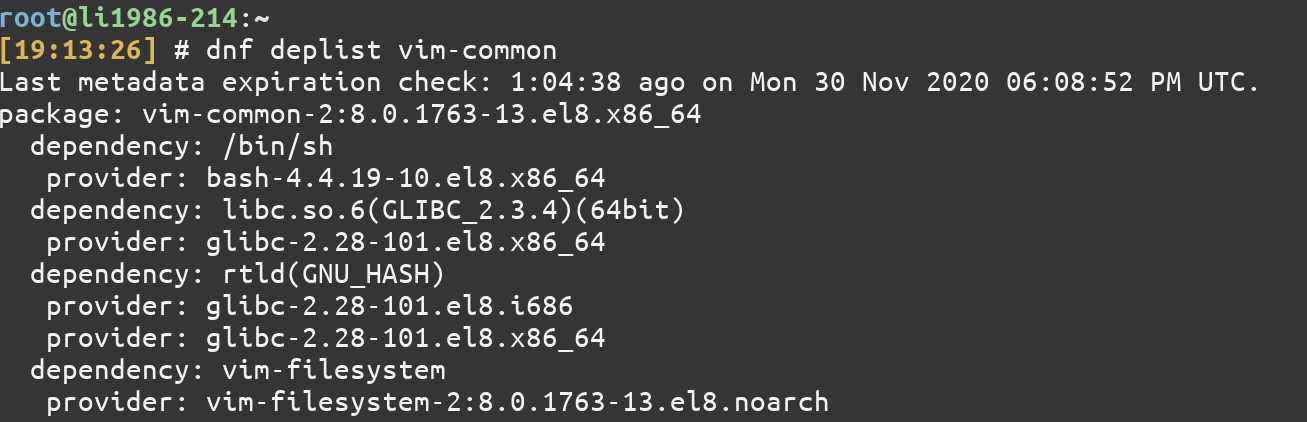
9. List dependencies of a package
To list the dependencies of a package, use the deplist command like this in the command line:
dnf deplist vim-common
Conclusion: A Modern alternative for yum package manager
This tutorial was about dnf command in Linux. Hope this article helped you get introduced to dnf and will be able to use the command with ease in the future. Continue to follow the website as we continue to post more and more articles on Linux in the future!
References
The complete DNF command reference on Fedora based Linux distributions
What is dnf?
dnf is a package management tool used primarily in Linux distributions such as Fedora. It allows users to install, remove, update, and manage software packages on their system efficiently.
How can I install packages using dnf?
To install packages using dnf, you can use the command dnf install [package-name]. This command will search for the specified package in the enabled repositories and install it along with any dependencies.
What is a repository in the context of dnf?
In dnf, a repository is a collection of software packages, metadata, and configuration files accessible over the internet or locally. It serves as a source from which dnf can download, install, and update packages, ensuring that only installed and available updates are applied.
How does dnf handle dependencies?
dnf automatically resolves and installs dependencies when installing a package, always check for updates available using the corresponding command. It ensures that all necessary packages required by the software being installed are also downloaded and installed.
Can I remove packages using dnf?
Yes, you can remove packages using dnf by using the command dnf remove [package-name]. This will uninstall the specified package from your system.
How do I disable a specific repository with dnf?
To disable a repository in dnf, you can edit the repository configuration file located in /etc/yum.repos.d/ directory and set enabled=0 for the repository you want to disable.
How can I see a list of installed packages?
You can view a list of installed packages by using the command dnf list installed. This will display all the packages that are currently installed on your system.