

In this module, we’ll learn to create Ubuntu persistence using the mkusb utility. There have been many times when we need a portable version of our system’s OS, in which we could have a pre-installed environment we can use on any system. As, using another’s system may put a toll on our privacy, consume time and efforts.
There have also been times when we can no more risk our system by installing an additional OS we need, or times when we need Ubuntu for just trying out purposes but our system cannot handle the Virtual Machines much properly.
So, in this article, we will be discussing how we can make a Ubuntu persistence using mkusb and save our time by creating a Persistent USB holding our Ubuntu installation which we can take anywhere, use on any system with ease.
Also read: How to create an encrypted persistent Kali USB?
Pre-requisites
Here are some pre-requisites you need to make a Ubuntu persistence with your USB Pendrive:
- Minimum 8 GB USB stick/drive
- Ubuntu ISO file
- Good Internet Connection
- A system with Linux installed
Installing mkusb on our Linux system
To create Ubuntu persistence, let us start with installing mkusb.
Firstly, add the repository for the mkusb package to your system by running the following command. Make sure you add sudo if you aren’t using a root account.
sudo add-apt-repository universe
sudo add-apt-repository ppa:mkusb/ppa
You will also be asked for the root password, type it and hit Enter.
Once the repository is added, run the below command to refresh the package index of your system.
sudo apt update
Now, run the following command to start the mkusb installation:
sudo apt install mkusb -y
It will also automatically download and install all the other dependencies needed by mkusb.
Now that mkusb is set up on your system, it’s time to create your Ubuntu persistence.
Creating the Ubuntu Persistence
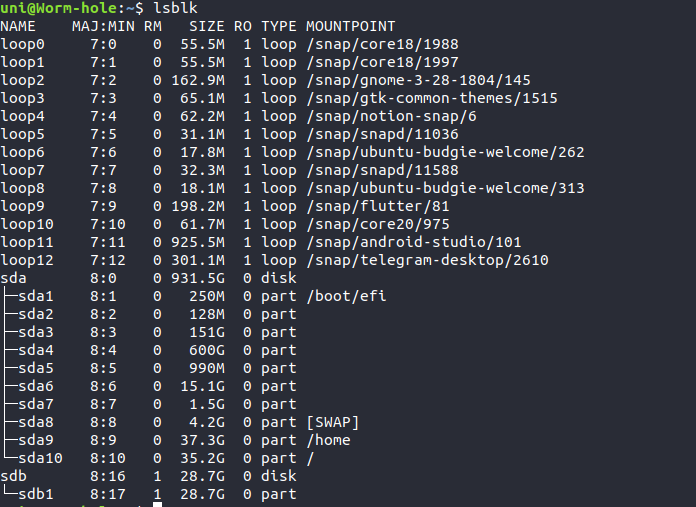
Now, plug in your USB drive and enter the following command:
lsblk
You will get an output similar to the below image, check that your USB is listed in your output. It means that your USB is connected properly and we can begin with the process of creating the Ubuntu persistence.
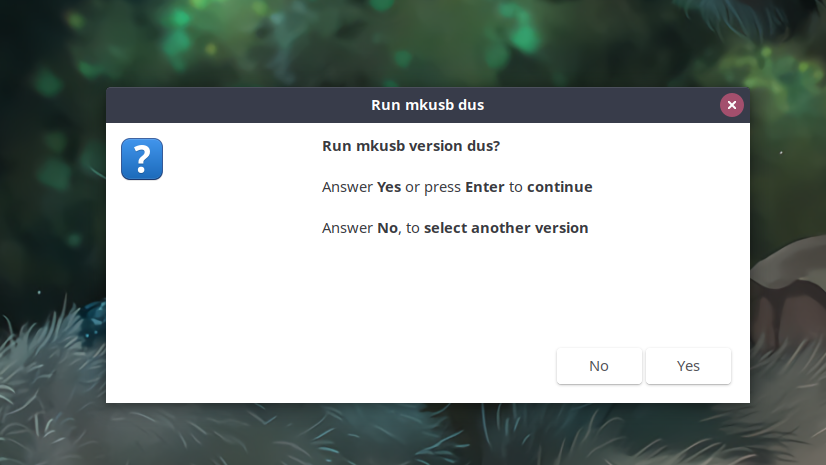
Now, open the Applications tab in your Linux and open the mkusb application. A confirmation box will pop up, click on “No” as we will work with the same version of mkusb.
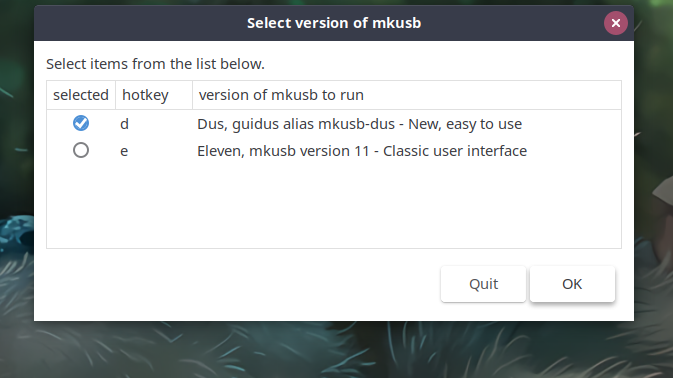
In the next step, which interface you wish to use. Here, I choose the “New, easy to use”. You can choose any one of them, but the process differs quite a bit in both.
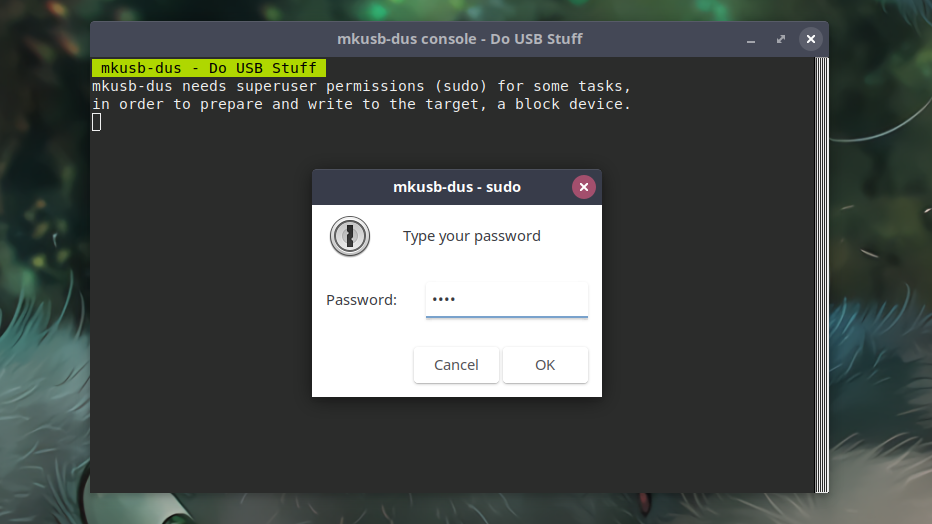
Now mkusb will open and ask you for your root password, as it needs root privileges to go ahead. Type your password and hit Enter or click OK.
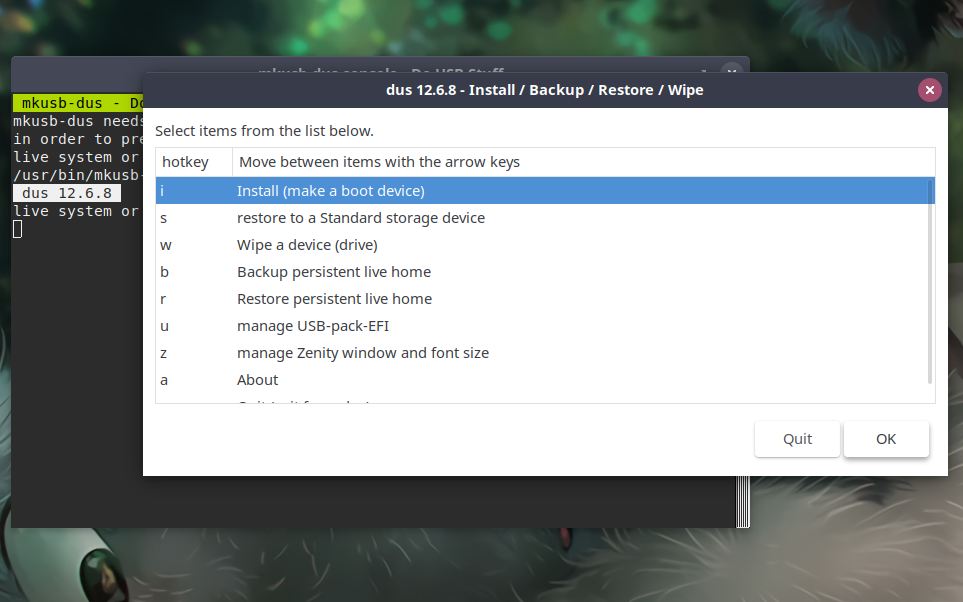
Now, a new popup window will open asking what you wanna do. Choose the “Install” option in this box and click on OK.
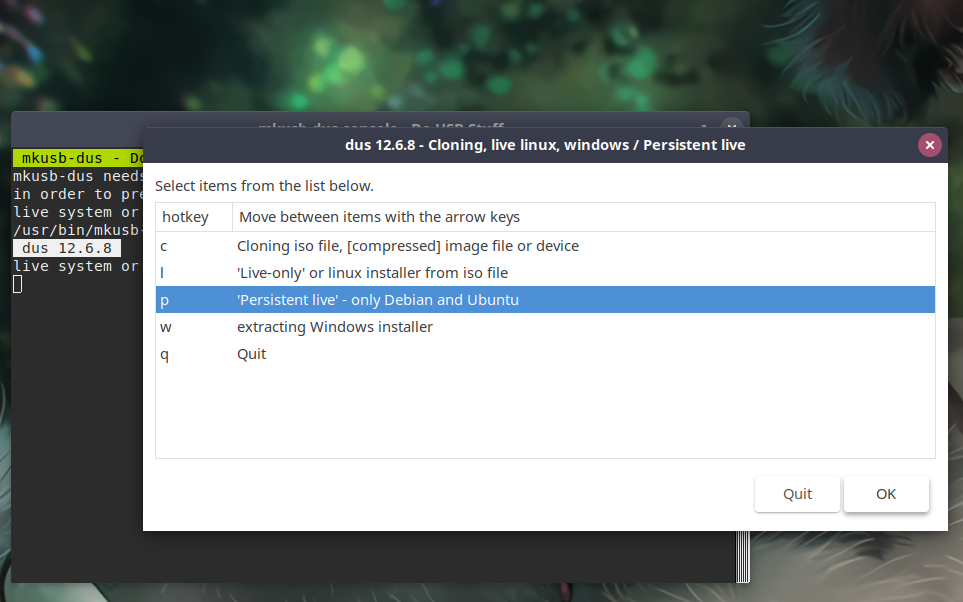
Now in the next screen, click on the ‘Persistent live’ option as in the image below and click OK.
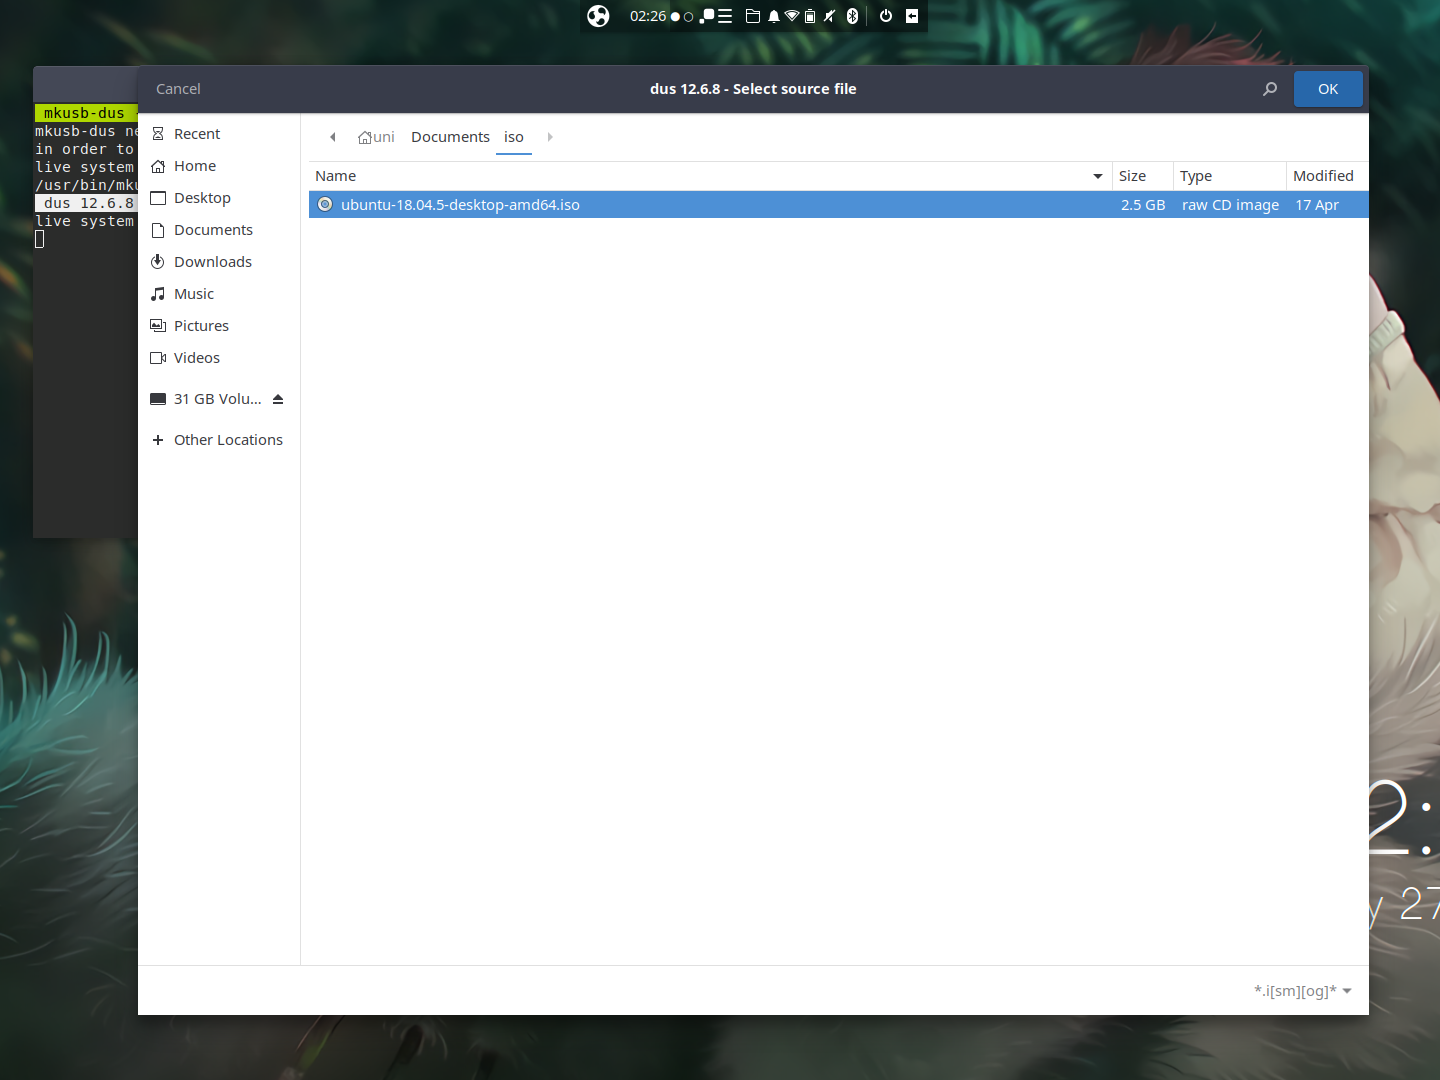
Now, a file chooser will open up as in below image. Here you need to select the installation file (iso image) of the Ubuntu you want to create the persistence of.
Choose the installation image and click OK.
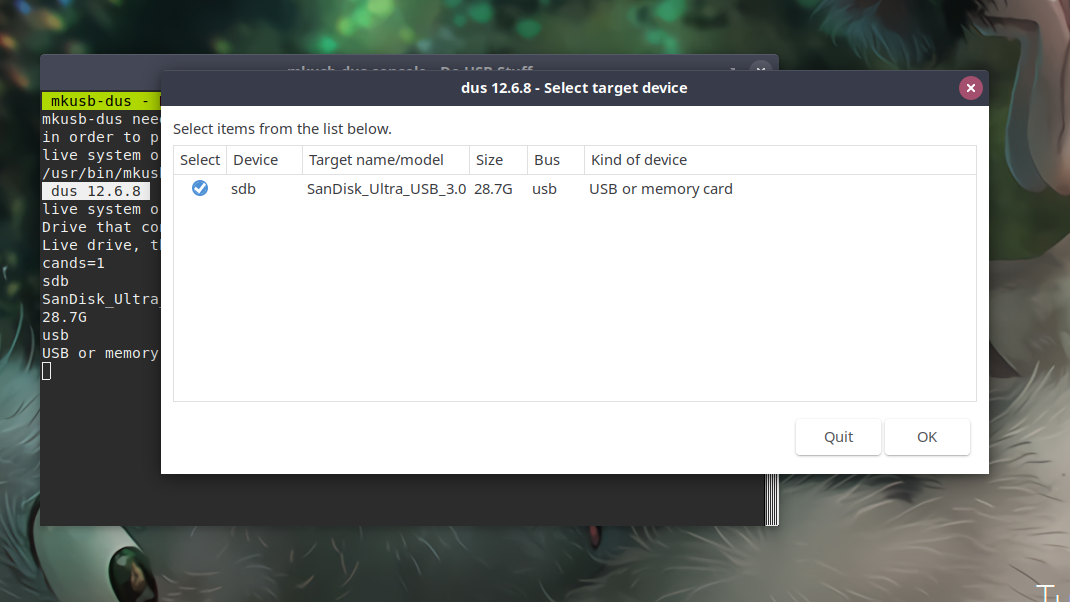
The next dialog box will ask you to choose the USB device, select your USB device and click OK.
If your USB does not show up in this option, then your USB drive isn’t properly connected. You will be needed to restart the mkusb and start with the process again.
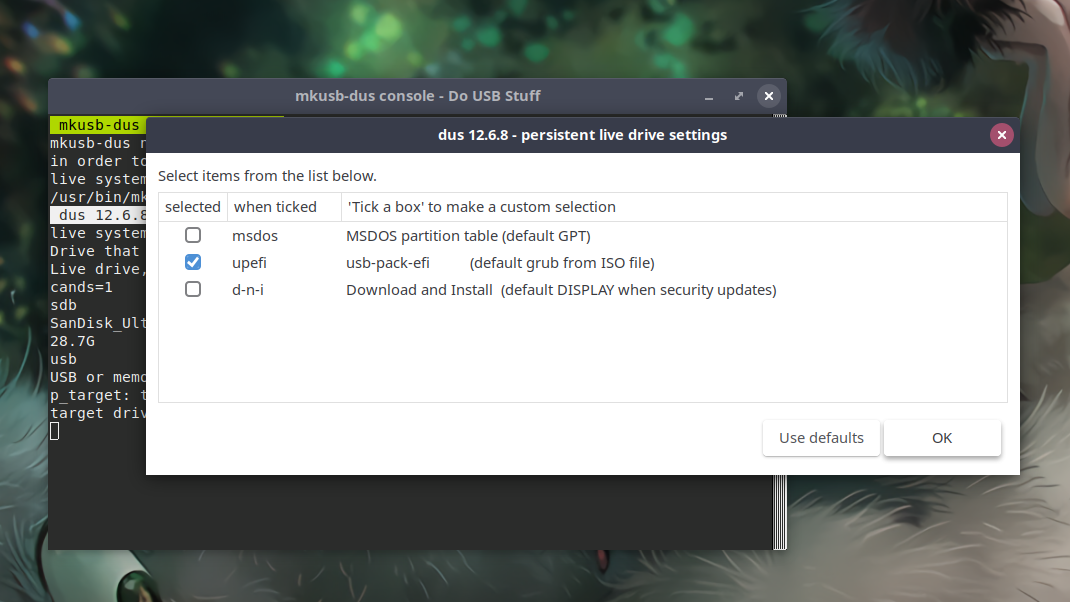
Now, it will ask you to select persistent live drive settings as in the below image, choose “upefi” and click on OK to proceed.
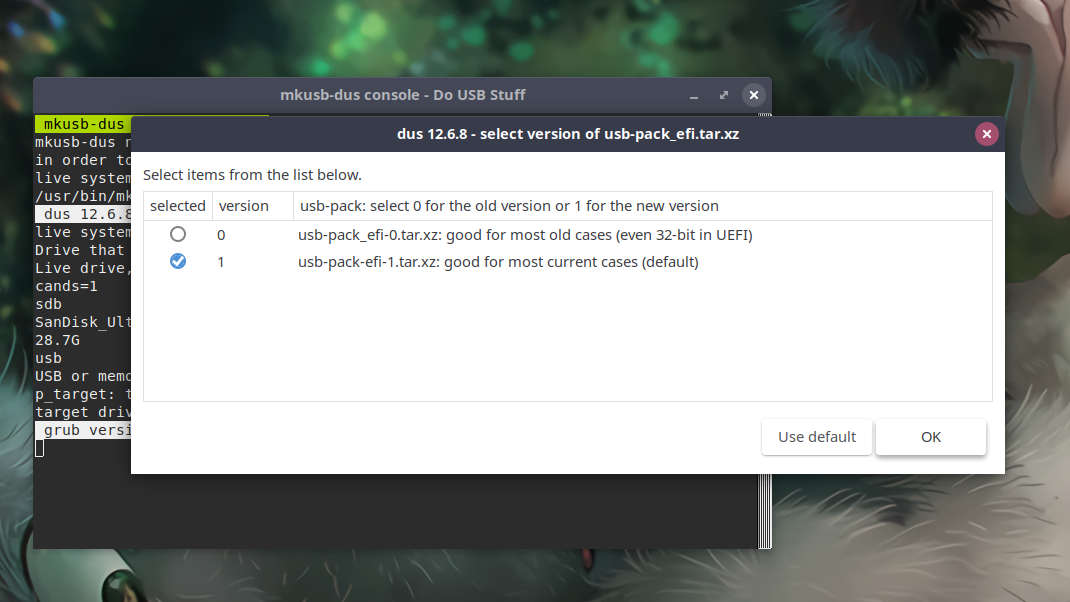
Now, it will ask you which usb-pack-efi you want to use, choose the default one and click OK.
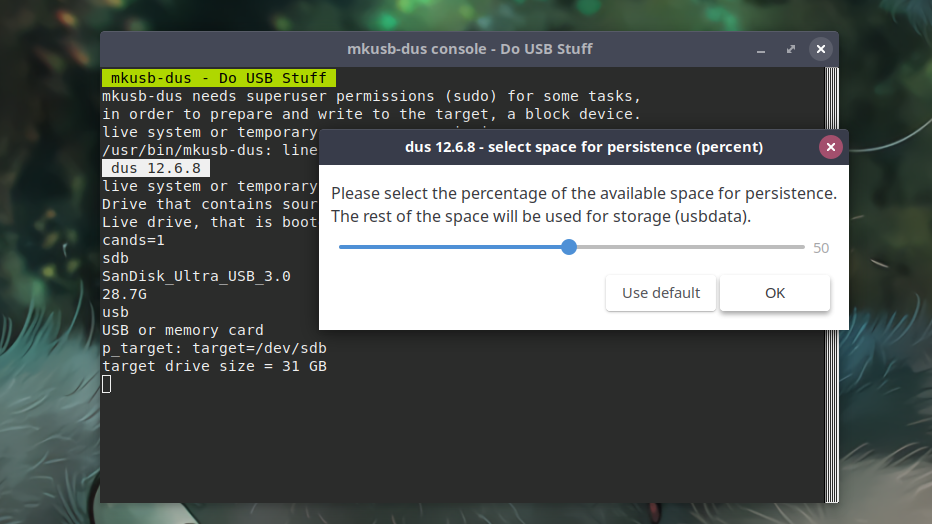
Now you will be asked to allot the space from your USB drive to create the Ubuntu persistence. Choose as much you like, the rest of the space will be used to create a partition named “usbdata” which you can use to store data normally.
Allot the space for creating persistence and click on OK.
Now you have almost completed the process of making the Ubuntu persistence.
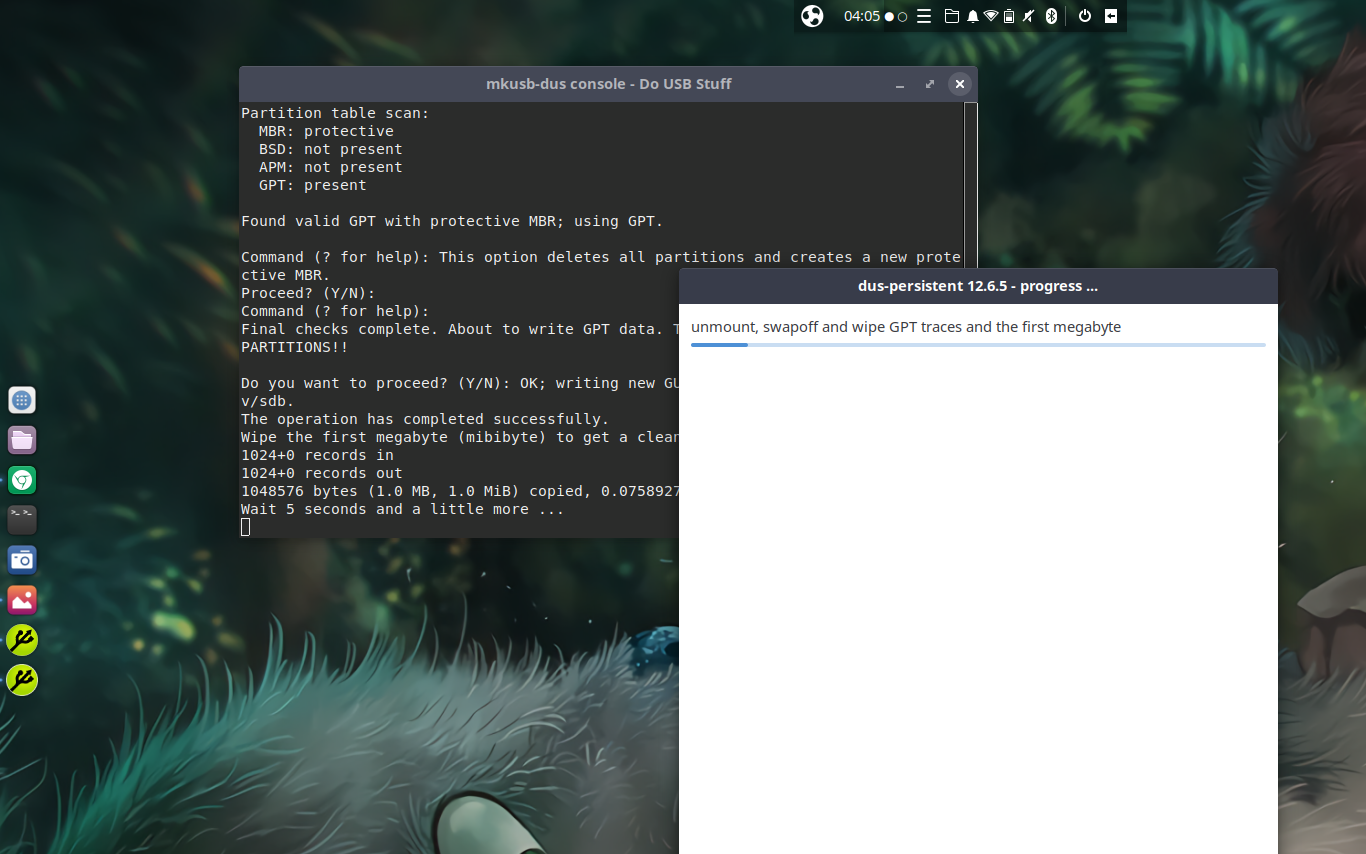
A window will pop up named “Final checkpoint”. This is the last step, choose the “Go” option and click on the Go button below as seen in below image.

Now, wait for sometime as your USB is currently being processed to make persistence, by the system.
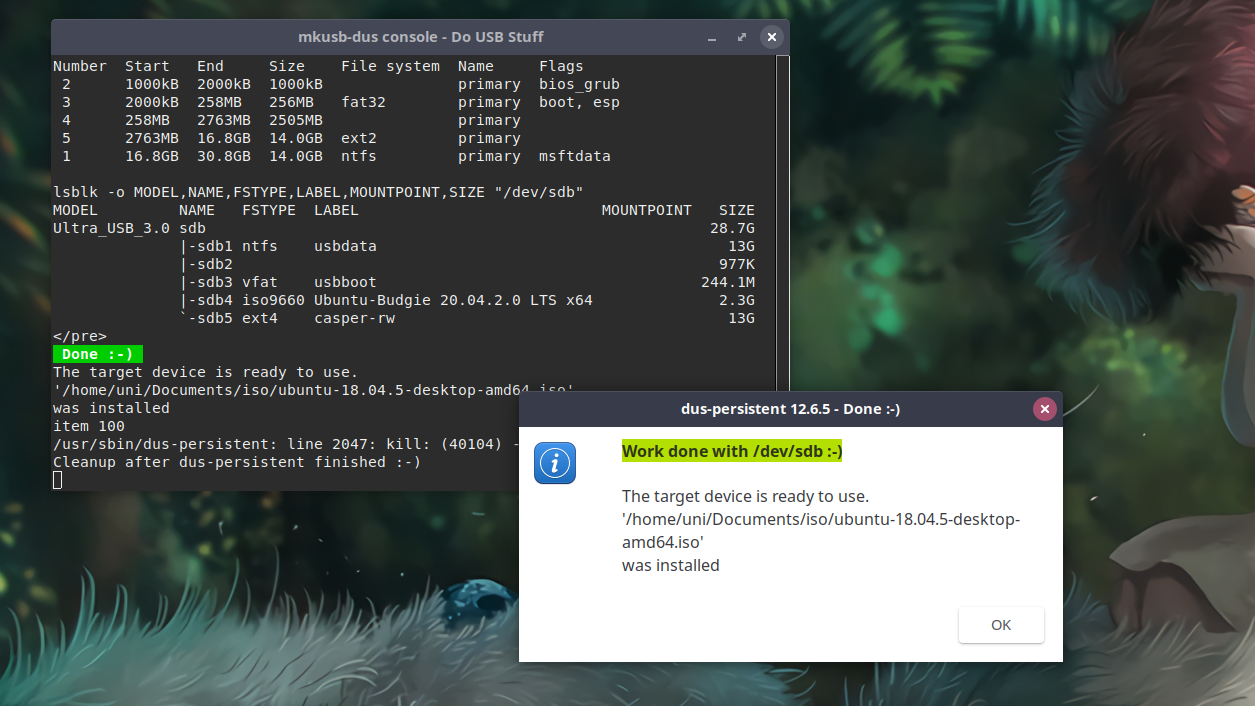
Once mkusb finishes its work, you will get a popup with “Work done” highlighted on it. Click OK and exit the mkusb application.
Your USB drive has now become a Ubuntu persistence drive.
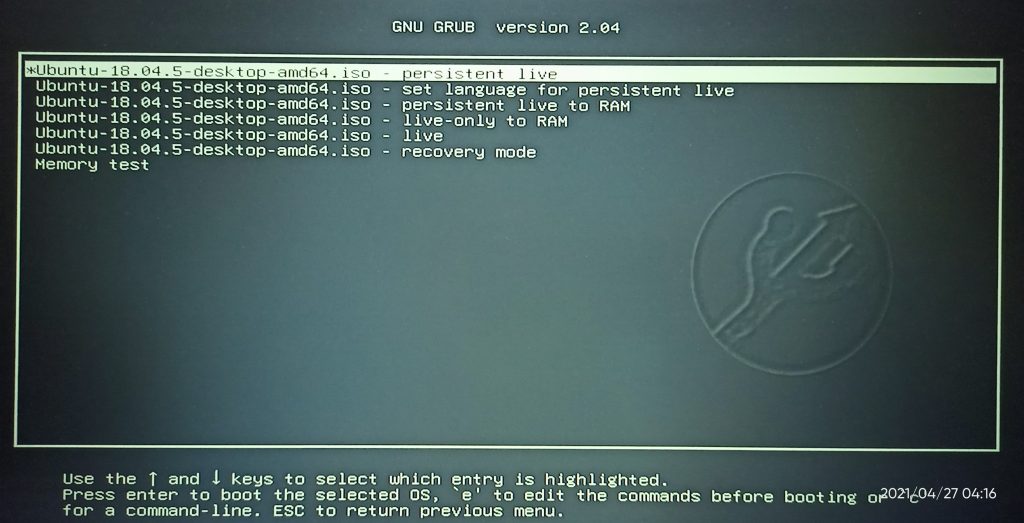
Now, restart your system and Enter the boot menu. For opening the Boot menu, hold your F12 key while booting your system and it will open. It may also differ, as the process to open Boot menu differs on different systems.
Choose your USB Drive in the Boot menu of your system and the bootloader of your USB will open. You will get a screen like the below image.
Choose the first option “Ubuntu – persistent live”, to start the persistence.
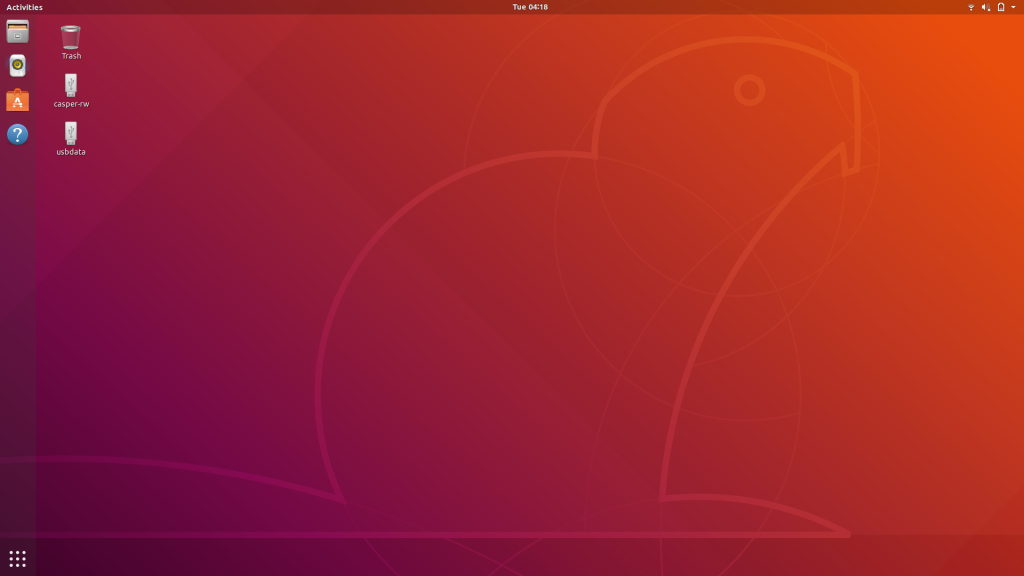
Your Ubuntu desktop will open, you can now use it to suit your needs.
Also, as it is a persistent drive now. So, unlike live Ubuntu, it will function as the Ubuntu installed on your Hard Drive. The only difference being, it is on the USB drive.
Bonus
- You can make the persistence of any version of Ubuntu/Debian official distribution via this method.
- mkusb is open source, and you can find its code here.
Conclusion
In this article, we discussed how we can create a Ubuntu persistence USB drive with help of mkusb very easily. We also discussed how you can start the persistence, to work with it.
Hope you liked it!