

In this module, we’ll learn to install and set up Flutter on Linux. Flutter has been gaining fame lately because of its flexible application, as it can be used to develop Android and iOS applications using the same codebase. Because of this big organizations are using it to improve their productivity.
Also, it can be used to develop web apps, and soon plans to provide support for Linux application development.
In this article, we will discuss setting up Flutter on our Linux system and a quick walkthrough on how to run an flutter app, to ensure that the setup works fine.
Setting Up Flutter on Linux
There are many ways by which you can set up flutter, but here we will use snap packages of Flutter and Android Studio for set up. Rather than using their tar files from their official websites as it would consume a lot of time.
Using snap packages saves time and there are fewer chances of encountering bugs in the process.
Step 1: Install Flutter on Linux
First, open the terminal and install the snap package for Flutter using the below command:
sudo snap install flutter --classic
It will ask for your root password, enter it and you are good to go.
You can also install it with help of Software Center, by simply searching for Flutter in it.
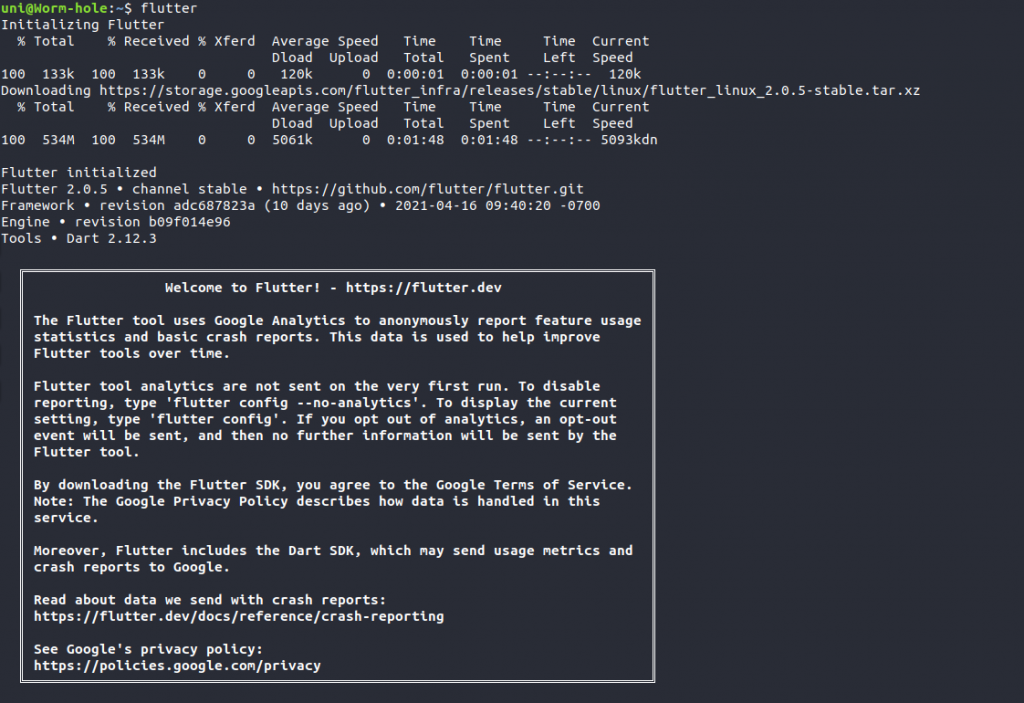
Now to complete the flutter installation, run the below command to ensure that the important packages are installed.
flutter
You will get the below “Welcome to FLutter!”, once your Flutter is ready with all important packages installed. Now all you need is Android SDK.
Step 2: Install and configure Android Studio
To use the Android SDK, we will install Android Studio and let it do all the work. To install Android Studio, open your terminal and run the below command:
sudo snap install android-studio --classic
It will ask for your root password when using sudo. Enter it and you’re good to go. You can install Android Studio, using the Software Center by simply searching for Android Studio and hitting install.
After you are done installing Android Studio, start the Android Studio using the below command:
android-studio
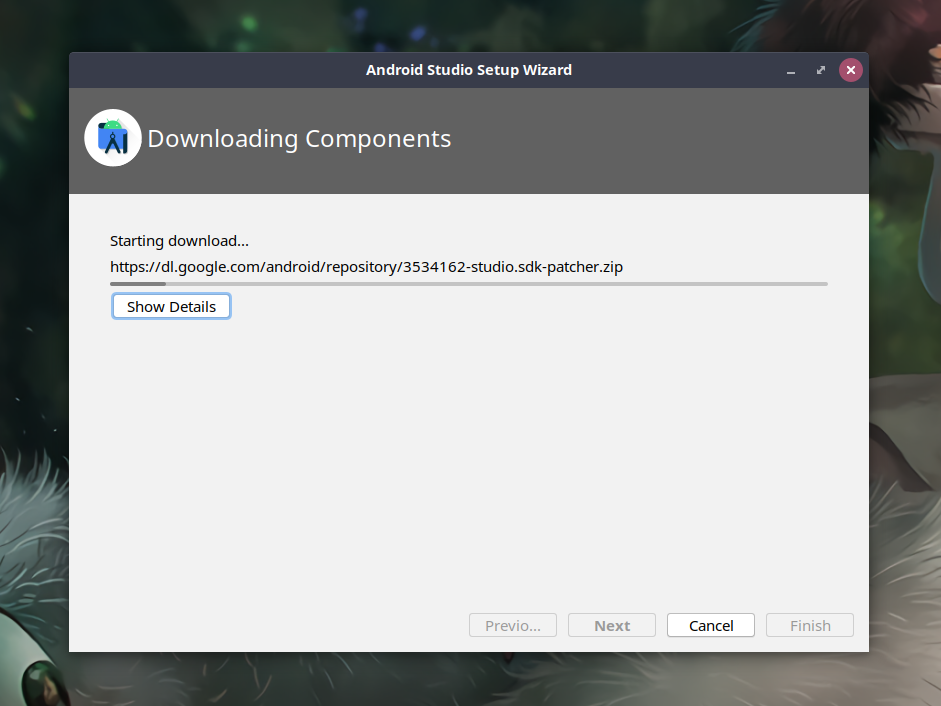
After your Android Studio starts, it will look something like this:

After your Android Studio has started it will ask you to confirm some settings. Go with the defaults and keep hitting Next unless your Android Studio starts installing the Android SDKs and other needed components.
Once it starts, you will get the below screen:
Step 3: Setup Flutter and Accept Android licenses
Once Android Studio finishes the installation, go to your terminal and run the following command:
flutter config --android-studio-dir /snap/android-studio/current/android-studio
It will configure your Android Studio directory to the snap package directory of Android Studio you just downloaded.
Now, run the following command, and it will open android licenses. Keep entering “y” for accepting the licenses as long as you are asked for input.
flutter doctor --android-licenses
Once, you have finished accepting all android licenses you have finished the set up successfully.
Step 4: Verify the Flutter set up
The below command acts as the Health Check for the Flutter set up and verifies if something is broken off left in the set up that might cause problems to Flutter while running.
Run the following command to check if something is left:
flutter doctor
If everything is fine, you will get an output similar to the image below.
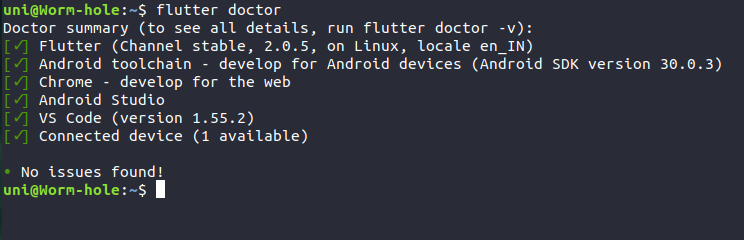
You might not get a tick on your Chrome and VS Code if they aren’t installed on your system. You can ignore them as they are not much essential.
Run a Flutter sample app
Now that we have set up Flutter on our system, let’s check it out with a sample app to ensure Flutter is working properly.
Step 1: Create a directory and cd into it
First of all, create a directory with any name you like in place of sample_app, and cd into the directory using the mkdir and cd commands:
mkdir sample_app
cd sample_app
Step 2: Initialize the directory with Flutter starter files
Once you’re inside the directory, run the below command:
flutter create .
It will initialize your directory with some starter SDK files, required for a Flutter app to function.
By default, the template is a counter app.
Step 3: Run the Flutter hello-world app
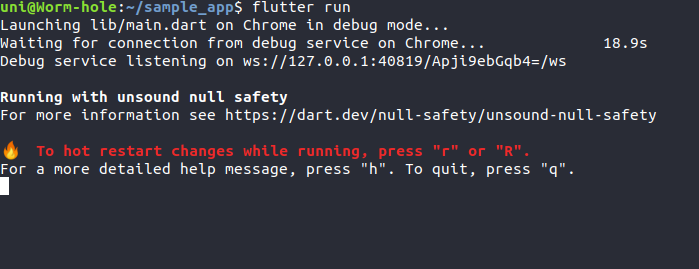
Once flutter create finishes execution, run the following command to start your Flutter app:
flutter run
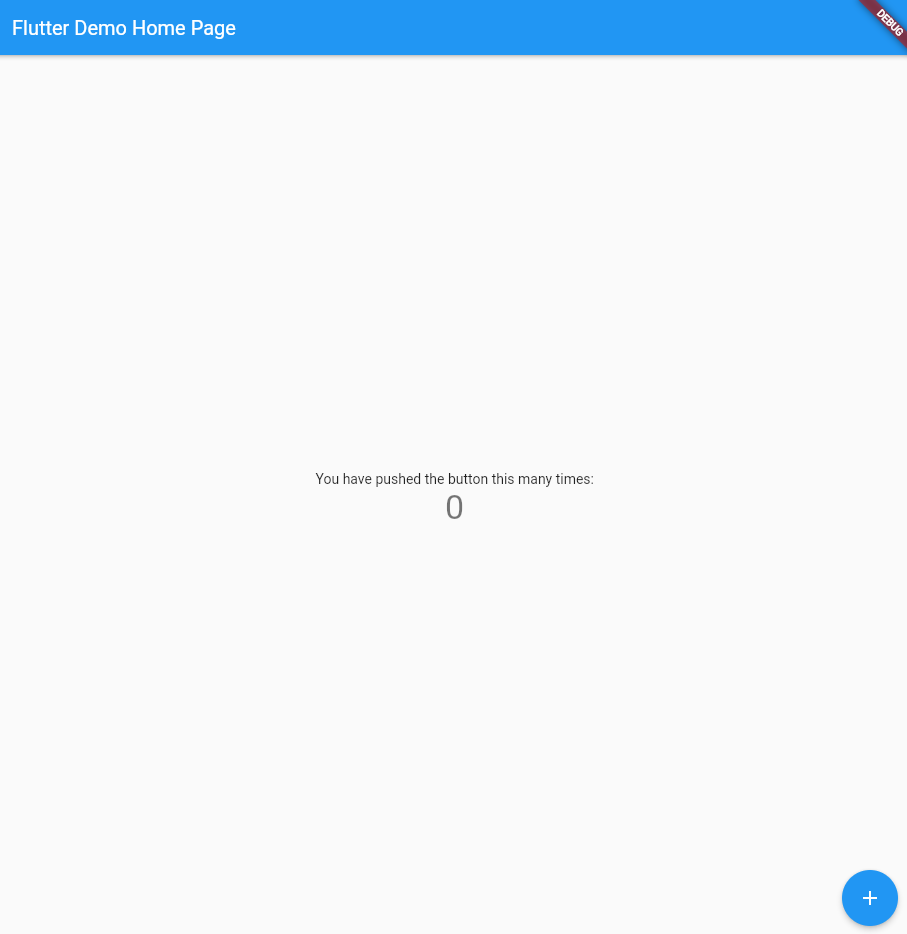
Wait for a moment, and a chrome tab with running application with open and you will get below screens in your Terminal and Chrome respectively.
Bonus
- Flutter is open source, and you can find its code here.
- You can use your Android phone to run the Flutter app rather than using the Android Virtual Device(AVD) of Android Studio, as it is bulky.
Conclusion
In this article, we discussed how we can set up Flutter on our Linux system in an easy way that any beginner would be able to complete the setup. We also discussed the process of running a Flutter app to ensure Flutter works perfectly.
Hope you liked it!