

Whether it is for personal use or creating a server, Ubuntu offers a plethora of tools to adequately configure the network settings on a device to suit the user’s needs. Learning to configure network settings may come in extremely handy for both new and experienced users alike as it is a fundamental part of the user experience provided by any operating system.
This guide will cover the basics of network configuration in Ubuntu that everyone should know.
Also read: A Step-by-Step Guide to Set up a DHCP Server on Ubuntu
Identifying your network interfaces
There can be multiple network interfaces connected to the same system, hence you need to first identify the correct interface in order to configure it for its proper functioning.
Enter the command below to identify the installed network interfaces by their logical names.
ip addr
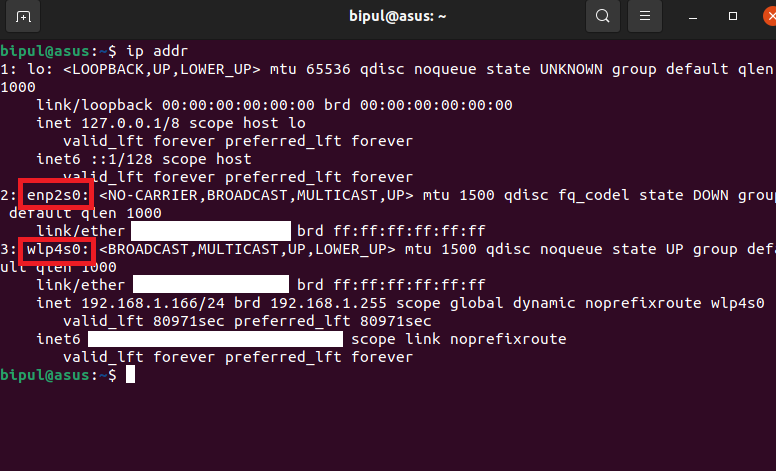
ip addr- If you are using a wired connection, the name of the device will be something like
enp2s0where ‘en‘ stands for ethernet, ‘p2‘ is the bus number and ‘s0‘ is the slot number. The bus number and slot number might differ depending on your system. - Similarly, if you are using a wireless network (using Wi-Fi), the device’s name will be something like
wlp4s0where ‘wl’ stands for wireless. - ‘
lo‘ represents the loopback interface.
Network configuration using graphical utilities
To get the internet up and running on your device, you can simply use the Ubuntu graphical user interface. Follow the steps below:
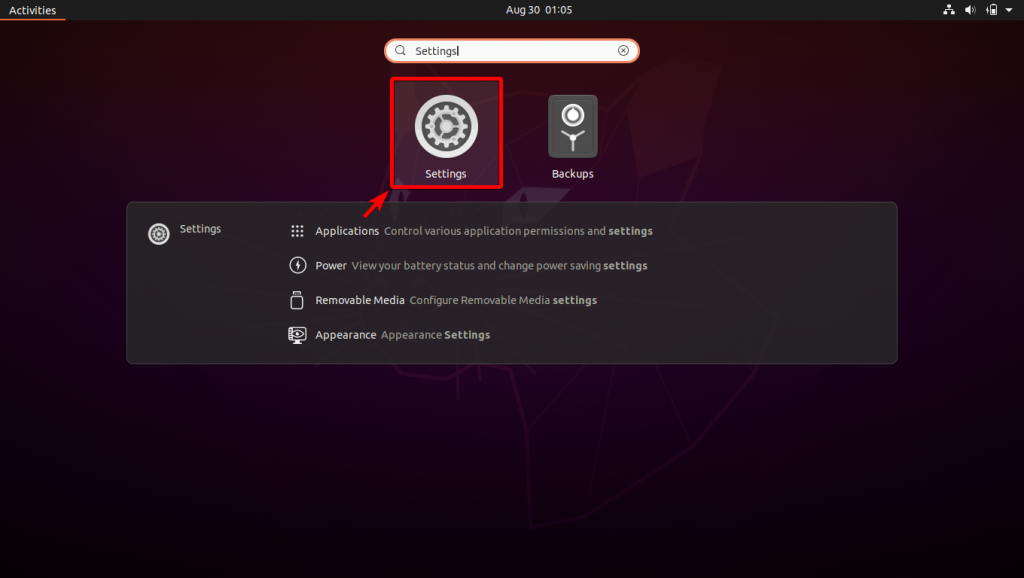
1. Open Settings
2. You should click on Wi-Fi or Network depending on whether you are primarily using a wireless connection or a wired connection respectively
3. Click the settings icon near your Wi-Fi/Wired device name
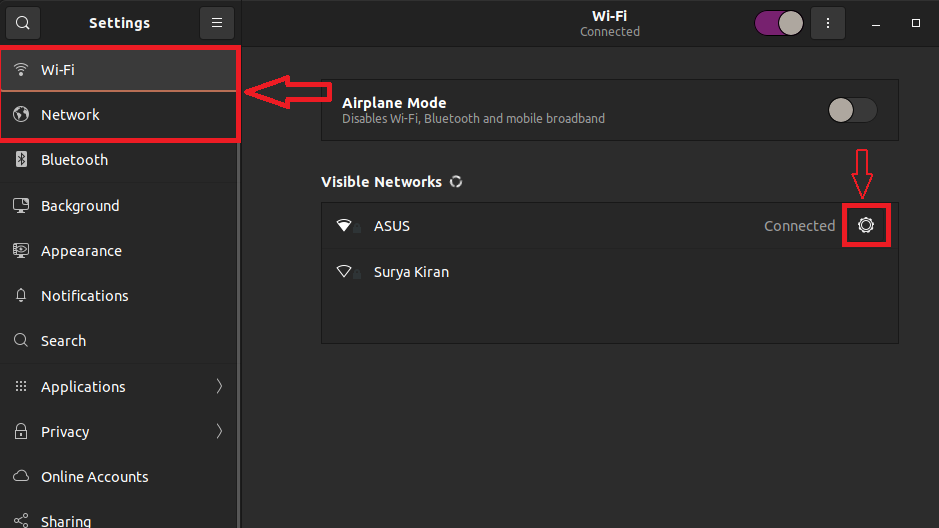
4. You can see the device details in the Details tab. Move to the IPv4 tab to configure the IPv4 Methods, DNS, and Routes.
By default, the IPv4 method would be set to Automatic (DHCP) which is the correct configuration in case your device has a dynamic IP address.
In case you need to use a static IP address, you can just choose the Manual IPv4 method and enter the corresponding addresses.
Network configuration using Netplan and terminal
Using the GUI is easy but it is also limited in terms of the number of modifications it allows. Using the Ubuntu terminal, we can dive into more advanced settings to gain full control over network configuration on our devices.
We will extensively use netplan to save the configurations. To access the netplan configuration file, enter the code below:
cd /etc/netplan/
This command will change our directory to /etc/netplan/ which is the location where the configuration files are saved.
Enter ls to list the files in the directory to get an output like this:
bipul@asus:/etc/netplan$ ls
01-network-manager-all.yaml
Ideally, you will see a configuration file with the YAML extension already present. You will need to edit the file in order to make and save changes:
sudo vi <filename>
In my case, the command would look like this:
sudo vi 01-network-manager-all.yaml
Do note that you can always create multiple configuration files if the first one gets cluttered.
Change the logical name of the interface
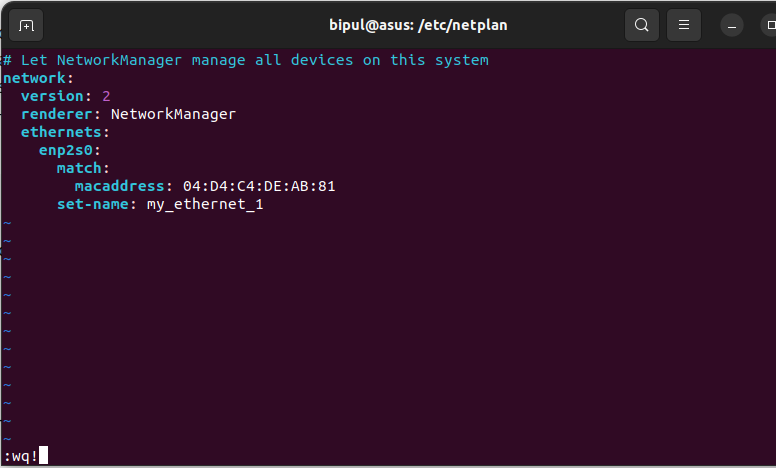
1. We can use netplan to change the logical name of the network interface. Edit the config file by adding the match and set-name keys.
# Let NetworkManager manage all devices on this system
network:
  version: 2
  renderer: NetworkManager
  ethernets:
    enp2s0:                       #Current logical name of your network device
      match:
        macaddress: 00:11:22:33:44:55                 #MAC/Hardware address
      set-name: my_ethernet_1                          #New name
2. Save the file after saving the changes done in the vi editor.
3. Enter the command:
sudo netplan try
4. Once you get the output as shown below, hit ENTER to apply the changes made.
sudo netplan try
Do you want to keep these settings?

Press ENTER before the timeout to accept the new configuration

Changes will revert in 118 seconds
Change the ethernet interface settings
You can configure the ethernet interface using a utility called ethtool.
Install ethtool using the command below:
sudo apt install ethtool
View the interface details:
sudo ethtool <interface-name>
The above command will yield output like the following:
bipul@asus:/etc/netplan$ sudo ethtool my_ethernet_1
Settings for my_ethernet_1:
	Supported ports: [ TP	 MII ]
	Supported link modes:   10baseT/Half 10baseT/Full
	                        100baseT/Half 100baseT/Full
	                        1000baseT/Full
	Supported pause frame use: Symmetric Receive-only
	Supports auto-negotiation: Yes
	Supported FEC modes: Not reported
	Advertised link modes:  10baseT/Half 10baseT/Full
	                        100baseT/Half 100baseT/Full
	                        1000baseT/Full
	Advertised pause frame use: Symmetric Receive-only
	Advertised auto-negotiation: Yes
	Advertised FEC modes: Not reported
	Speed: Unknown!
	Duplex: Unknown! (255)
	Auto-negotiation: on
	master-slave cfg: preferred slave
	master-slave status: unknown
	Port: Twisted Pair
	PHYAD: 0
	Transceiver: external
	MDI-X: Unknown
	Supports Wake-on: pumbg
	Wake-on: d
	Link detected: no
ethtool is a powerful utility that one can use to change parameters such as duplex mode, port speed, Wake-on-LAN support, etc. To view the syntax and usage of all the options covered by ethtool, enter the following command to read the Linux ethtool manual:
man ethtool
Once you are done, press Q to quit the manual page.
Set a temporary IP address
1. You can set a temporary IP address that will be lost after the device shuts down using the command:
sudo ip addr add <ip-address-with-netmask> dev <device-name>
In my case, it looks like this:
sudo ip addr add 10.32.0.166/24 dev my_ethernet_1
2. Next, you need to set a default gateway:
sudo ip route add default via <default-gateway>
3. To set a DNS, you need to move to the /etc/ folder:
cd /etc/
4. Edit the resolv.conf file:
sudo vi resolv.conf
5. Add the DNS servers as:
nameserver <DNS-server-IP>
For example, if I want to add the Cloudflare DNS server 1.1.1.1, I will enter:
nameserver 1.1.1.1
Do note that all the changes made here will be reverted back to original settings after reboot as this is a temporary IP address assignment.
Set a dynamic IP address
Setting a dynamic IP address with netplan is easy. As discussed above, you will need to edit the YAML configuration file.
1. Use the vi editor to edit the netplan config file as discussed before
2. Add the key dhcp4 under the ethernet device and set its value to true. The file should look like this:
# Let NetworkManager manage all devices on this system
network:
  version: 2
  renderer: NetworkManager
  ethernets:
    enp2s0:                       #Current logical name of your network device
      dhcp4: true
3. Apply the changes by entering:
sudo netplan try
Set a static IP address
We have already made an in-depth guide for setting up static IP addresses using netplan. Click here to check it out.
Summary
In this article, we learned a few common ways to configure a network on Ubuntu. Keep in mind that the knowledge compiled in this guide is just the tip of the iceberg and you can refer to the complete official documentation below.
References
- Ubuntu Network-Configuration
- Netplan reference