

While using a static IP may not be as robust as a dynamic (DHCP) one, it certainly has many uses of its own. Whether you are trying to set up your device as a web/FTP server or to configure it as a shared device on a local network, this tutorial will guide you through the different ways you can set up a static IP address on your Ubuntu device.
Difference Between Static and Dynamic IP Addresses
- As the name suggests, static IP addresses never change and are assigned to a device manually, whereas dynamic IP addresses are temporarily assigned to a device and change over time.
- Static IP addresses are assigned to a device by the ISP whereas dynamic IP addresses are assigned by a DHCP server.
- Dynamic IP addresses are mostly used by personal devices while shared devices or servers used in offices/organizations use a static IP address.
How To Set up a Static Ip Address in Ubuntu?
There are two methods to set up a static IP address in Ubuntu. Follow the methods below to easily set up a static IP address on your device.
Method 1: Using Ubuntu Settings
This is a straightforward method that can be done without the need to interact with the terminal. Also, this is the optimal method to use if you are on a Ubuntu desktop or any personal device running Ubuntu. Follow the steps below to keep going:
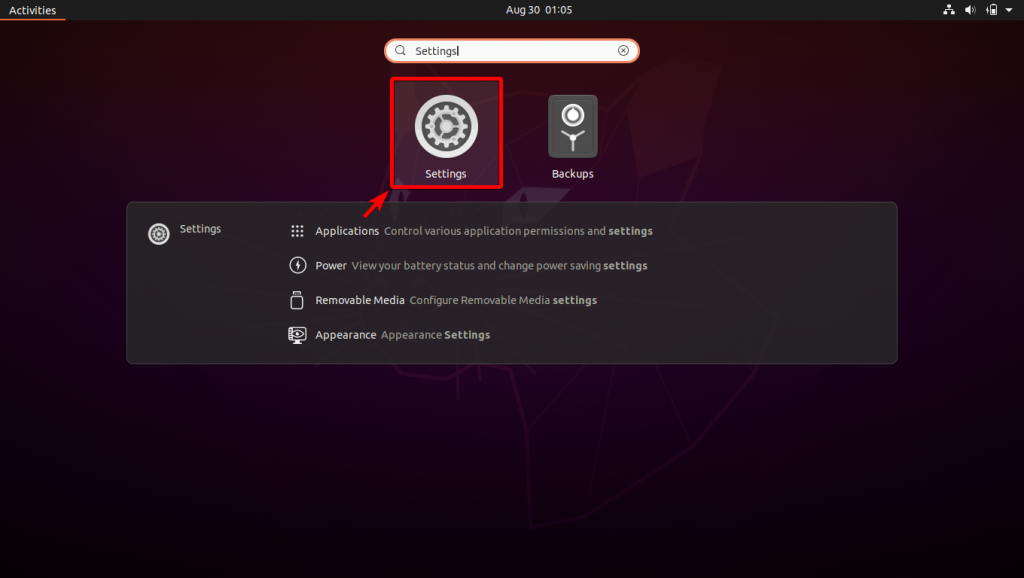
1. Open Settings from the list of applications
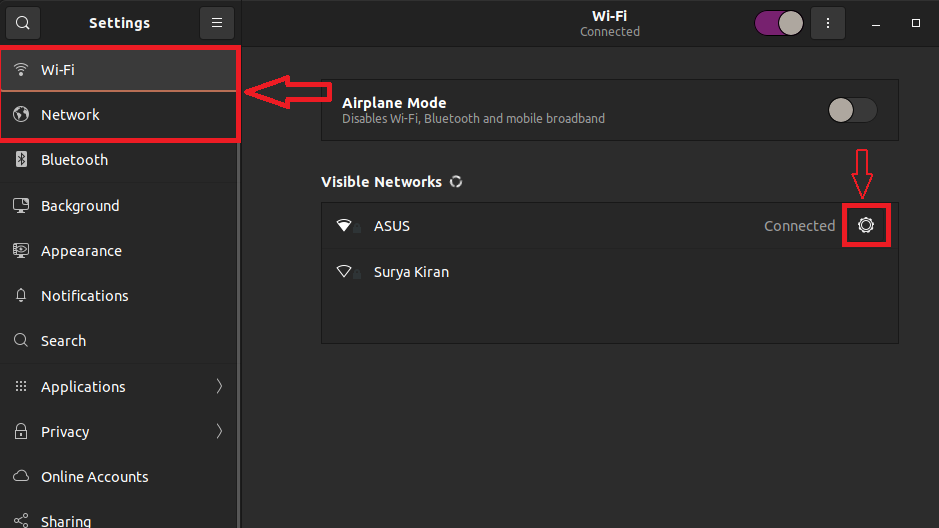
2. If you are using a Wi-Fi, click on Wi-Fi otherwise choose Network and then click on the small gear icon to open the corresponding settings menu
3. Go to the IPv4 tab and under IPv4 Method, choose Manual
4. Enter the suitable Address, Netmask and Gateway, and finally click on Apply to save the settings.
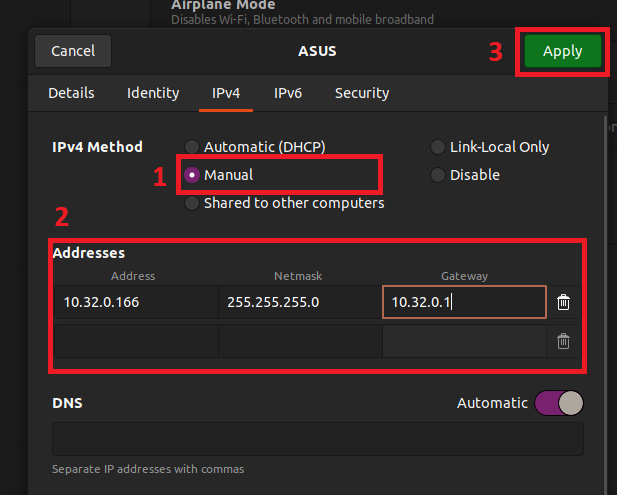
Note: To revert these changes and go back to dynamic IP, all you need to do is choose the Automatic (DHCP) option instead of the IPv4 Method chosen in step 3.
Method 2: By Creating a netplan Configuration
Netplan is a command-line network configuration tool that uses a YAML file to store the network configuration of our Ubuntu device. Using netplan is the recommended way to configure a static IP address for a server although you can also use it on your personal device.
Prerequisite:
You need the adapter name of the primary adapter you are using for the network connection. Follow the steps below to get details about your network adapter:
1. Open the terminal (Press Ctrl+Alt+T)
2. Enter the following command:
ip addr
This command will display the current IP addresses and their properties along with the adapter they belong to.
3. Note down the adapter name as shown below.
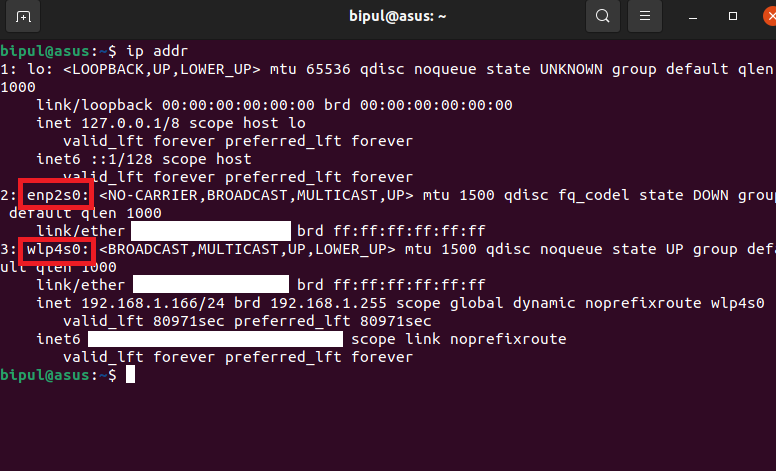
Please note that an adapter name starting with the prefix 'en' stands for ethernet (In case you are using a cable) and the one with the prefix ‘wl' stands for wireless LAN (In case you are using Wi-Fi). You have to choose the corresponding adapter name accordingly.
Creating the netplan configuration:
Once you have noted down your adapter name, you can continue with the steps below:
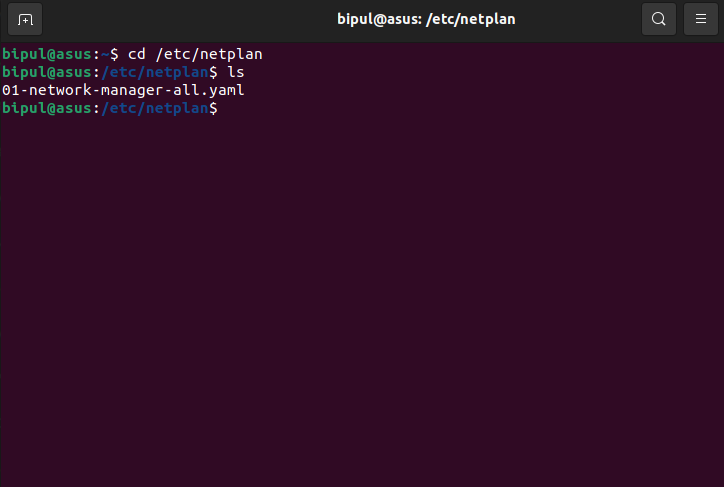
1. In the terminal enter the following command:
cd /etc/netplan
We need this command to navigate to the etc/netplan folder where we have to create the netplan configuration file.
2. Enter the ls command to list the files in the directory
We will edit the file 01-network-manager-all.yaml to set up our new IP address configuration.
3. To edit the file using the Vi editor, enter the following command:
sudo vi 01-network-manager-all.yaml
Once you are in the Vi interface, press I to start editing the file.
4. Now you need to carefully format the code and enter the correct parameters as shown in the example code below:
# Let NetworkManager manage all devices on this system
network:
  version: 2
  renderer: NetworkManager
  ethernets:
    enp2s0:      #Your adapter name
      dhcp4: no
      addresses: [10.32.0.166/24]       #Your IP address
      gateway4: 10.32.0.1                  #Your gateway address
      nameservers:
          addresses: [1.1.1.1, 1.0.0.1]    #DNS servers
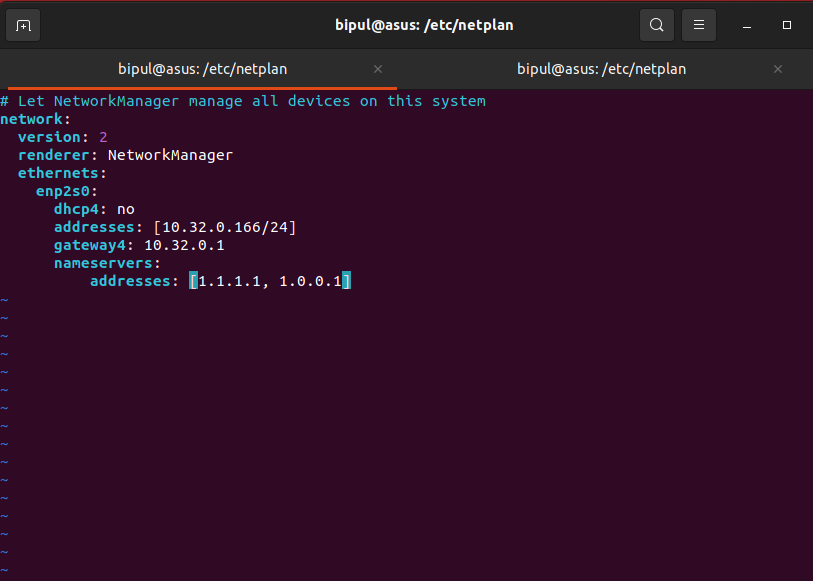
Once you have correctly entered the code save it by pressing ESC and entering :wq! in the Vi editor.
5. Enter the following code to try and apply the modifications made:
sudo netplan try
You can confirm whether the changes were made successfully by using the ip addr command again.
Conclusion
We discussed two methods to set up a static IP address on an Ubuntu device. The first method was relatively easy and minimal while the second method provided an advanced way to configure the IP address of our device. Thanks for sticking with us till the end, we hope that you were able to achieve your goal.
References
- Official Ubuntu documentation: https://ubuntu.com/server/docs/network-configuration
- SavvyNik on YouTube: https://www.youtube.com/watch?v=NjmcUYLmhj0&t=33s