

In this tutorial, we will learn about VMware Tools, its importance, features, and of course, the methods to install VMware Tools on Ubuntu or any other Linux Distributions.
What are VMware Tools?
VMware Tools enhances the functionality of the Virtual Machines running on VMware Workstation Player, VMware player, or fusion. The Guest OS does not behave like the Host OS. When it comes to performance and operation, there are certain limitations. To overcome those limitations, VMware Tools was introduced to enhance the overall performance.
Features of VMware tools:
- Clipboard Sharing
- Fast Graphic Performance
- Drag and Drop operation
- Network acceleration
- Time Synchronization between the Guest OS and the Host.
- Improves video resolution and Sound support.
- Auto resize Guest OS display.
We can install VMware Tools using open VM tools or official VM tools.
Installing VMware Tools using open VM tools
Open VM Tools is an open-source package available in the official package repository of Ubuntu. To install VMware Tools from the Ubuntu repository:
- Run the following command to update the packages using the sudo command:
sudo apt update
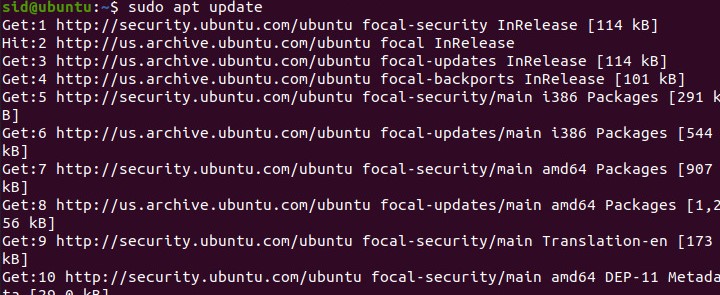
The packages should be updated.
- If you are using Server OS (Ubuntu Guest OS), enter the following command:
sudo apt install open-vm-tools

If you are using a Desktop OS (Ubuntu Desktop), enter the following command:
sudo apt install open-vm-tools-desktop
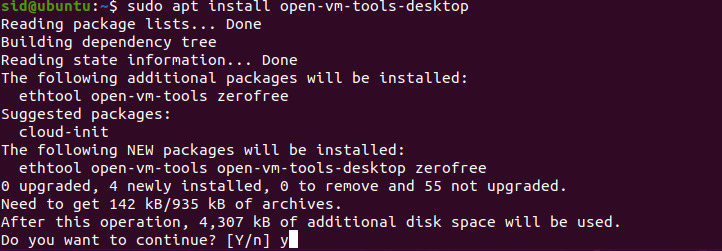
- Press Y and enter to confirm. Reboot your Virtual Machine.

- That’s it. Open VMware Tools is installed successfully.
Installing VMware Tools using official VMware Tools
We can install official VMware Tools either using a terminal or GUI.
1. Using Ubuntu Terminal
- Open the VMware player, workstation, or fusion. Start the Guest Virtual Machine.
- Select VM-> Install VMware Tools.
- In the Ubuntu Guest OS, Enter the following command to create a new directory:
sudo mkdir /mnt/cdrom

To mount the CD-ROM (the directory that we created above), run the below command:
sudo mount /dev/cdrom /mnt/cdrom

Run the following command to find the exact name of the VMware Tool bundle:
ls /mnt/cdrom

To extract the content of the VMware bundle, enter the following command:
tar xzvf /mnt/cdrom/VMwareTools-x.x.x-xxxx.tar.gz -C /tmp/
The above command is the general syntax. There are different versions of VMware Tools. Replace the VMwareTools-x.x.x-xxxx.tar.gz with the file name you found above.

Now, run the following command to change the directory to the VMware distribution folder.
$ cd /tmp/vmware-tools-distrib/

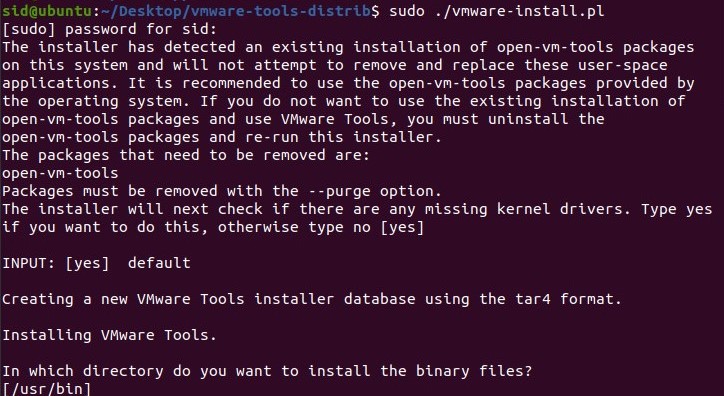
Finally, run this command to install VMware Tools:
sudo ./vmware-install.pl
2. Using GUI (Graphical User Interface)
If you are not familiar with the command line, you can easily install VMware Tools using GUI.
- Open VMware Player, Workstation, or Fusion. Start the Guest Virtual Machine.
- Navigate to VM -> Install VMware Tools.
- Mount the official VMware Tools CD/DVD mounted on the desktop by double-clicking on it.
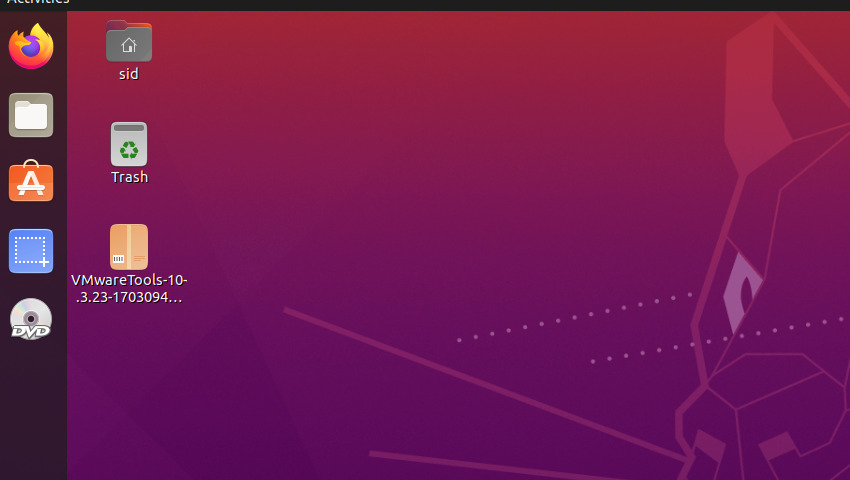
- Right click on the tar.gz file and click on Extract to to extract the compressed file.

- After the extraction. A vmware-tools-distrib folder will be created. Change the directory by running this code:
cd Desktop/vmware-tools-distrib

- Now, Enter the following command to install the official VMware tools:
sudo ./vmware-install.pl

- Press <enter> to accept all the defaults. Reboot your Virtual Machine for changes to take effect.

- You have successfully installed Official VMware Tools.

Conclusion
You can use any of the above methods to install VMware Tools for stability and better performance. You can copy-paste and share files between the guest OS and the host.
What is the process for installing VMware Tools on an Ubuntu Desktop virtual machine in ESXi?
The process involves downloading the VMware Tools bundle, mounting it in your Ubuntu virtual machine, and then executing the installation command using the command line interface, which varies depending on your version. You will need to follow the prompts to complete the installation.
Do I need to upgrade my Ubuntu server before installing VMware Tools?
It is generally recommended to keep your Ubuntu server updated, especially if you are using a version of VMware that may have compatibility improvements. However, you can install VMware Tools without upgrading your server if you’re using a compatible version.
What command do I need to run to find the installed version of VMware Tools?
You can run the command ‘vmware-toolbox-cmd -v’ in the command line interface to find the installed version of VMware Tools on your Ubuntu virtual machine.
Is it necessary to enter my password during the VMware Tools installation on Ubuntu Desktop?
Yes, during the installation process, you may need to enter your password for security reasons, especially when executing commands that require administrative privileges.
How does the installation file name of the VMware Tools bundle vary depending on the version of the VMware product?
The installation file name of the VMware Tools bundle varies depending on the version of the VMware product you are using. Make sure to download the correct bundle that corresponds with your ESXi version.
Can I install VMware Tools on a server with only a command line interface?
Yes, you can install VMware Tools on a server with only a command line interface, which is essential for virtualization. You will need to download the appropriate VMware Tools package and use command line commands to complete the installation.