

Eclipse is a popular cross-platform Java IDE that can be used to create and manage your Java projects. It also has plugins through which you can work with PHP, C++, JavaScript, and more programming languages on this application.
As this application does not come packaged in the official repositories of many Linux distributions, we have to manually do that by downloading the Eclipse installer tarball. In this tutorial, we are going to learn to Install the Eclipse IDE on Debian and Ubuntu based distributions.
Also read: Install R on Ubuntu distribution: A Complete Guide to Setting up R Development Environment
Method 1: Install Eclipse IDE on Ubuntu from Snap store
Snaps are enabled by default in Ubuntu installations. To install Eclipse from snap package management, run the following commands in a terminal :
sudo snap install --classic eclipse
Method 2: Install Eclipse on Ubuntu From the Official Repositories
This method is easy, but not recommended because this will usually install an old version of Eclipse, as Ubuntu Linux focuses on stability more than being up-to-date. To install the Eclipse package from the Software Center, open the software center and search for ‘Eclipse’. Click on the ‘Install’ button and type your desktop password when prompted.
You can also install it from the terminal by typing :
sudo apt update && sudo apt install eclipse
Method 3: Installing directly from the tarball
To install the latest version, we first have to manually install the dependencies of the program.
1. Install OpenJRE and JDK
JRE is used to run precompiled Jar files on Ubuntu, and therefore Java-based applications on Ubuntu also run on JRE. To install it from the command line, open a Terminal and type :
sudo apt update && sudo apt install default-jre
You can install a specific version of JRE by typing openjdk-8-jre or openjdk-17-jre instead of default-jre (Java 11+ is recommended for Eclipse). Next, we need to install the Open JDK Java development kit, which we will use to compile and run the Java programs. Type the following commands in the terminal to install it:
sudo apt install default-jdk
And if you are looking for a specific version of Java, you can install openjdk-8-jdk or openjdk-17-jdk packages (Java 11+ is recommended for Eclipse).
And if you have multiple versions of java installed at the same time, you can run the following command to choose a default version:
sudo update-alternatives --config java
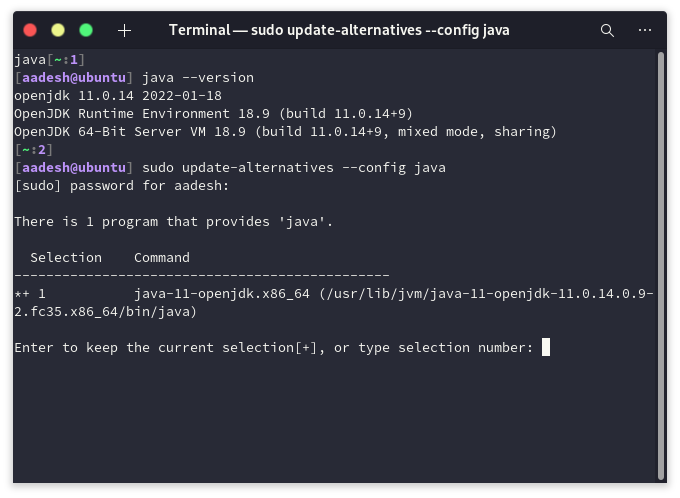
You will be presented with multiple options, select the version you prefer, and then press Enter.
While the snap method is ideal for Ubuntu, you can use this method for any Linux distribution, such as Linux Mint or Fedora. Head over to the official download page of Eclipse and download the latest x86_64 tarball (tar.gz file). Once the download is finished, head over to the downloads folder and extract the compressed file either by double-clicking or typing the following commands in the terminal :
tar xfz ~/Downloads/eclipse-inst-jre-linux64.tar.gz

After extracting the installer in the current directory, run the executable by typing :
~/Downloads/eclipse-installer/eclipse-inst
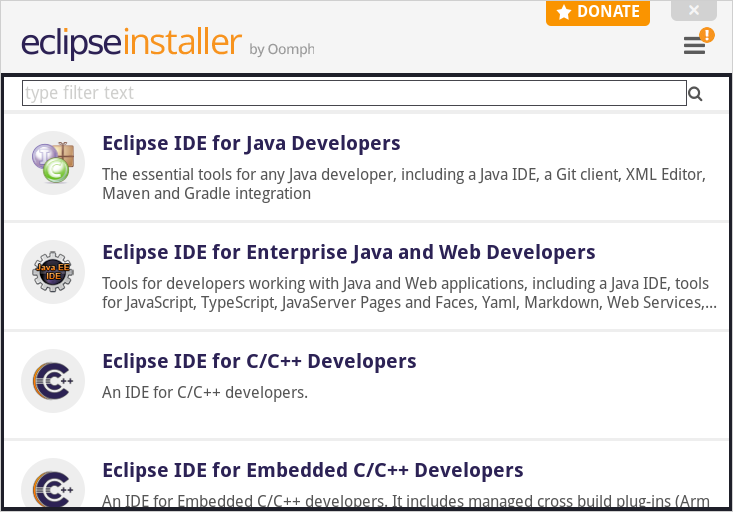
From the launched window, select the package you wish to install and click next.
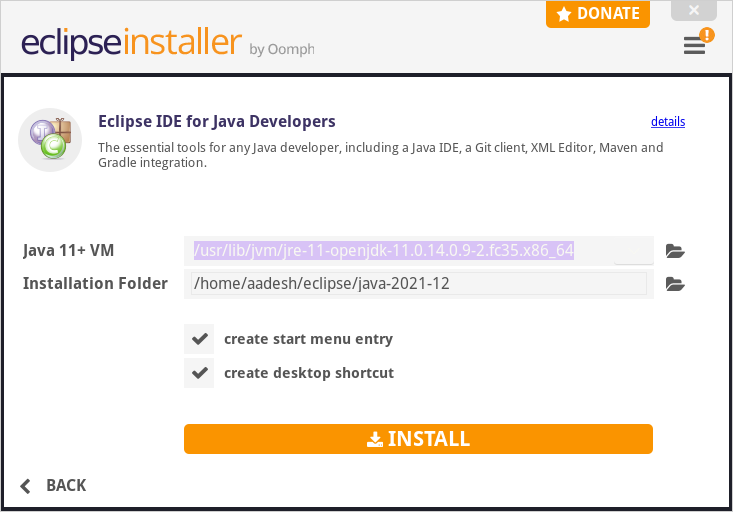
On the next screen, select the Java version and then finally click on the Install button. Eclipse will be installed on your Ubuntu installation. You can launch eclipse from the desktop shortcut or application menu.-
Summary
We hope you have learned how to install Eclipse on Ubuntu using this article as a guide. Enable plugins to make your experience even more smooth. And have fun coding!
Also Read
How to install a Jellyfin Server on Debian based distributions