

The Raspberry Pi is a highly useful mini-computer that you can use to create a local home server. While you can install Linux distributions on this device, the process is not entirely as simple as flashing an ISO to a USB drive and then installing it on an SSD. And unlike traditional CPUs which are built on the x86_64 architecture, Raspberry Pi runs on the ARM CPU and hence requires operating systems that support this architecture.
Raspbian or Raspberry Pi OS is based on Debian and therefore is the preferred operating system for this hardware. After a month or two after the Debian new release, an update is shipped to this OS as well and therefore requires an update. Like Debian, each version of Raspberry Pi OS is also supported for a very long time and therefore does not necessarily require a whole system update (you can still update your old OS to get important security updates). However, if you want to upgrade the version of the OS installed in your Pi, it is recommended by the developers that you do a clean fresh installation of the new version of the OS.
This, as you can notice, is not ideal for everyone since there are various custom config files, scripts as well and applications installed on the OS, which are not easy to back up, and sometimes users do not even remember the applications they have installed on the Pi. Hence, in this tutorial, we will try to update the Raspberry Pi OS like any other Linux distribution using the APT command.
Upgrading your Raspberry Pi OS is a straightforward process that involves backing up your data, resolving any pending updates, optionally upgrading the firmware, editing your update sources, performing the OS upgrade, and finally, cleaning up. This guide provides a step-by-step approach to help you smoothly transition to the latest version of Raspberry Pi OS.
Step 1: Back Up Your Data Before Upgrading
Seriously, back up any important files if you are performing this upgrade on any work machine that is handling critical tasks. Backing up is also an ideal practice before performing upgrades in a work environment. We are not responsible for any data loss or damage to your hardware.
You can use Timeshift or any other backup tool or script to back up your entire system on an external drive. You should also know that since we are going to perform a version upgrade, there will also be some downtime, although it will only be for a small time (for a single reboot) after the upgrade is complete.
Step 2: Resolve Any Pending Updates
Connect with your Pi using SSH, and then, make sure the system as well as the installed tools are up-to-date, for a smoother upgrade experience. Type the following commands in your Terminal window:
sudo apt update && sudo apt dist-upgrade
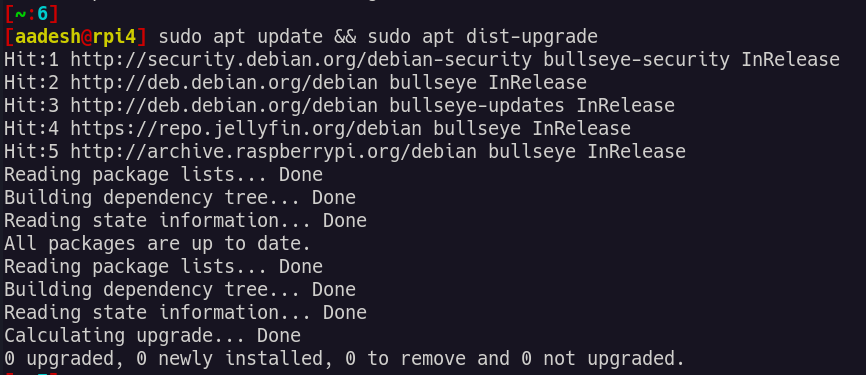
This command will refresh the repositories and also install any pending updates to the system, also reboot the system if the Terminal prompts you to do so.
Step 3: Optionally Upgrade the Firmware
Since you will have a downtime upgrading your Pi, why not install any Pending updates to the firmware of Raspberry Pi? Just type the following commands in your Terminal to perform a firmware upgrade:
sudo rpi-update
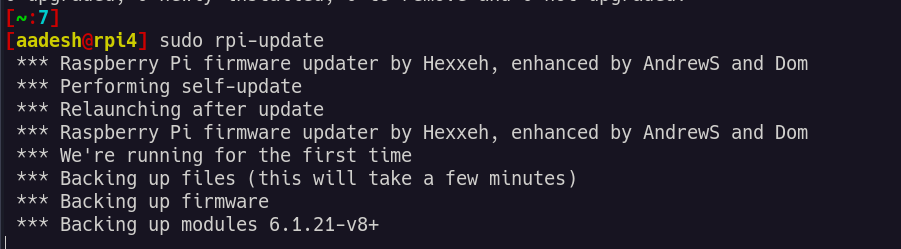
You will of course need to reboot for changes to take effect, but we will do that after performing the system updates as well.
Step 4: Edit Your Update Sources
The APT command tries to contact the websites listed in the sources.list file, which is located in the /etc/apt directory. We can remove anything that says ‘Bullseye’ and replace it with ‘Bookworm’ and when the APT command is run after this edit, it will contact the ‘Bookworm’ websites and perform any pending upgrades. To edit the source file, you use any preferred text editor like Vim or Nano. Just type the following commands in your Terminal:
sudo nano /etc/apt/sources.list

Once opened, navigate with the arrow keys and replace ‘Bookworm’ with ‘Bullseye’. When done, you can save the file by pressing Ctrl+O and then press Enter, and exit it by pressing Ctrl+X.
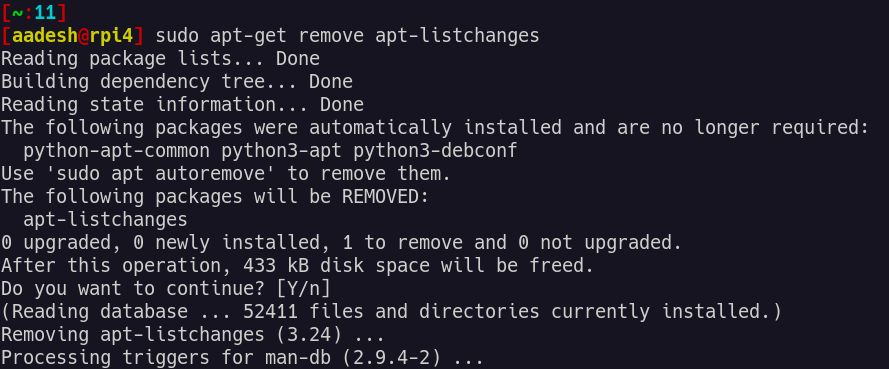
Now, you should remove the large changelog file, because it is going to save a lot of time when we will perform the upgrade.
sudo apt remove apt-listchanges
Step 5: Perform the OS Upgrade
Finally, we are ready to perform a full system update to our Raspberry Pi. Type the following commands in order to do this:
sudo apt update && sudo apt dist-upgrade
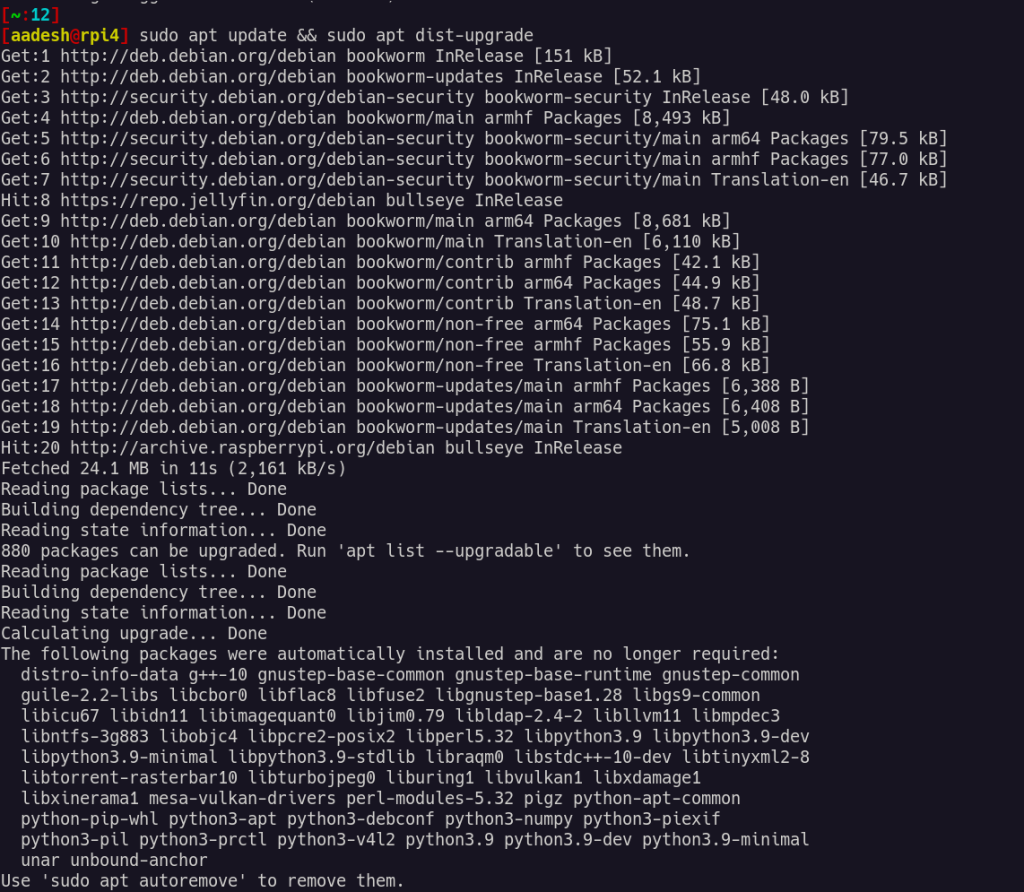
This step may take some time depending upon the tools installed, your network speed, etc, so be patient. During the updates are installed, you may be asked several times to either keep your config files or replace them from the repository, you should keep your own config files unless you want to write everything from scratch (this is the reason why we are performing the upgrade in the first place).\
Once the update is completed, simply reboot your system.
sudo reboot
Step 6: Post-Upgrade Cleanup
You may want to remove unused dependencies or tools that this upgrade has turned obsolete for the OS. To do that, you can simply use the apt command like this:
sudo apt autoremove -y && sudo apt autoclean
This also saves up disk space on your SD card. You can check the current version of the Installed Raspberry Pi OS with the help of Neofetch command.
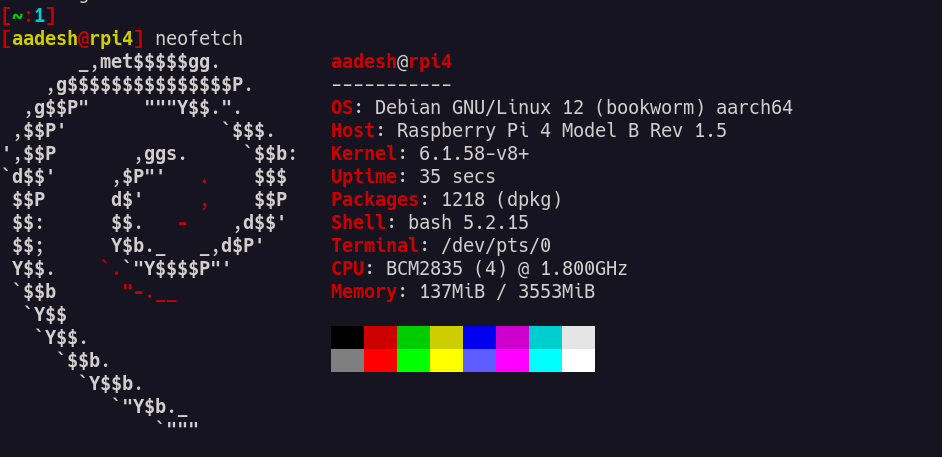
As you can see, we have successfully upgraded the OS to a newer version of Raspberry Pi OS.
Conclusion: What’s Next After Upgrading?
Raspberry Pi is an exceptional computer, and you can do all sorts of things with this machine. Holding the power of Debian, this OS is a perfect base on which you can install and self-host several applications and make it a home server. Here are several other projects that you can check out with the help of Raspberry Pi OS and make your life better, it takes a little effort, but believe me you will be satisfied with the end result. Now that you’ve successfully upgraded your Raspberry Pi OS, the possibilities are endless. What will you build next?