
Raspberry Pi is a very popular DIY microcontroller. It is used in various electrical builds to regulate signals and perform tasks. Enthusiasts, students, and teachers extensively use it to make their projects. It serves as an invaluable learning resource for electronics and programming.
There’s both a hardware component and a software component of the Raspberry Pi. Installing Raspberry Pi OS can be difficult on MicroSD cards or similar storage devices for new users. And that’s where the Rpi imager comes in.
Some of the features of the Rpi imager are:-
- The UI is very intuitive, user-friendly, and simple.
- It supports writing various OS to SD cards including Raspberry Pi OS, Ubuntu MATE, and RetroPie.
- You can customize the hostname, username, SSH, password, etc. while flashing the OS.
- It is compatible with popular operating systems, including Windows, Linux, and macOS.
Prerequisites for Installing Rpi Imager on Linux
The following Prerequisites should be taken care of before installing Rpi Imager on Linux:-
- You should have a stable internet connection for downloading Rpi Imager.
- You should update the package managers and your system.
- You should have the storage i.e. SD card that you want to flash the OS to.
- If you want to flash a custom OS, then its .img file should be available in your system.
- Ensure that your Linux distribution is supported by Rpi Imager
Step-by-Step Guide to Installing Rpi Imager on Linux
Rpi Imager is an essential tool for Raspberry Pi users, simplifying the OS installation process on SD cards. Developed as a successor to the NOOBS installer, Rpi Imager offers an intuitive UI and supports a wide range of operating systems including Raspberry Pi OS, Ubuntu MATE, and RetroPie. This guide walks you through the prerequisites, installation methods, and usage of Rpi Imager on Linux, making it easier for both beginners and advanced users to get started with their Raspberry Pi projects.
Rpi imager can be installed via package managers like apt, snap or by downloading the Debian package file from the official site. We’ve listed the methods of installation for these methods below.
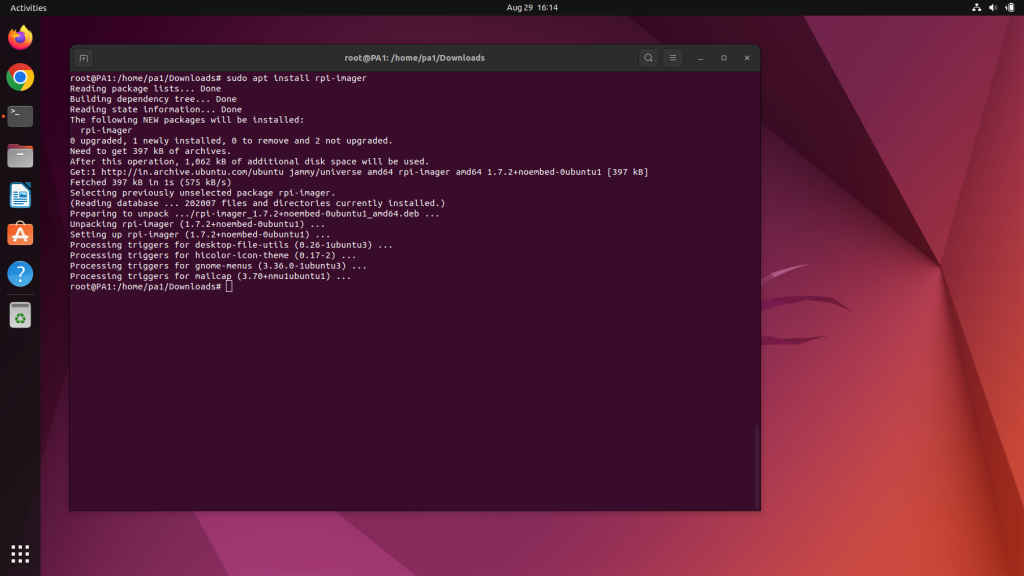
Installing Rpi Imager on Linux via apt
The Raspberry Pi Imaher package is available on the apt package manager’s repositories. Open the terminal as a root user and enter the following command:-
sudo apt install rpi-imager
Installing Rpi Imager on Linux via snap
The snap package manager can be used to install the Rpi imager as well. The command to do so is:-
sudo snap install rpi-imager
Manually Installing Rpi Imgaer via the .deb package file
The Debian package file is available on the official site. After downloading it, follow the steps below:-
- Open the terminal as a root user in the directory where the file is downloaded.
- Then use the command as follows:-
sudo dpkg -i imager_<version_name>
Rpi Imager will then be installed and ready for use.
How to Easily Use Rpi Imager for OS Installation
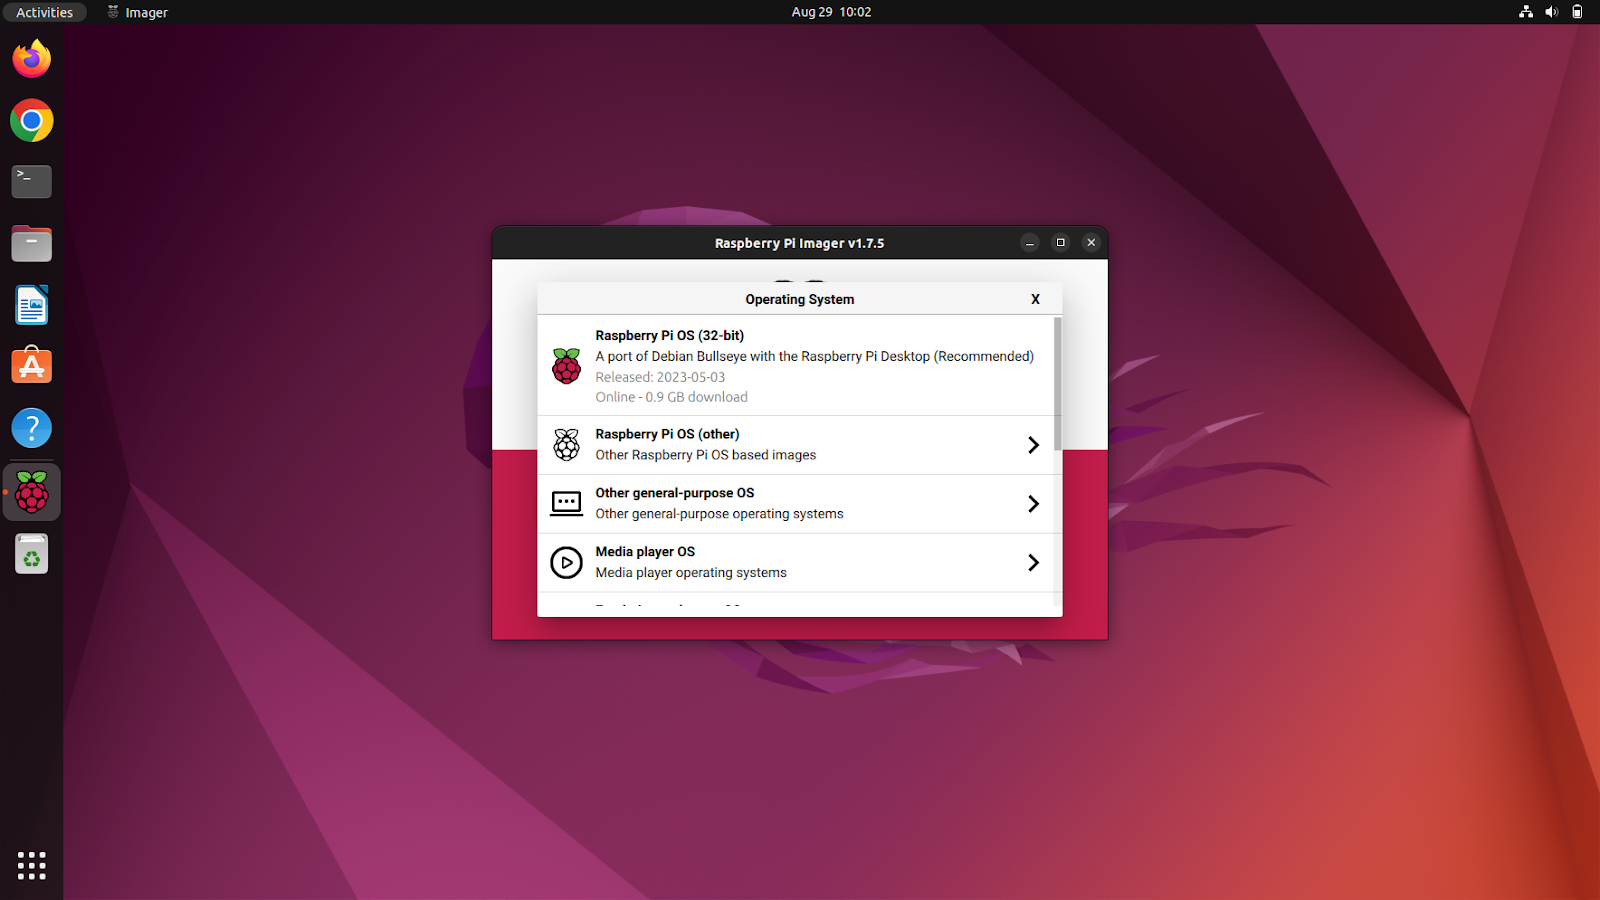
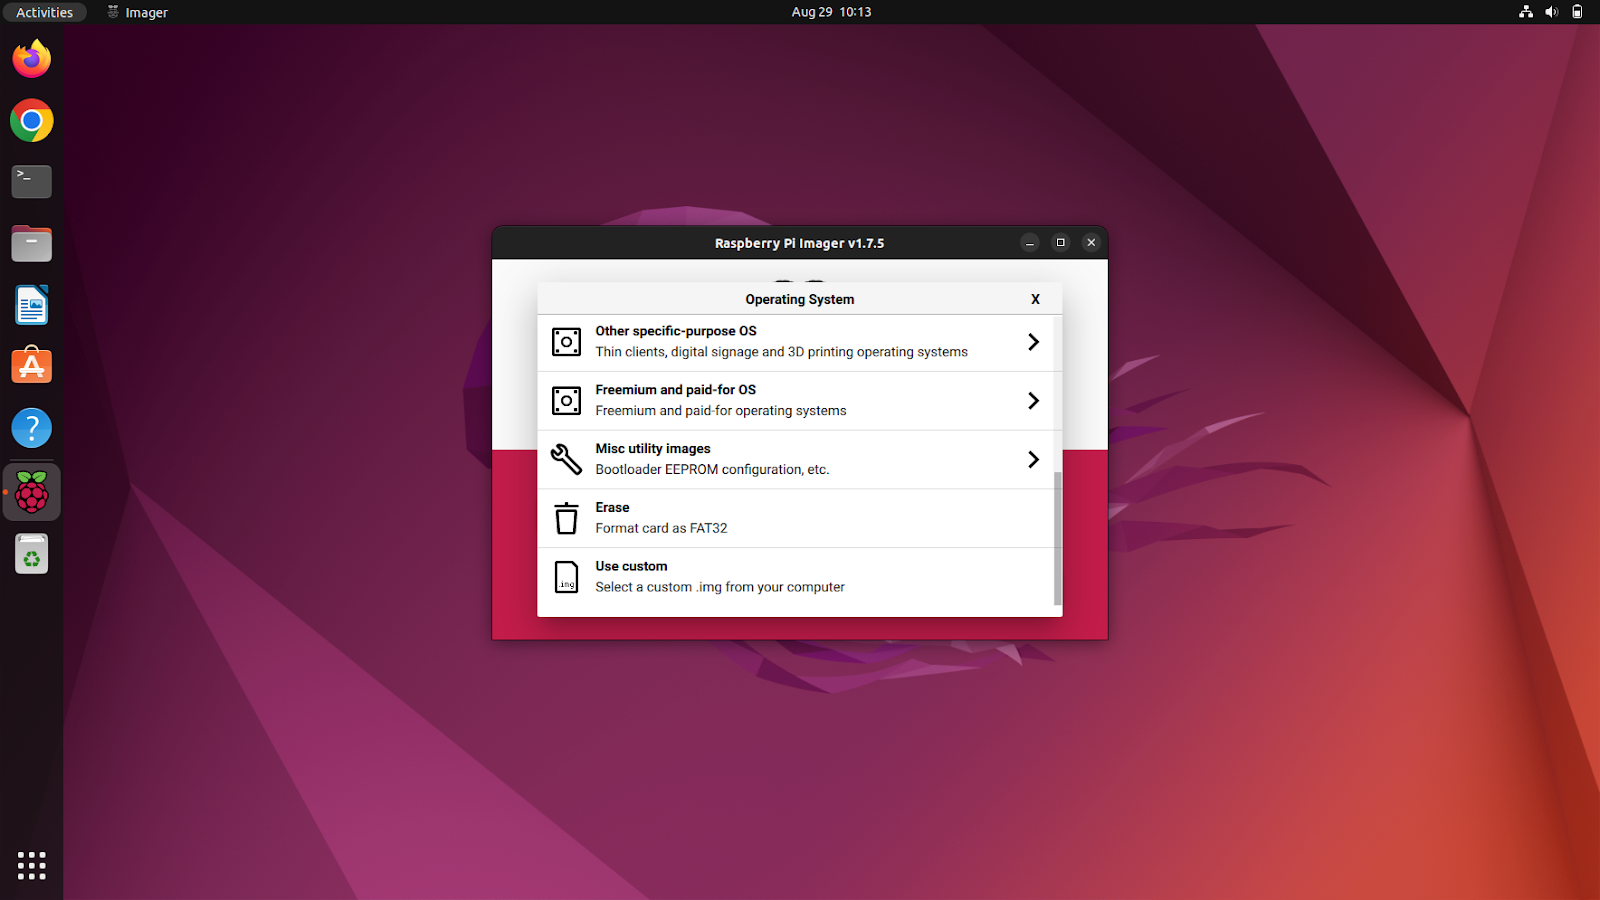
Using Rpi Imager is straightforward. First, connect the SD card to your machine. Launch the Rpi Imager from the activities tab or use the terminal if you’d like. Then select the OS you want to flash. Rpi Imager offers a variety of pre-loaded operating systems, including Raspberry Pi OS, media player OS, emulator OS, and more. You can also flash a custom OS using its .img file. You can choose the preferred one.
After choosing the OS, you’ve to select the storage. It should ideally be your SD card. Choose the preferred storage and then click on the Write option. It’ll tell you to verify that your data on the SD card will be erased. Accept it and the Rpi imager will flash the OS to your SD card.
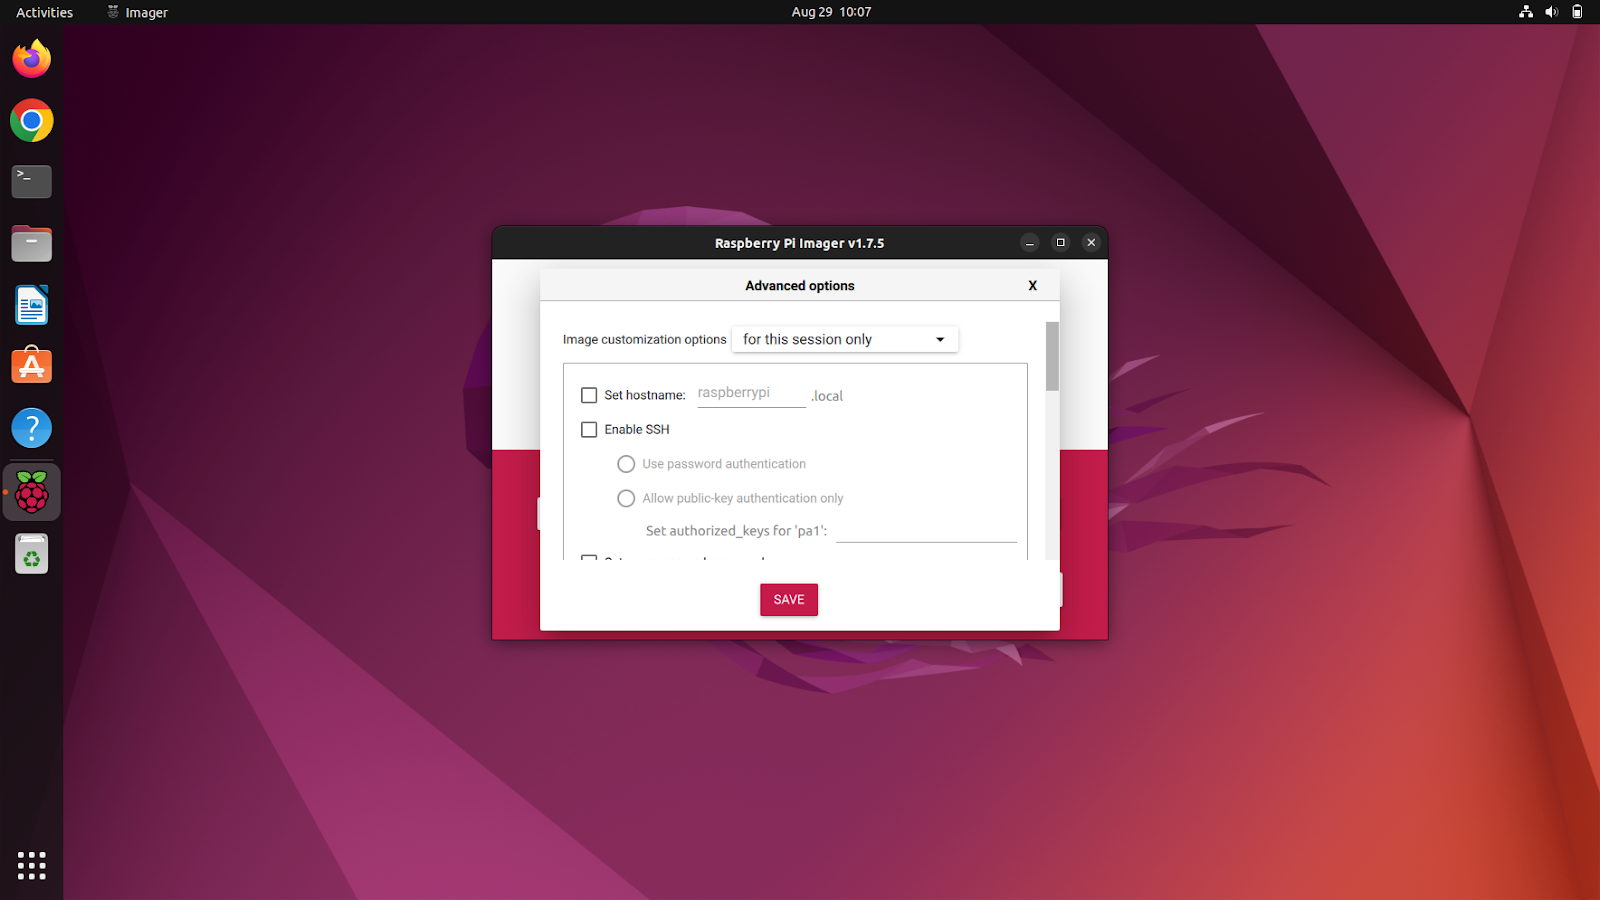
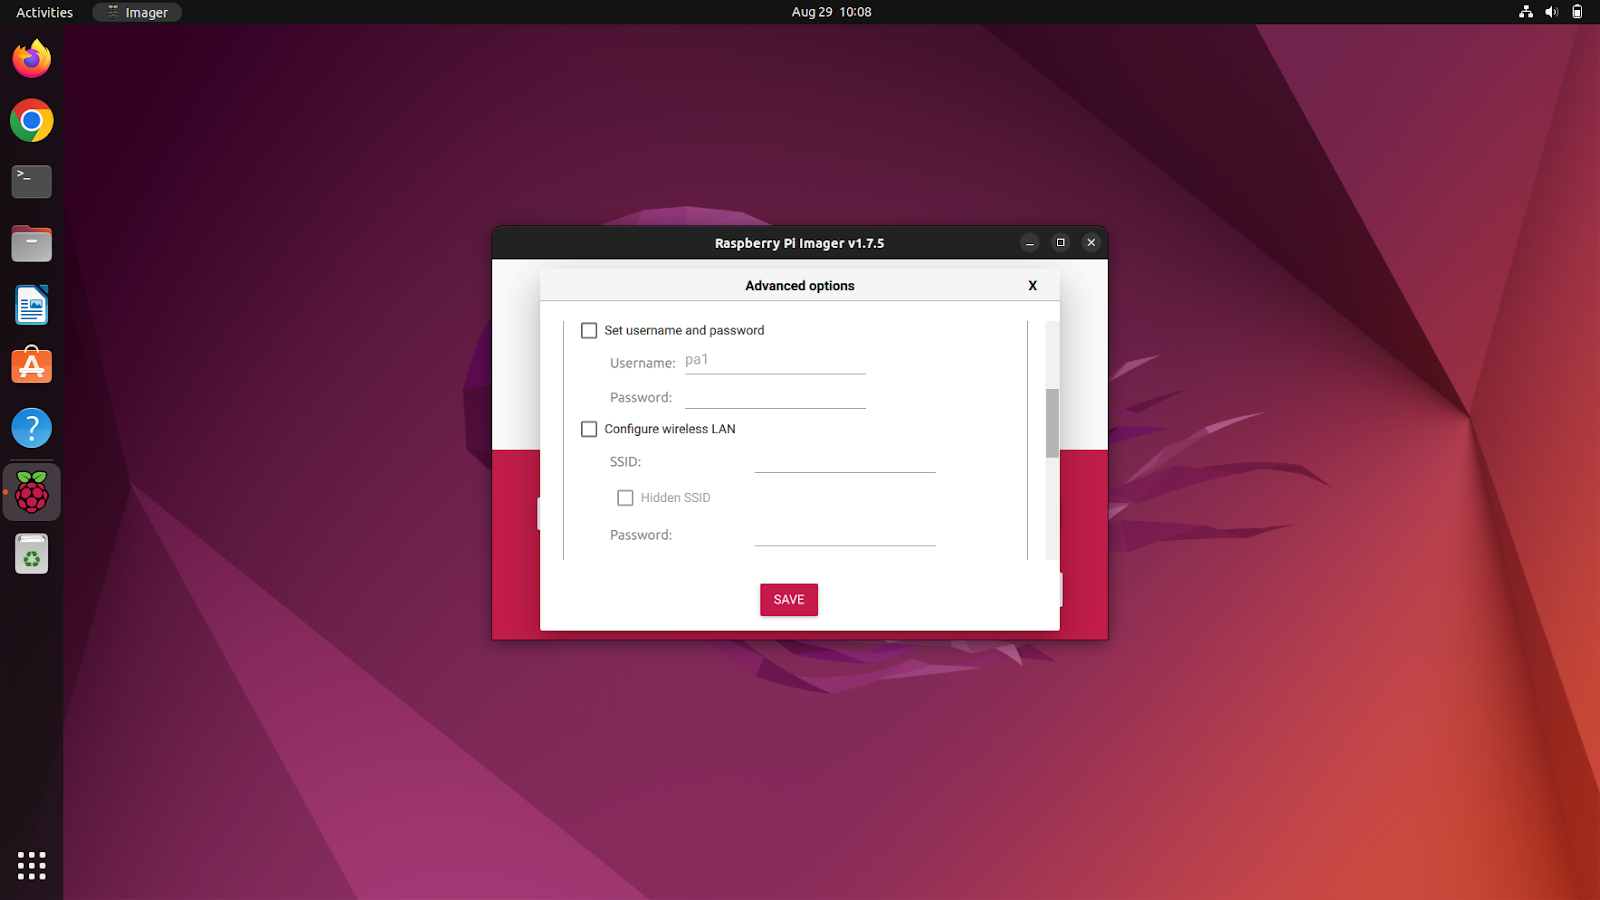
Unlocking Advanced Features in Rpi Imager
The advanced options can be accessed by Ctrl + Shift + X. It lets you configure a bunch of settings like hostname, SSH settings, username, password, LAN, etc.
Handy Utilities in Rpi Imager You Should Know
Rpi Imager also offers miscellaneous utilities such as BootLoader EPROM configuration and SD card erasure in FAT32 format. The BootLoader EPROM configuration can be used to restore the factory default settings and change the boot priority of the Raspberry Pi bootloader.
How to Uninstall Rpi Imager: A Quick Guide
If you’ve installed Rpi imager by apt package manager then use the command:-
sudo apt remove rpi-imager

And if you’ve used snap package manager then use the command:-
sudo snap remove rpi-imager
Wrapping Up: Simplify Your Raspberry Pi Experience with Rpi Imager
Rpi imager can help both beginners and advanced users flash OS into SD cards for use in Raspberry Pi. It is very easy to use and eliminates the complex procedure of flashing the OS. Flashing can be done with just a click of a few buttons which is very convenient. It supports a wide range of Raspberry Pi OS and you can update the OS through Rpi imager as well.
In this article, we’ve listed the prerequisites, methods of installation and a tutorial for Rpi Imager as well. So there you have it—a comprehensive guide to mastering Rpi Imager. Ready to take your Raspberry Pi projects to the next level?