

If you’re searching for a tutorial on the nmap Command in Linux, I’d love to first welcome you to the world of network security. Nmap utility which stands for Network Map is used to find open ports on a device connected to the network. The potential uses and the options to explore with the nmap command are just about endless because of the flexibility offered by this utility.
But let’s go over some of the most common options, which will get you started on scanning your first few networks and learn more about the ports that are open for your personal device or servers.
Default Usage of the nmap Command in Linux:
nmap [options] <target IP or hostname>
1. Basic Nmap Scanning Methods
The most basic types of scans are the TCP and UDP scan, SYN scan, and Ping scan. What these scanning methods essentially do is craft and send a specific type of packet to the target IP and wait for a response. Based on the response, the nmap command in Linux determined if a port is open or closed and the status of the target machine.
TCP Connect() Scan Using Nmap command in Linux
The name of the scan denotes the connect() system call which is made by all UNIX systems when you perform socket programming. This scan uses the same system call to determine open or closed ports. How does it work? It’s simple. The nmap utility sends a connect request to every port and waits for the TCP connection to complete. If it does complete, the port is open. If it doesn’t complete, the port is closed.
nmap -sT <IP or hostname>
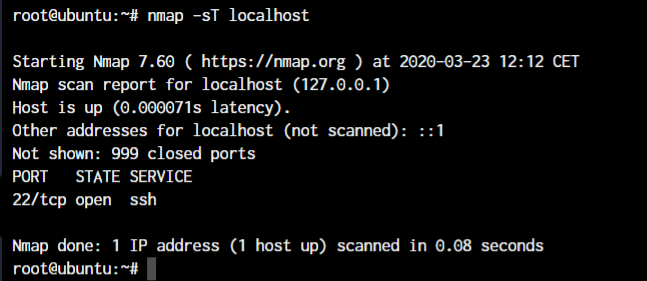
As you can see in the above screenshot, we scanned the localhost and we get the ports that are open on the system. In this case, it’s only the SSH port 22 which is open for our server.
UDP Scan Using Linux nmap Command
Moving on from the TCP connect scan, let’s go ahead with the UDP scan. The difference between the TCP and UDP connections is that TCP packet waits for the server to confirm with a response packet while a UDP packet simply checks if the packet reached the server. With the UDP scan, you can see all the UDP ports that are open.
If you can see in the above screenshot, it says 22/tcp which means that the server will respond to a TCP packet and will reject a UDP packet (unless there’s a faulty firewall configuration.
nmap -sU <hostname or IP>
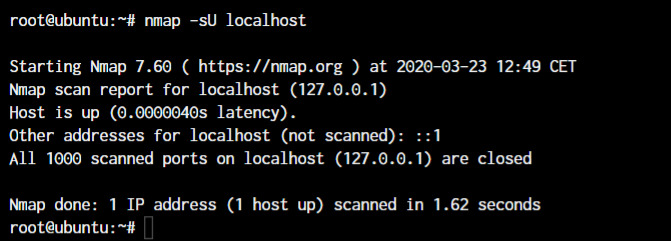
Notice how the UDP scan returns with no open ports listed. This is because we don’t have any open UDP ports on our server.
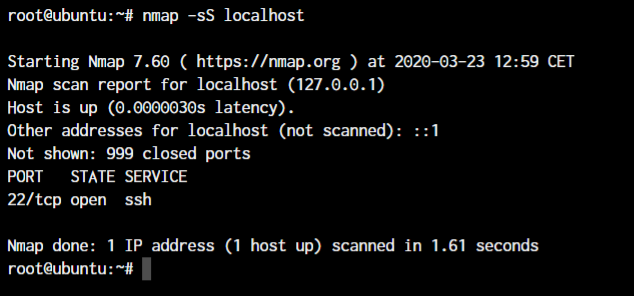
SYN Scan Using nmap
We looked at the TCP and UDP scanning methods. Let’s go over the SYN method of port scanning. Remember how we mentioned that once a packet is sent, the TCP packet waits for a response from the server? These two packets are called as SYN and ACK.
- SYN – This packet is sent by a client as a synchronization request
- ACK – Once the server receives the SYN packet and has the necessary ports open for requests, it responds with an acknowledgement
What happens if we only send SYN packets and don’t really wait for the acknowledgment of the connection? We get a really fast yet stealthy port scan. This is because we’re simply sending a synchronization request and then just moving on. The server may or may not respond with an ACK and based on what the response is, the SYN scan interprets if the port is open/closed/filtered.
nmap -sS <target host or IP>
If the SYN packet receives an:
- ACK packet – The port is open
- RST Packet – The port is closed (RST = Reset)
- No response or Unreachable Error – Port is filtered
- ICMP Unreachable – Port filtered
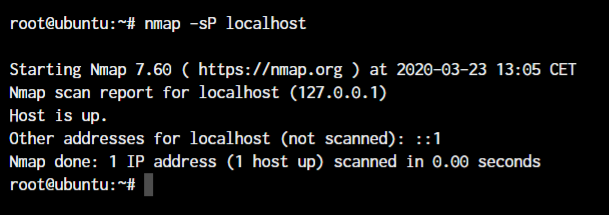
Ping Scan Using the nmap Command in Linux
Okay, we’ve seen the basic port scanning techniques above, but the Ping scan is yet another scan that allows us to confirm if a machine is connective to a network or not. Very simple: It sends an ICMP packet and waits for confirmation from the target. This scan is equivalent to the ping command but can be performed on hundreds of target addresses in one command.
nmap -sP <target IP or hostname>
2. Advanced Nmap Scanning Method
The techniques that we mentioned above can easily be filtered and blocked by firewalls. But there are some more methods that we can use, send differently crafted packets to find if a port that’s detected as closed, really is closed.
ACK Scan Using nmap Command in Linux
I mentioned about how a TCP packet waits for the ACK packet to confirm the connection. But what if we directly send the ACK packet instead of the SYN packet? Let’s understand this.
Most firewalls will anyway block this kind of a trick but some firewalls built on basic rules might allow this letting us know which ports are open. This is because an ACK packet denotes that the connection was already established from the server and our system is only confirming the connection.
Cheap trick? Yes. Works? Sometimes. Worth a try? Of course.
nmap -sA <target IP or hostname>
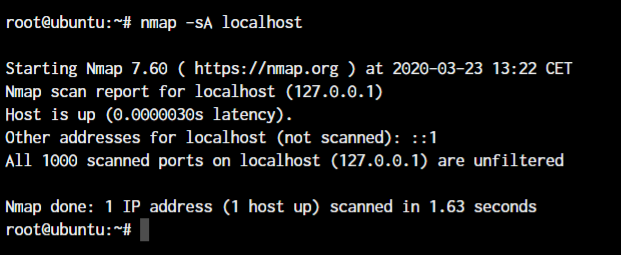
Well as you can see, it responds with 0 open ports which means our firewall and systems are working fine and not responding to unnecessary packets.
TCP Window Size Scan Using nmap Command
This is similar to the TCP connect() scan but it works on the anomalies of the Window Size reporting. This command is sometimes useful when other methods failed. But as with any other network security testing tool, there’s no specific way to do things. Every system is configured differently and you need to work with those systems differently too.
nmap -sW <target IP or hostname>
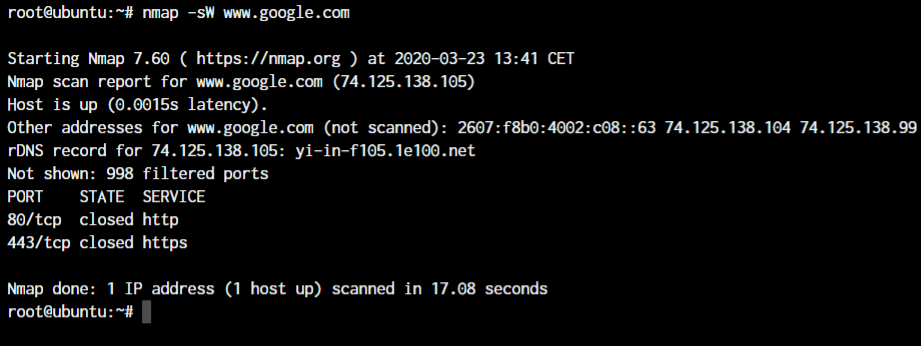
In this case, I’ve used Google as an example in this port scanning demonstration because our localhost has just one open port. Have a look at the above example, and you’ll see the HTTP and HTTPS ports are “CLOSED” but we know that both the ports are open when we connect to them! How’s that possible?
That’s because the Google servers are blocking ANY traffic that’s not coming from a browser. In our case, we tried a window size scan and that’s not an HTTP or HTTPS traffic. If we manage to send an HTTP packet to the Google server on port 80 or 443, we’ll get the entire HTML source code of the page as an output.
RPC Scan Using The Nmap Command in Linux
A remote procedure call or RPC scan would be used with some other types of scans mentioned above that allow you to determine if a port has an RPC compliant application running in the background. A remote procedure call allows us to determine the application and the version number that the application is on making it easy for hackers to determine bugs and exploit them.
nmap -sR  <target IP or Hostname>
OR
nmap -sV  <target IP or Hostname>
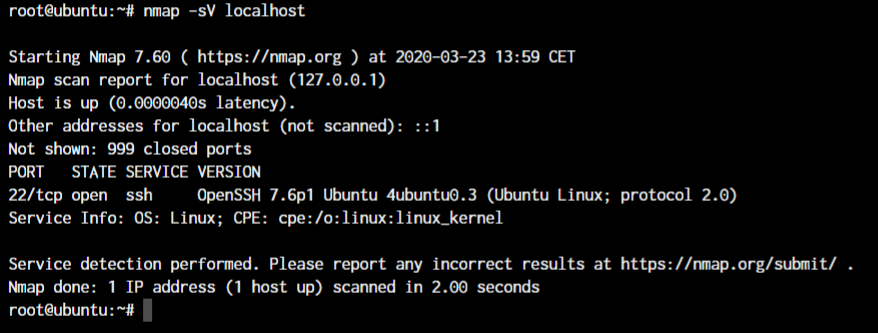
-sR is an alias for the -sV option and both help in finding the application and the version running behind the specific ports.
3. Scanning Stealthily
All of the scans we have discussed above are more or less detectable by firewalls when used independently. So we need to apply some covert tactics to hide our attempts at finding ports. One of the easiest method is to slow down the scanning so much so that the firewalls are unable to differentiate port scanning packets from regular traffic.
Slowing Down Port Scanning Using nmap Command in Linux
In the above scans, you saw how quickly all ports were being scanned. If a firewall is active, it will very quickly raise an alarm and detect and then block our port scanning attempt. On badly configured firewalls too, this is easily detectable so it’s best to slow down our scanning if we know that a specific website doesn’t really see much traffic in general.
For example, if I scan Google very quickly, there’s nothing to worry about because:
- Google’s servers are very secure
- Google receives billions of search requests a day – Our port scanning packets are minuscule
- Google has configured their firewalls really well since they have no other choice. So it’s unlikely that you’ll end up being able to find vulnerable ports on their servers.
But if I scan an unknown website for open ports, and send thousands of packets in a short amount of time, the spike in request traffic will be very visible. Let’s learn how to slow down scanning while using the nmap command in Linux.
nmap -T<0-5> <IP or Hostname>
The explanation for 0 to 5 in the nmap command in Linux are as below:
- paranoid (0) – Slowest, waits 5 minutes before sending each packet
- sneaky (1)
- polite (2)
- normal (3) – Default scanning speed if nothing is specified
- aggressive (4)
- insane (5) – Fastest, sends packets as fast as possible
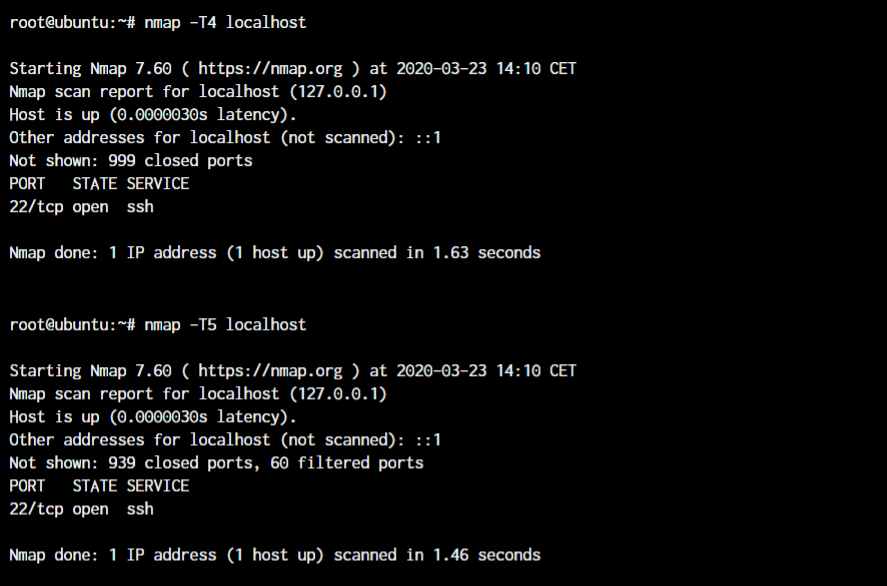
I’m running only the T4 and T5 for the demonstration. As I’m working with the localhost, I don’t have any reason to slow down my scans here. When you’re in a real-world situation, you can adjust your scan timing accordingly.
Fragmenting Packets using the nmap Command in Linux
Some firewalls have built-in mechanisms to defragment packets and combine them together. But not all of them have it. So what if we could send all packets in smaller pieces?
Firewalls that cannot handle fragmented data will simply pass it to the requested port and expect the operating system to perform the defragmentation. That’s a success for us since we get to know if the port is open or not!
nmap -f -sT <IP or hostname>
This command option, paired with a specific scan type will fragment the packets that are being sent to the target IP.
Using Decoy IPs With nmap Command in Linux
This is one of the best methods to hide your port scanning attempts from firewalls if you know a few IPs that are already scanning the same IP. Instead of hiding your IP, it just makes your attempts look like a host of other IPs that are doing the same thing.
For this method, you need to know a few IP addresses that are decoys for the network you’re trying to scan.
nmap -D<comma separated IP addresses> <remote IP>
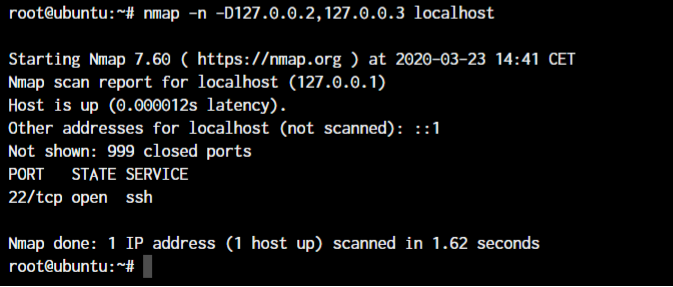
Now the demonstration won’t really show up much to you apart from the extra IPs that I’ve added but you can have a look at the packets in Wireshark to analyze the packets that are being sent and the IP addresses that they’re being sent from.
Conclusion
This is a very comprehensive tutorial on the nmap command in Linux but is in no way an extensive one because of the tons of variations that are available and can be performed with the nmap command options. If you’re looking for a complete tutorial, have a read through the nmap handbook.