

This article talks about the nice command in Linux. In Linux, each process has a nice value granted to it. This value influences the scheduling of processes and thereby determining the amount of CPU to spent on each one of them. “The more the nice value, the less the supposed priority”. This ultimately means that the more the process is nice, the more it allows other processes to get CPU.
The nice value ranges from -20 to 19 where -20 means a process is not nice, therefore must be given more priority, and 19 is the nicest process, therefore allows other processes to access resources before itself.
There is yet another priority in play, which denotes the actual priority in the eyes of the kernel. The Nice Value is not a real-time priority value but can be considered as a hint to the kernel about what range of priority a particular process should have.
Monitoring the nice value
We can not influence the value before monitoring it. Therefore, Linux has a set of system monitoring commands like top, atop, and htop that can be used to figure out nice values for every process in the system.
Using the standard top command
top is a simple command that provides information about the utilization of the system’s resources by each process. This includes knowledge related to CPU scheduling. By typing top in the terminal we get:
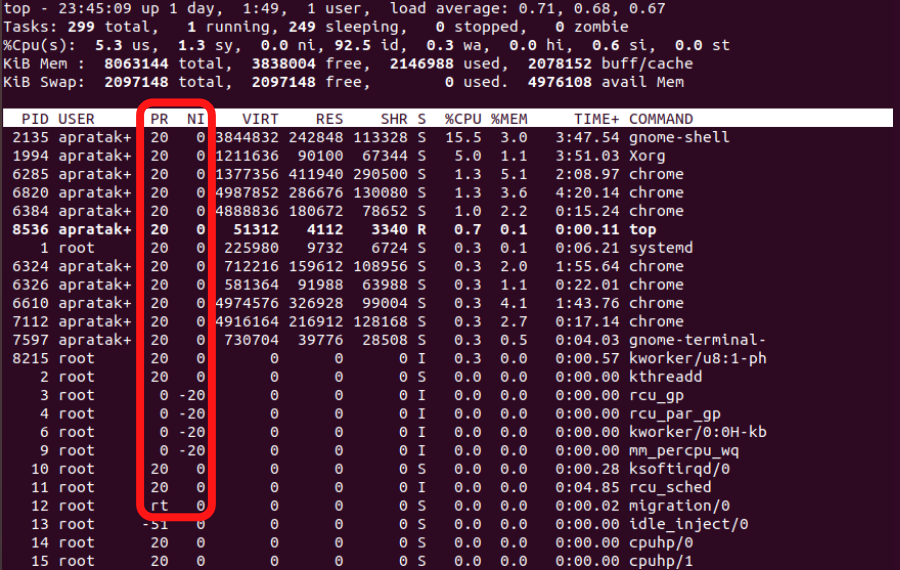
The two adjoining columns denote the priority-related values for every process. The PR column denotes the actual kernel-given priority of the process, whereas the NI column provides the Nice Value for each process. We have a complete article based on the top command if the user wants to gain further knowledge about it.
Using the htop command
htop is an interactive tool for displaying the usage of the system’s resources. It supports searching and filtering of values for the user’s convenience. We have to simply enter htop to obtain all the relevant information.
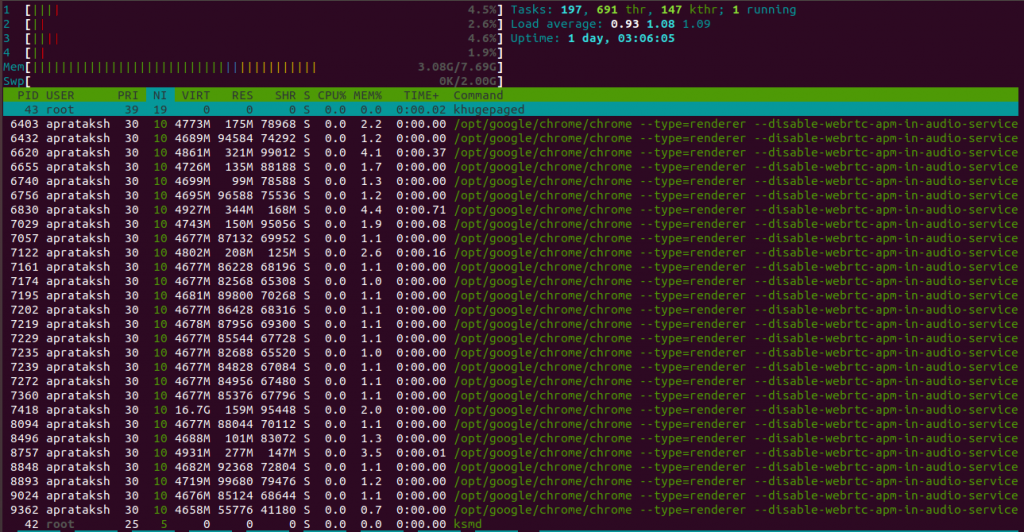
The fourth column denotes the nice value. This utility sorts the processes on a click on a specific column name. In the above figure, all the processes are sorted in decreasing order of nice value. Curious readers can visit here for more information about htop command.
Display the current niceness
The nice command without any parameters display the nice value of the bash running on the terminal.

As seen in the above figure, the default value is set to 0. This implies that any command running using this terminal will have the same nice value.
Standard usage of nice command in Linux
The nice command can be used to start a process with a nice value specified by the user. This basically alters the actual priority assigned by the kernel.
Let us run an example for efficient understanding:
sudo nice -n <VALUE> <COMMAND>

In the above snippet, we initiate the htop utility with a nice value of -10. We can refer the result in the command’s output:
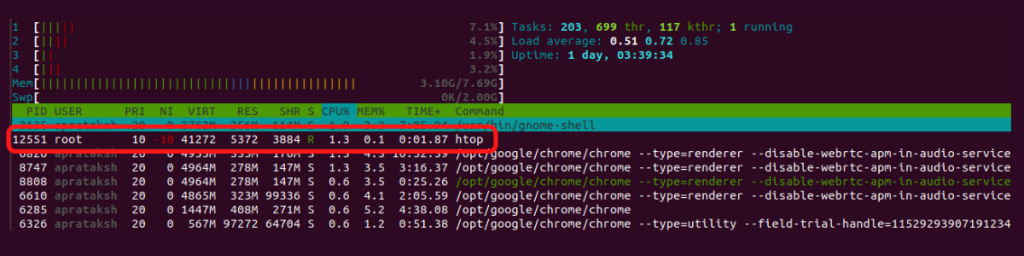
By default, htop runs with a nice value of 0. It must be duly noted that to run a command with nice value less than 0, the root permissions are necessary.
Set a nice value for the bash
Instead of using nice command for every process we create, we can set a particular nice value to the current bash. It is done by:
sudo nice -n <VALUE> bash

The result can be noticed using the same htop command initiated above:

The htop command inherited the nice value of the bash which was used to run it.
Conclusion
Though the nice command has a simple usage and rather less technicality, but it stands out as a crucial command in the context of process scheduling. We have a bunch of articles on Linux commands which are worth a read. Make sure you check them out.