

As the name suggests, the locate command in Linux is used to find files in the system by their names. This command is more efficient than the prominent find command that serves the same purpose. The reason for this efficacy is that the locate command uses a database instead of traversing through the entire file structure.
If you don’t have the utility on your system, you can download the mlocate package. Ubuntu users can install it by running:
sudo apt install mlocate
Whereas other Linux users can install it using their standard installation commands followed by mlocate.
How to use the locate command in Linux?
Let’s go over the features and functionality of the locate command in Linux. However, as we mentioned before, there’s a database that the locate command searches through. So I’ll begin by updating the database first.
1. Update the mlocate database
The locate command depends on the mlocate (Merging locate) database. The Cron utility is responsible for updating the database daily. Curious readers can visit the mlocate file in the /etc/cron.daily/ directory to learn about the processes involved.
There is a manual way to update the database by running sudo updatedb in the terminal. The mlocate database reuses its existing database and therefore the updation is achieved in no time.
The major drawback of using a database for searching files is that the database needs to be updated before we try to search for any newly created file.
2. Search a file/folder by name using the locate command
We can search for files or folders by their names using the locate command by:
locate -b <FILE_NAME>

locate -b <FOLDER_NAME>

As seen from the snippet, the command returns the absolute path of the files and folders along with their names. The '-b' option tells the command to search the name in the basename, instead of including the complete path.
The below output will clarify the difference.
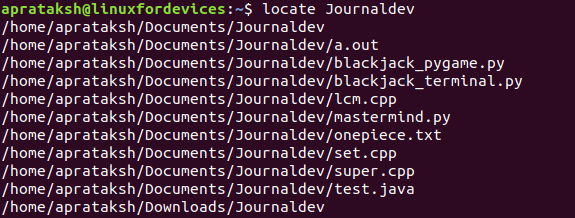
The command without '-b' flag includes all files that contain the folder name in their paths.
3. Count the number of matched files
The locate command can easily return the count of match files. The following command prints the number of .txt files in the system.
locate -c .txt

The '-c' option refers to the count of files that match the specified pattern.
4. Limit the number of items in the locate command output
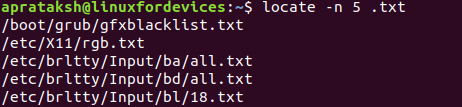
With thousands of files in the system, the size of output can increase tremendously and overflow the terminal. Therefore, the locate command provides '-n' flag that restricts the number of items in the output.
locate -n 5 .txt
5. Display only existing files
As we previously mentioned, the database needs to be updated every time a file is added or deleted. There is one shortcut provision that verifies the existence of a file in the system.
locate -e <FILE_NAME>

In the above snippet of the terminal, we remove the text file and then try to locate the file using the normal command. As we can see, the standard command returns the file name even though it is already removed. The purpose of the ‘-e’ flag is to tackle such a situation by verifying whether the file exists.
An easy alternate to the above flag would be updating the database by running sudo updatedb.
6. Ignoring case while searching
By default, the Linux locate command is case-sensitive. There is an in-built option that switches off the case checking module.
locate -i LiNuX

Even though the letters are in jumbled case, the command effectively finds files having ‘linux’ in their name.
7. Using regular expressions for searching
an important method that we haven’t talk about yet is when we search for files without any additional options, the locate command returns files containing the matching string, instead of the identical filename.
As shown in the previous example, the output shows filenames that contain “linux”, instead of files that are entirely named “linux”.
The reason behind this is that when matching names without the '--regex' option, if we use “linux” as the matching string, the command converts the matching pattern to “*linux*”, which translates to all those files containing “linux” in between their names.
The locate command provides '--regex' option to search for complex patterns.
locate --regex "PATTERN"
In order to match files having names identical to the matching string, we use:
locate --regex "/STRING$"
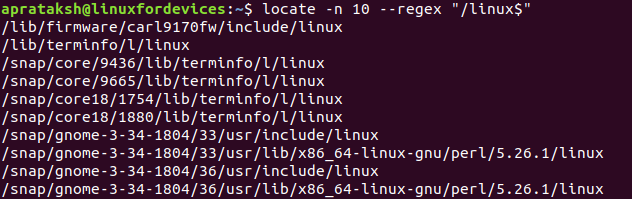
In addition to matching the regular expression, the command in the above figure restricts the number of items in the output to 10. To learn more about regular expressions, visit here.
8. Using the locate command to search other databases
The locating of filenames happens through the mlocate database by default. The creators of locate command added an option of locating files in user-defined databases. This can be achieved by using the '-d' option.
locate -d <DB_NAME> <PATTERN>
The relative path is needed in case the database is not present in the current working directory.
Conclusion
The locate command is a simple Linux utility to search for files efficiently. The find command serves a similar purpose and has more background, but being a complex command reduces its popularity among new Linux users. To learn more about the locate command, you can read through the manual pages using the man command.