

To ensure you always have an up to date system without much intervention, we need to configure automatic updates using Cronjob. Manually updating may lead to missing out on critical updates and you need to have the latest updates and patches to make sure that your device is safe from both security threads and software bugs. Cronjobs make your life easier by giving you the opportunity to perform tasks automatically at specific intervals without any intervention from you.
This tutorial was made with Ubuntu. But if you’re using any other Linux distro, you can follow the same process after you install cron on your system. The only difference for the tutorial will be the installation process.
Installing Cron on Your System
Cron in Linux systems is a utility that is designed to schedule and run a command or a script on your system at a pre-specified date and time. This task of executing a script or command is labeled as a cron job and it runs in the background on your system. While most Linux distributions come with cron installed on them as default if it is not present on your Ubuntu system you need to install it.
Before we do this, we need to update our default repositories using the apt package management service. To do this, you need to open the terminal on your Ubuntu system and type the following.
sudo apt update && sudo apt upgrade
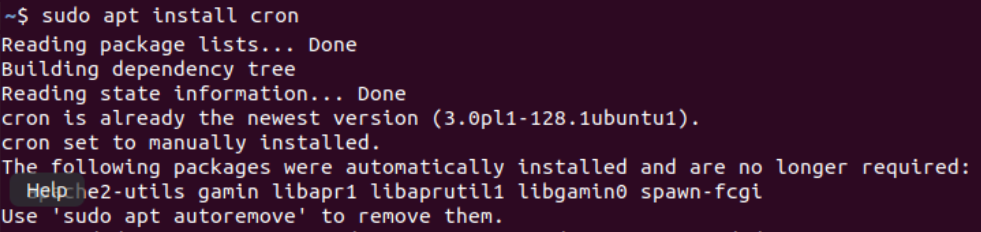
Now that we have the desired repository, we can proceed with the tutorial. We will use the apt package management service to install the cron utility on Ubuntu. To do so, we enter the following in our terminal.
sudo apt install cron
You may be asked for your password. This command will install the corn utility on your system.
Now, we will enable the cron service to run in the background on our system using the systemctl command. This is how the command should look.
sudo systemctl enable cron
Now the cron utility is installed on our system and we can start using the utility to schedule jobs for us.

Where’s the Crontab Configuration File?
All the jobs scheduled using the cron utility are stored in a file known as crontab. Each user’s local crontab is saved at /var/spool/cron/crontabs/ whereas the global crontab for a system is saved at /etc/crontab. This will be the file we will use to set up our automatic updates.
Note that we can use our user’s local crontab with sudo privileges. However, the terminal prompts you for your sudo user password during every session for security purposes. Hence, we use the root user to bypass the security check.
Understanding the Crontab file format
Jobs stored in the global crontab are stored in the following format.
[minute] [hour] [day_of_month] [month] [day_of_week] [user] [command_to_run]
The fields in the syntax are listed in the following table along with the allowed values for each field.
| Field | Values allowed |
| Minute | 0 to 59 |
| Hour | 0 to 23 |
| Day of month | 1 to 31 |
| Month | 1 to 12 OR JAN to DEC |
| Day of week | 0 to 6 OR SUN to SAT |
Apart from this, you can use a special character as * (asterisk). This is used to denote ‘each’. For example, if you wished to run a command each Wednesday at 5 PM, you use the following entry.
0 17 * * 3 [command]
This will run [command] on the fourth day of the week (Wednesday, we use 3 because computers count from a 0), every month and every day of a month (because these are denoted by an asterisk, at 17 hours and 0 minutes (5:00 PM). Some newer cron daemons may allow for a special syntax. These special entries along with what they represent is given in the table below.
| Special Syntax | Regular equivalent |
| @hourly | 0 * * * * |
| @daily | 0 0 * * * |
| @weekly | 0 0 * * 0 |
| @monthly | 0 0 1 * * |
| @yearly | 0 0 1 1 * |
Now that we understand how the cron utility works, let us set up our automatic updates.
Setting up custom automatic updates using Cronjob
We will add the job of updating our system to the global crontab. To do so, we open the file using our preferred text editor.
sudo nano /etc/crontab
Once we enter the file, we will add the following command to the cron jobs list. This will schedule the system to call apt update and apt upgrade through the root user every Wednesday at 8 PM. These details will be saved in a file named automaticupdates.log for us to check later.
50 19 * * 3 root /usr/bin/apt update -q -y >> /var/log/apt/automaticupdates.log
0 20 * * 3 root /usr/bin/apt upgrade -q -y >> /var/log/apt/automaticupdates.log
After making the changes, we save the file and exit. Now we have successfully set up automatic updates on our Ubuntu system. These updates will happen every Wednesday, at 7:50pm and 8:00pm.
Wrapping up
Cron is an essential Linux utility designed for managing and scheduling jobs for your system. They are widely used to make repetitive jobs on your system automated and perform system maintenance related jobs. This tutorial aimed to help you configure Ubuntu automatic updates using Cronjobs. If you have any feedback, queries or suggestions, feel free to reach out to us in the comments below.