

In this tutorial, we will discuss how to use ip command in Linux.
IP stands for Internet Protocol. What is the protocol? It is a set of rules and regulations followed in networking. Let’s dive into the concept first.
What is an IP?
IP stands for Internet Protocol which works with the Transport Layer. TCP stands for Transmission Control Protocol which works with IP and provides a reliable transport service between processes using the network layer. An IP is responsible for logical addressing.
What is the IP address? It is the collection of 4 Octet separated by (.). The format is x.x.x.x.
Each Octet consists of a byte of data or 8 bits. For example, 192.168.0.128 is an IPv4 address consisting of 32 bits(in binary). Every device has its own unique IP address. It is just like the identity of the device. Note that devices connect with the use of an IP address. Talking about IPv6, it is the most recent version of the protocol which consists of 128 bits i.e. 16 octets. It came into existence to replace IPv4.
Check the detailed information on IPv4 and IPv6:
- Get a detailed view of IPv4 Official Documentation.
- Get a detailed view of IPv6 Official Documentation.
Here, we will discuss the ip command in Linux. We often use “ifconfig” command in Linux to know the IP addresses. But ip command is more powerful than ifconfig command. Check the difference between IP and ifconfig command
The ip command provides various options such as:
- show: To view the IP address
- add: To add a single/multiple interfaces to the device
- del: Deleting the IP address
- route: use IP with routes
- addr: to display the IP address.
- dev: to specify the name of the network interface
These are the basic uses of the IP command which we will discuss in detail in the upcoming sections. Check the IP Linux Official documentation for more details.
The ip Command in Linux to Show Your IP address
To show the information about the IP addresses we can use the ip address show command demonstrated below. It will list all the information including all the network interfaces and associated IP addresses. You can also use the address command instead of addr command.
Let’s have a look at the command below:
ip address show
OR
ip addr show
Or
ip addr
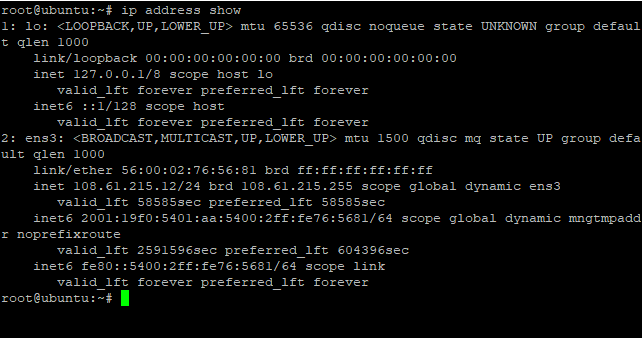
There is a list of network interfaces listed in the above image such as ens3 and lo. There are two IP addresses displayed in the above image. It determines:
- The first IP address determines the internal IP address. The purpose is to communicate within the computer. The interface name is “lo” as mentioned in the image.
- The second IP address is the actual IP address the computer uses on LAN ( Local Area Network). The name of this network interface is “ens3”.
Display IPv4 address
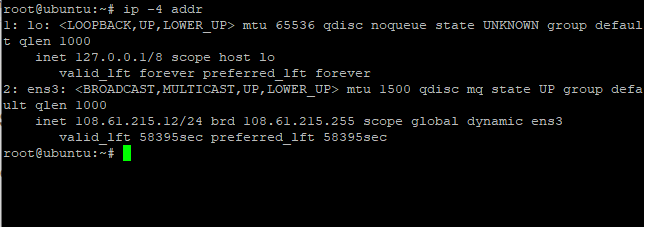
Earlier we discussed how to display the IP address. The user can also print the IPv4 address or IPv6 address separately. If the user wants to print IPv4 address, use the “-4” option with addr command. The output will only display the IPv4 address. Let’s have a look at the command below:
ip -4 addr
Display IPv6 address
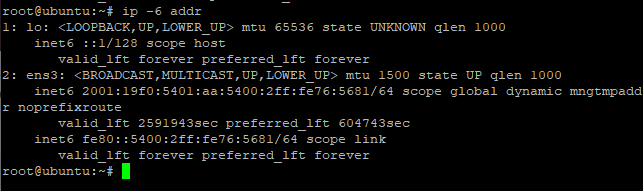
Earlier, we used the addr command with -4 option to print the IPv4 address. The user can also print the IPv6 address by using the “-6” option with addr command. Let’s have a look at the command below:
ip -6 addr
Information of single network interface using IP command
There are many network interfaces associated with a device. As we discussed earlier, there can be more than one network interface such as “ens3” or “lo”. In your device, it can be eth0 or enp0s3 also.
The user can also display the information of the particular network interface using “show dev” with IP command. The “dev” specifies network devices that are to be operated.
Let’s have a look at the command below:
ip addr show dev lo
Or
ip addr show ens3
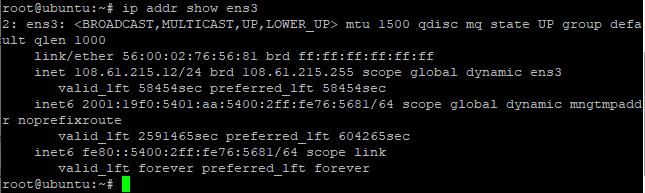
It has displayed information about “ens3”.
Details of a network interface of specific ip version
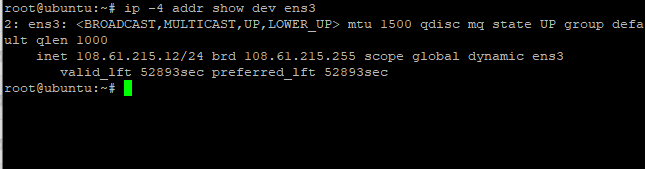
Earlier, we printed the information of a specific network interface. The user can also display the information of a specific network interface belonging to a specific version i.e. IPv4 or IPv6. Mention the “-4” option for IPv4 whereas the “-6” option for IPv6 version.
Let’s have a look at the command below:
ip -4 addr show dev ens3
Adding an IP address
The user can manually add the IP address to the network interface. Before using the command, the user should know how many network interfaces are present in the system. Use the IP addr command to know the network interfaces as discussed above. Use add option with IP command to add the IP address to the specific network interface.
To do so, type the following in the terminal:
sudo ip addr add 192.168.4.45/24 dev ens3

“24” used is the subnet mask. The subnet is used to divide the IP address into two parts i.e. the host computer and the network to which it belongs. Check the Subnet Official Documentation for more details.
Check for the added IP address
To check whether the IP address has been added or not, use addr command to do so. Let’s have a look at the command below:
ip -4 addr show dev ens3
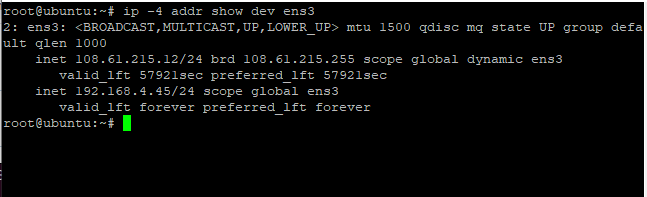
You can see the IP address i.e. 192.168.4.45 has been added.
Ping the IP address
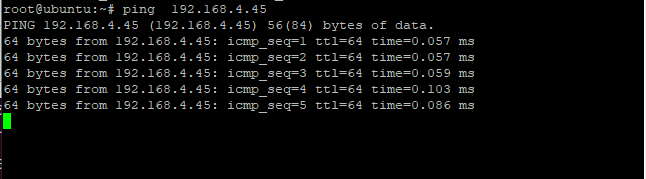
As we have added an IP address to the network interface, the user can check whether it is transferring the packages or not. The user can use the ping command to do so. It simply verifies whether the computer can communicate over the network or not.
Check the Ping Official Documentation for more details.
Let’s have a look at the command below:
ping <ip> address
Add multiple IP addresses
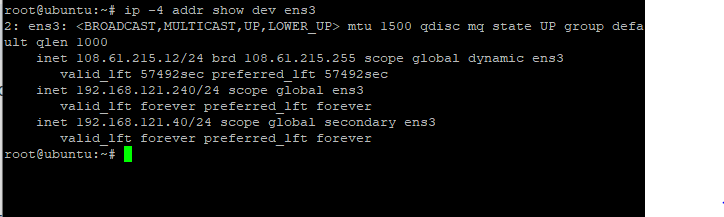
Earlier, we learned how to add the single IP address to the network interface. Folks, we can also add multiple IP addresses to the network interface. Use the same command used before twice.
Let’s have a look at the command below:
sudo ip address add 192.168.121.240/24 dev ens3
sudo ip address add 192.168.121.40/24 dev ens3
Use show option with IP command to list the multiple IP addresses. To do so, type the following in the terminal:
ip -4 addr show dev ens3
Delete an IP address using the ip Command in Linux
Earlier, we used an “add” option to add the IP address. The user can also delete the listed IP address using the del option with the ip command. Let’s have a look at the following command:
sudo ip address del 192.168.4.45/24 dev ens3

Further, to verify the deletion we can use show option with IP command to check. The IP address has been deleted as shown in the image above. The command for this is as follows:
ip -4 addr show dev ens3
Remember to change the name of the network interface. It can be different in your system.
Manage the network interface using link object
Till now, we have learned to add and delete single and multiple IP addresses. The next is to look up how to manage network interfaces. The link subcommand is used to manage and display the state of all network interfaces. The “link” subcommand is used with IP command to display information for all the interfaces.
To do so, type the following command in the terminal:
ip link
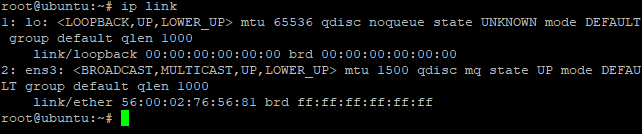
Display information for specific network interface
Whenever the user wants to get the information for the specific network interface, he has to mention the name of the network interface. The “dev” option is used to specify the name. Let’s have a look at the command below:
ip link show ens3
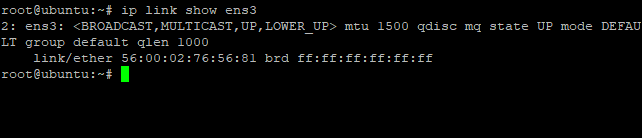
The name of the network interface can be different in your device.
Display the interface statistics
This option lets you print the statistics of the network interface i.e. information related to the packets, errors, dropped packets, multicast, and so on. “-s” option is along with “link” is used with IP command.
To do so, type the following in the terminal:
ip -s link
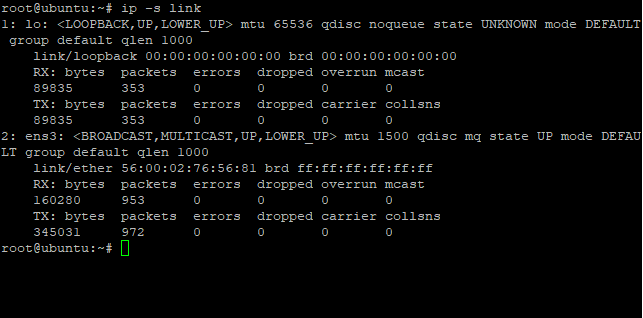
It will display the statistics of every network interface in the device.
Set the network interface
The user can start and stop the services of the network interface. The “set” option is used to either start(up) or stop(down) the services. This option is used along with link subcommand.
Note that, if you are using the Linux server on Putty don’t use down with set option. It will stop the network interface. Therefore, the admin has to restart the server again.
To start the network interface, type the following command in the terminal:
sudo ip link set ens3 up
Use “link” command to show the status. Let’s have a look at the command below to stop the network interface
sudo ip link set ens3 down
Conclusion
That’s it. We have learned how to use the ip command in Linux. You can also check IP Red hat Official Documentation for more details. If you face any issue, do let us know in the comment section.