

Neovim, or Nvim, is a terminal-based text editor (IDE) commonly used for programming on Linux as well as macOS. It can be installed using package managers like pacman on Arch, apt on Ubuntu, dnf on RHEL, or by directly building from source. Neovim offers features like Language Server Protocol support and enhanced plugin support. Let’s look at the ways to install and use Neovim on Linux.
Neovim: Revolutionizing Vim for Modern Development
Vim is a text editor that comes with the UNIX based system and is used to write small programs. But as time passed, there was something Vim lacked and to overcome those shortcomings, Neovim was introduced by the developers. Written in Lua, the goal of Neovim was to modularize the code, making it easier to maintain and contribute.
Neovim is a Vim-based open source software engineered for extensibility and usability, to encourage new applications and contributions. According to the official website, Neovim is built for users who want the good parts of the old editor, and more.
Neovim also has built-in Language Server Protocol support. Language server Protocol enables code highlighting, syntax checking, autocompletion, etc for different programming languages such as Python.
Vim had already pretty good plugin support, but Neovim does one up on that, it allows plugins to use a more versatile language to write plugins in Lua. Also note that Neovim config files are fully compatible with Vim, so you don’t have to do extra work while migrating from one IDE to another.
There are other good features in Neovim, but I will let you guys explore that out as you start using Neovim once you install it in your Linux systems.
Step-by-Step Guide to Installing Neovim on Linux
You can install Nvim either from using the package manager, or if nothing works, you build it from source (the last resort usually). I will cover all of these methods one by one. So let’s get started.
Installing Neovim with AppImage
AppImage comes with all the libraries bundled together, so you don’t have to deal with missing dependencies and other issues. For the most part, it works well enough, but as a cautionary note, it might not work if your Linux distro is more than 4 years old.
You can head over to neovim releases on GitHub release page and download the binary from there, or you can run the following commands:
curl -LO https://github.com/neovim/neovim/releases/latest/download/nvim.appimage
chmod u+x nvim.appimage
./nvim.appimage
If you don’t have curl in your Linux system, then you might be interested in checking this tutorial.
Using the chmod you are making the downloaded file executable, alternatively, you can also right-click on the file and make it executable in file properties, but I will leave that to you based on your preference. Finally, you can run the app, and voilà, you got neovim running in your system.
Using Package Managers for Neovim Installation
If AppImage is not your thing, don’t worry. I have you covered with this method, a lot of us prefer to download it from the repository using our preferred package manager (mainly the default one). So let’s get into it.
If you are using an Arch based system, then you will be happy to know that it’s available on the community repository, and you can just run the command below in your Terminal to install it.
sudo pacman -S neovim
Also, there is a nightly build available of Neovim on AUR, which you can download using PKGBUILD, so you might want to check that out.
Moving on, if you are using Centos 8/RHEL 8 then Neovim is available through the EPEL, run the below command to install it.
yum install -y https://dl.fedoraproject.org/pub/epel/epel-release-latest-8.noarch.rpm
yum install -y neovim python3-neovim
On distros like Ubuntu and Debian, you can run the following command to get the stable version of Neovim.
sudo apt update && sudo apt install neovim
If you are using either Fedora 25 or higher (last I checked the latest release was Fedora 39) then Neovim is available, and you can run the below command to install it.
sudo dnf install -y neovim python3-neovim
If you are on Gentoo then an ebuild is available so you can run the below command to get Neovim in your system.
emerge -a app-editors/neovim
You can also use snaps to install Neovim, if you don’t have Snap then you can check out this tutorial. Copy and paste the following commands to get Neovim via this method.
sudo snap install --beta nvim --classic
Building Neovim from Source
Building from scratch is usually complex and as a beginner on Linux you might feel scared of it, but hey there’s a first for everything so you can also give this try, it’s not that difficult. You can use this method if the application is not available in the official repositories of your platform. First, you need to ensure that you have the prerequisite libraries, which are:
You can check the tutorials to see how to install the above libraries, once installed you have to follow the steps below.
- First, clone the repository
git clone https://github.com/neovim/neovim
- Then
cdto navigate to the cloned folder
cd neovim
- Now let’s build it by running the command below, just remember that it will take some time, so don’t panic and wait for the process to finish.
make CMAKE_BUILD_TYPE=RelWithDebInfo
- After building it, you can now install it using the command below.
sudo make install
To verify if it’s properly installed or not, you can just run the nvim command.
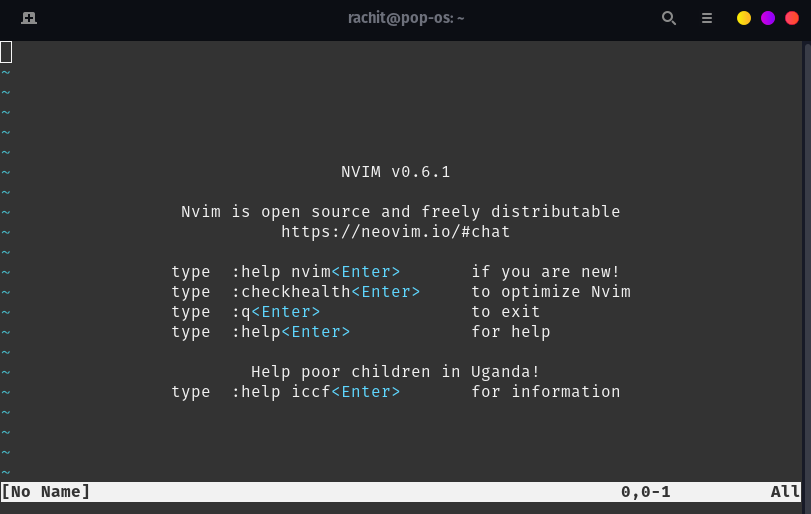
Regardless of the approach you used, you should have Neovim installed in your system, and now you can use it for small or big programs. Explore Neovim and install plugins, customize it, and have fun. For reference, when you type neovim command, the screen will be similar to the image below.
Summary
You’ve made it to the end, and now you know all the ins and outs of installing Neovim on your Linux system. Whether you’re a Vim veteran looking for something fresh or a newcomer eager to dive into terminal-based editing, Neovim has something special for you. So go ahead, fire up Neovim, and explore all those cool features we talked about. What’s the first project you’re going to tackle with your newly installed Neovim?