
Let’s learn formatting USB drives in Linux. USB drives are essential for any sort of work environment whether it be sharing files or installing new operating systems. A lot of time we might need to format a USB drive either to remove bad sectors or change the file system or you simply might want to clean the drive up. There are several ways to do this in Linux.
Formatting USB Drives In Linux
In this article, we will be looking at the two most prominent ways for formatting USB Drives in Linux
Method 1 : Using terminal
The terminal is the bread and butter of Linux. It’s usually the most efficient method to perform an activity on Linux. So let’s see how you can format your USB drive using some easy terminal commands.
Step 1: Identify the device
You can use this command to list all block devices like HDD, SSD, etc that are connected to your system.
lsblk
From this list, you can identify your device name and the partition to be formatted.
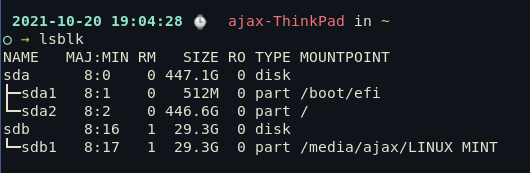
Here my drive is sdb and it has a single partition i.e sdb1 which is mounted at /media/ajax/LINUX MINT
Step 2: Unmount the partition
You can unmount the partition by executing the following command
sudo umount /dev/sdxY
where sdxY should be replaced with the partition name.
You can also verify that the partition has been unmounted by running lsblk again and checking if the mount point entry for that partition is empty.
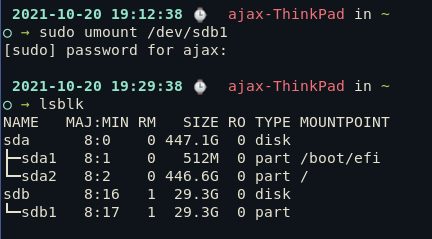
As you can see sdb1 is no longer mounted.
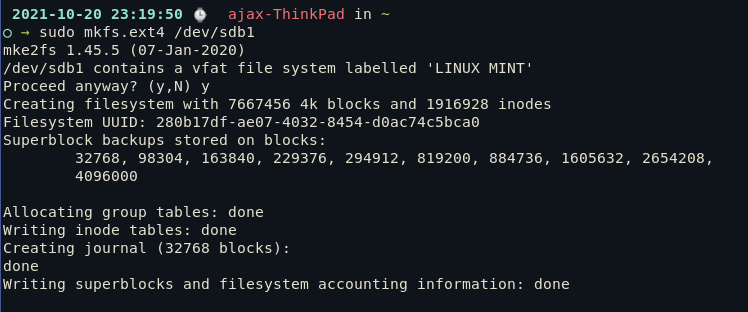
Step 3: Formatting the partition
To actually format the partition, run the following :
sudo mkfs.[fs type] [target device]
[fs type] should be replaced with the file system you want to format the partition with. Available options are ext2,ext3,ext4,NTFS and VFAT (for FAT32).
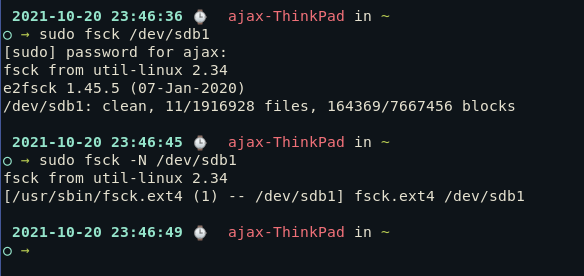
Step 4: Verification
You can verify that your device is formatted properly by running the following.
sudo fsck /dev/sdxY
sudo fsck -N /dev/sdxY
Method 2: Using Gparted For Formatting USB Drives
If you are not very familiar with the terminal, you can simply use a GUI tool named Gparted which is a popular free and open-source partition manager to do the operation.
Step 1: Install Gparted
Debian/Mint/Ubuntu/Any debian derivatives :
sudo apt-get install gparted
Fedora :
su -c "yum install gparted"
OpenSuse:
sudo zypper install gparted
Arch:
pacman -s gparted
For any other distros, visit the official download page of Gparted.
Step 2: Open Gparted from the menu or terminal
sudo gparted
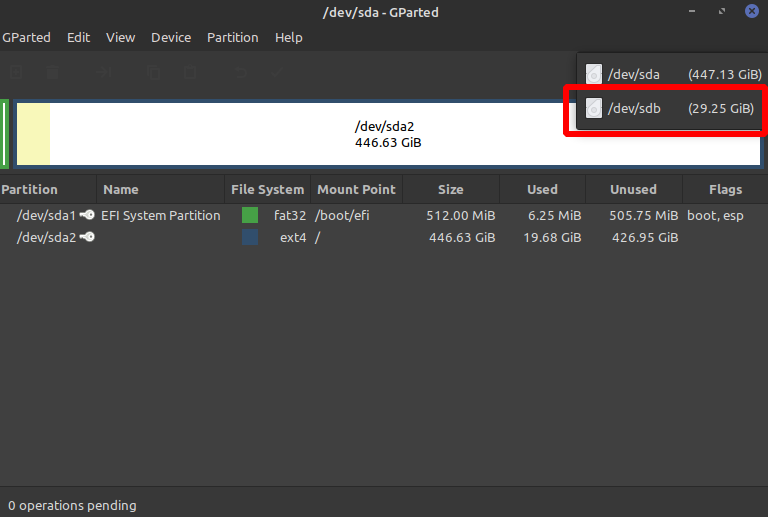
Step 3: Choose the drive to be formatted from the drop-down menu on the top right.
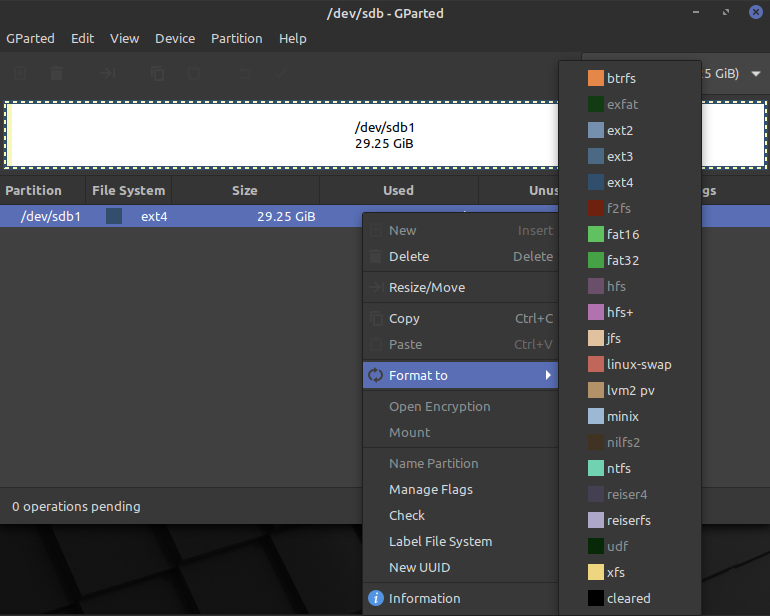
Step 4: Select the partition to be formatted. Right-click on it and hover over “Format”. Now select the file system you want in the formatted partition.
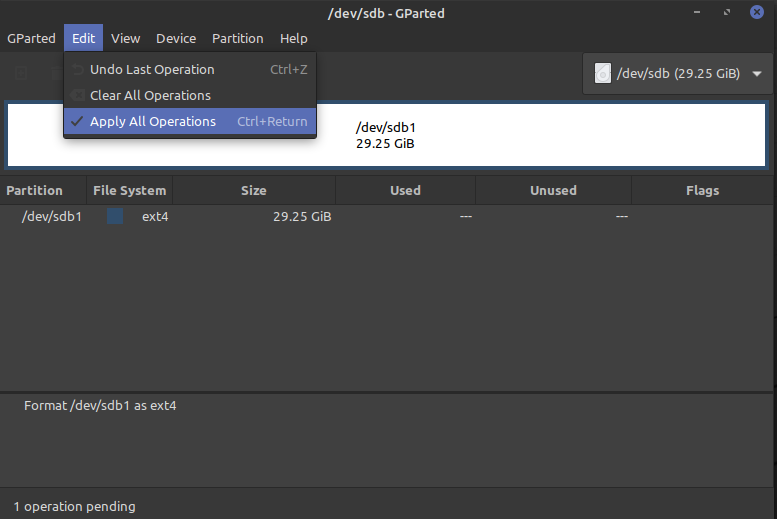
Step 5: From the “Edit” menu on top, select the “Apply all operations” option.
Conclusion
We have covered two ways to format your storage devices. There are several other ways like using the Disks utility on Gnome however these two ways are universal and do not require you to have a specific distro or desktop environment. To learn more about the fsck command used in the tutorial you can refer to this article. Have fun and keep exploring!