
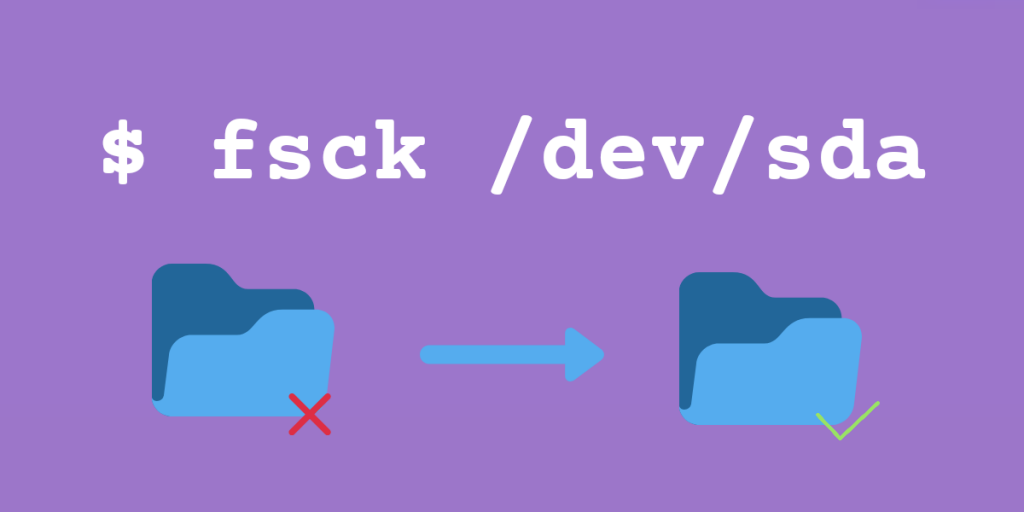
The fsck command (file system consistency check) is a utility to check and repair a Linux Filesystem. Modern file systems with journaling are designed such that tools like fsck are not readily required. However, in a few cases, fsck might be the only option to repair a ‘bad’ filesystem.
fsck can be run on a partition that got corrupted or inconsistent with the rest of the filesytem.
Reasons why fsck may be required
- Unclean Shutdown – This is the major cause of corruption. Due to an ‘unclean shutdown’, the system may fail to even boot properly
- Drive Failure or Corruption
Environments Where You Should NOT Use fsck
Since the command works directly with the sectors of the file system, it’s important to take the necessary precautions here.
e2fsck ‘s man page says:
Note that in general it is not safe to run e2fsck on mounted filesystems. The only exception is if the -n option is specified, and -c, -l, or -L options are not specified. However, even if it is safe to do so, the results printed by e2fsck are not valid if the filesystem is mounted. If e2fsck asks whether or not you should check a filesystem which is mounted, the only correct answer is “no”.
https://www.man7.org/linux/man-pages/man8/e2fsck.8.html
So, you must do fsck on an unmounted partition. If you can unmount the partition using umount, well and good. Otherwise you need to change your environment:
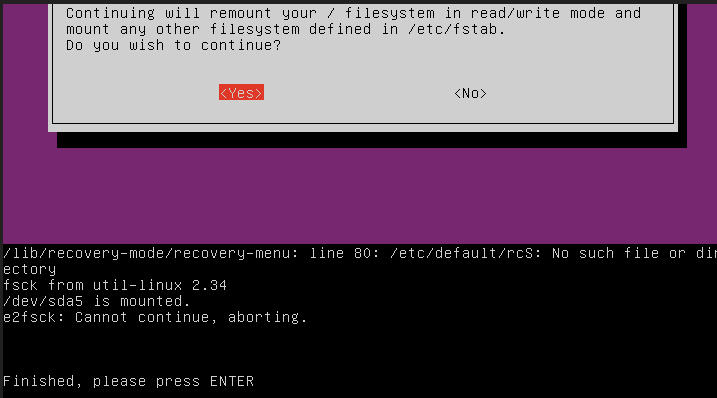
1. Recovery Mode
(For Ubuntu – Hold SHIFT while booting to enter into GRUB, Select ‘Advanced Options for Ubuntu’, then select the option labeled ‘recovery mode’, then select fsck). In the recovery mode, the partitions are mounted.
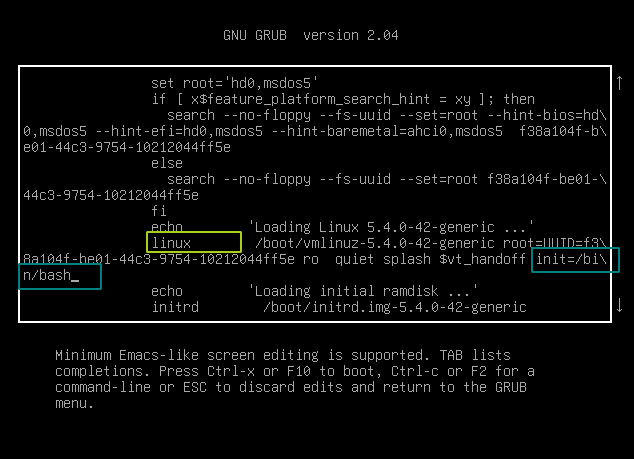
2. While using init=/bin/bash kernel parameter
( Hold SHIFT while booting to enter into GRUB, press e to edit the kernel parameters). It provides a bash shell from where fsck could be run but here too, the partitions are mounted.
How to use the fsck command?
With the basics clear, let’s move to the steps how you should use the fsck command in Linux.
1. Basic Usage of the
Before you begin with using the command, make sure you are working on an unmounted partition. To unmount a partition and then run fsck on it type :
$ sudo umount /dev/<partition_name>
$ fsck /dev/<partition_name>
Chances are you can’t unmount the partition. In that case, you may choose one of the following methods.
2. Running fsck using a live USB
This is probably the best way to run fsck. It provides a rich set of familiar tools like fdisk. Use this tutorial to create a live Ubuntu USB. This part assumes that you are running Linux off a Live USB.
To list all the partitions on your system, you can use the fdisk command.
$ sudo fdisk -l


Note: The partitions shown above (for 2 SSDs, one NVMe and other SATA) may be different than what you have on your system. fdisk prints more information about the partitions as well. However, for the purpose of this article, the name of the partition is sufficient.
Identify partition that is causing trouble, then simply run:
$ fsck /dev/<partition_name>
This should fix the problem.
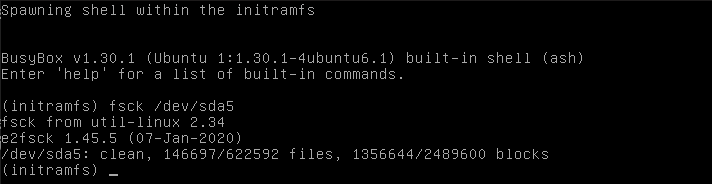
3. Using initramfs
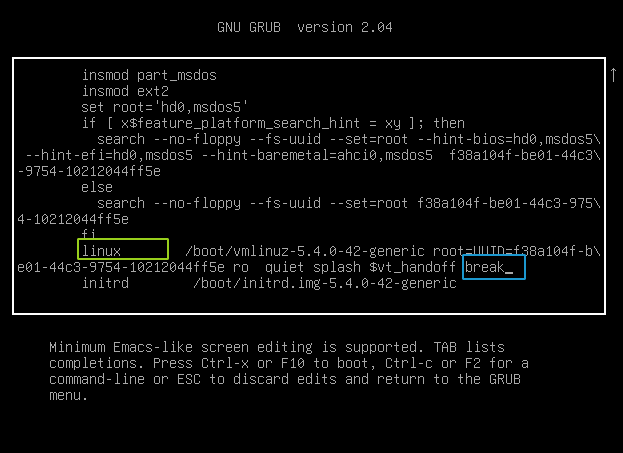
Another way to use the fsck command is while in the intramfs mode. To get into initramfs
- Hold
SHIFTkey while booting to get into the GRUB menu. - Press
eto edit the boot entry - Add the kernel parameter as ‘
break‘ as shown in the screenshot below - Press
Ctrl - Xto save and exit
initramfs provides a ‘less alluring’ way of troubleshooting.
The partitions are not mounted in initramfs, so performing fsck would be safe. Also, you need the name of the partition. Initramfs, however, provides a bare minimum of utilities. So fdisk won’t be available. You can list the partitions using the cat command as shown below:
$ cat /proc/partitions
Identify the partition and then run:
$ fsck /dev/<partition_name>
Note: fsck using Live USB may not be always available. In such a case use the initramfs method.
How to check if fsck is scheduled or not
You might want to know when was your partition checked last time or when will it be in the future. In that case, run:
$ sudo tune2fs -l /dev/<partition_name> | egrep -i 'check|mount'

- Maximum mount count is the number of mounts after which the filesystem will be automatically checked by fsck.
- Check interval is the time between two filesystem checks.
These two values are enough to identify when the fsck command was last run.
Difference between fsck and e2fsck
You may find different answers/articles asking you to run e2fsck or fsck.ext4 rather than fsck. What difference does it make if you run any of these tools instead of fsck?
fsck is just a frontend for all the filesystem-specific fsck commands like the two shown above (a wrapper if you might say). Invoking fsck automatically invokes the correct filesystem-specific fsck. Let’s see which all fsck are there on our system:
$ ls -l /sbin/fsck*

Running fsck on an ext2/3/4 partition runs the respective /sbin/fsck.ext* executable. These executables in turn are hard links to the e2fsck executable. So, even if you run fsck on an ext4 partition it would ultimately run e2fsck.
Conclusion
In this tutorial we covered fsck which is a useful tool for the recovery of filesystems. To learn more about fsck command, look at its man page.