
Updates getting stuck are an irritating problem as they are often not accompanied by an error code, making it hard to debug. Although this problem is prevalent in Ubuntu-based distros such as Linux Mint, it can still be caused in other non-Ubuntu distros due to some common issues with your system.
Also read: How to Check For Updates At Login On Debian/Ubuntu?
In this guide, we will talk about how one can overcome this problem using various potential solutions.
Causes of the issue
Let us first talk about the reasons this issue occurs. Some of the common causes are:
- Problems with the software updater: The software updater app on Linux distros (such as Ubuntu) is a bit more advanced compared to the Windows software updater. If a misconfiguration creeps up in the application, it can cause troubles like these.
- Corrupted drives/partition: When you are installing or updating Linux, the process might freeze for an infinitely long duration because of a corrupted partition.
- Problems with the sources.list file: The
sources.listfile is located in the/etc/apt/folder. This file contains the link to the sources from where Linux fetches the updates and installs them on your system. A wrongly configuredsources.listfile can cause the kernel unable to fetch the required files.
How to fix this issue?
As we have briefed through the causes, let us now look at some common methods to fix this problem. Before we move on to the advanced methods, take a quick look at these short and basic fixes:
- Check whether your internet connection is working properly, as downloading updates requires a stable network.
- Restart your system and try updating it once again.
- If possible, try closing all other running applications.
If the above methods didn’t work, you can move on and try some of the methods given below.
Method 1: Change the download server
You can choose the server from which the updates will be downloaded. Having the wrong download server selected is a common mistake many Linux users make. Here’s how to fix it:
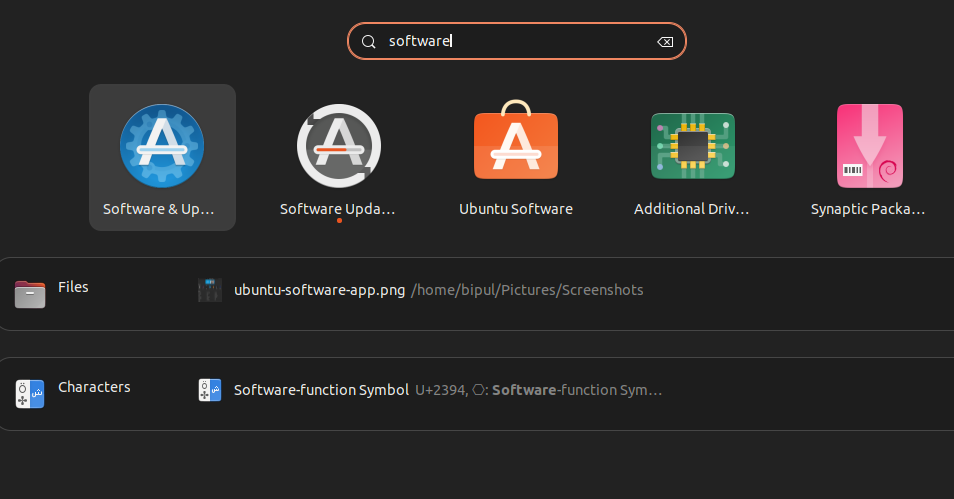
1. Open Settings
2. Locate the Software Updater application
You can also open it by searching in the applications menu
3. Select the correct server (Usually, you need to choose the Main server, but you can try other servers and see which one works)
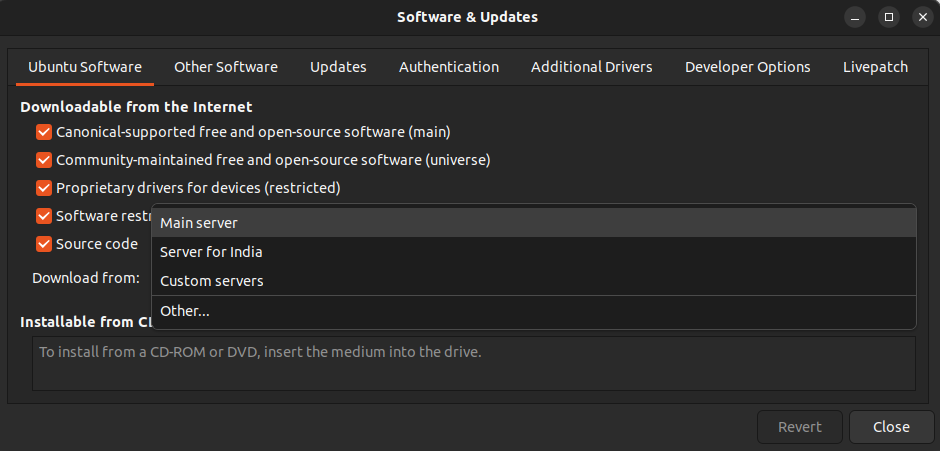
Alternatively, you can also use the ‘Select Best Server’ option if it’s available. Just select the ‘Other…’ option from the list of servers. The ‘Select Best Server’ option will automatically choose the best server depending on your location.
4. Make sure that you have the proper boxes ticked under the ‘Downloadable from the Internet’ section. If you don’t know which one to select, you can just tick all the options.
Method 2: Add the correct download sources to the ‘sources.list’ file
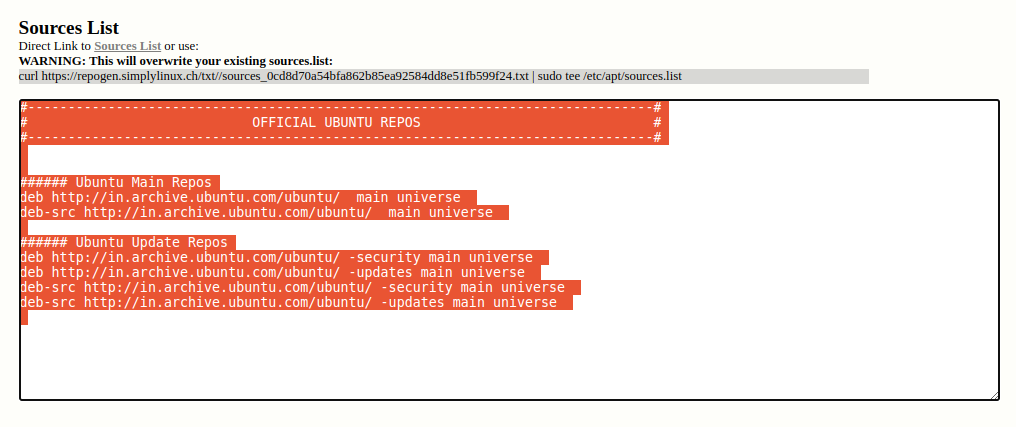
According to this ask Ubuntu thread, you can replace the current sources.list file with a minimal version of it. This might feel like a more lengthy process than the one discussed above so please proceed with this method carefully.
Creating the backup of your current sources.list file
First, we need to create a backup of the original file so that it can be retrieved even after being replaced by the new one. To do this, follow the steps below:
1. Open a terminal window
2. Enter the following code:
sudo cp /etc/apt/sources.list /etc/apt/sources.orig
This code will create a ‘sources.orig‘ file in the same directory which will store the copied content from the sources.list file.
Generating and using the new ‘sources.list’ file
NOTE: The following method is an example for Ubuntu-based devices only. You might have to look for the appropriate sources.list file for your distro.
Now, we will generate a minimal version of the sources.list file. Follow the steps:
1. Head over to the RepoGen Ubuntu Sources List generator
2. Select your preferences (such as your country, release version, and the repositories you want to download the updates from)
3. Click on ‘Generate List‘
4. The list is generated as a text box, copy all the contents
5. Edit the original sources list using the code below:
sudo vi /etc/apt/sources.list
6. Paste the copied content into the Vi editor and save the file by using the :wq! command.
7. Restart your device and see if your problem is resolved or not.
Method 3: Looking for corrupted partitions using Gparted
Gparted is a utility which makes managing the drives and partitions of your system much easier. To install and use Gparted, follow the steps below:
1. Enter the following code in the terminal:
sudo apt install gparted
This code will install Gparted on your system
2. Enter ‘gparted‘ in the terminal to run the utility
3. Look for partitions with the red exclamation sign. If it is a system reserved partition (usually they are automatically created by the OS and are just a few megabytes in size), ignore it as Gparted may falsely show it as erroneous.
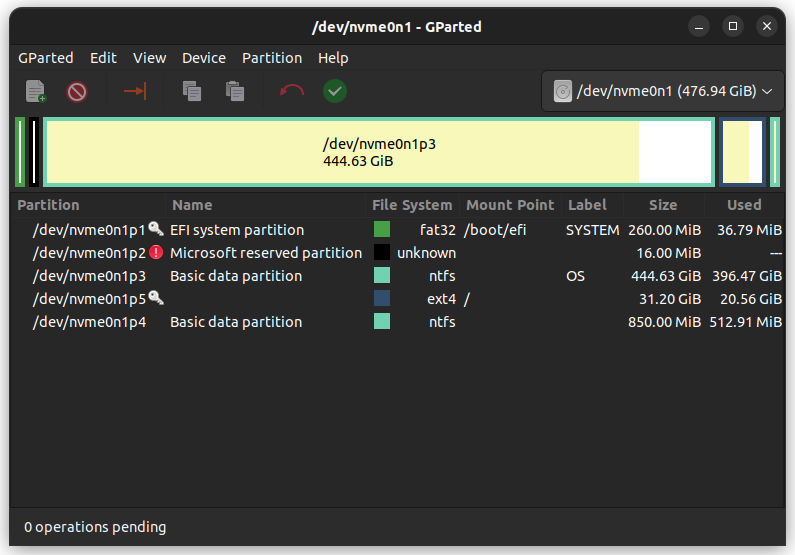
If a partition created by you is flagged with the red exclamation sign, backup the data from it and delete it by right-clicking the partition in GParted.
4. Use the unallocated space to freshly create a new partition instead and check if your problem is resolved.
Summary
What we saw in this article were three main methods to fix this issue. The first and third methods were simple GUI-based methods and hardly requires any time. The second method involves editing a system file so it should be done with caution. We hope that these solutions worked for you.