
A useful Arch Linux terminal setup changes the shell behavior you use every day, then adds a prompt that exposes useful context without hiding the command line. Start with Zsh, Starship, and a font that can render your chosen symbols.
I refreshed the package names and startup commands against the current Arch package listings and Starship documentation. The screenshots below show the existing Zsh and font-selection steps that still match the workflow.
Choose the parts you want to change
Your terminal emulator draws the window. Your shell reads and runs commands. Your prompt is the text shown before each command, so you can replace it without changing the terminal emulator.
| Part | Use it for | Current choice |
|---|---|---|
| Shell | Completion, history, and interactive behavior | Zsh |
| Prompt | Git state, directory, exit status, and language context | Starship |
| Terminal emulator | Tabs, key bindings, colors, and rendering | Keep yours or use Alacritty |
| Font | Optional symbols in the prompt | A Nerd Font |
Install Zsh, Starship, and a terminal emulator
Run pacman to update your system and install Zsh with Starship.
sudo pacman -Syu
sudo pacman -S zsh starship
# Optional: install a terminal emulator
sudo pacman -S alacritty
Add Alacritty only when you want a separate GPU-accelerated terminal emulator. Keep Konsole, GNOME Terminal, kitty, or another emulator when it already suits your workflow.
Make Zsh your login shell
Check the installed Zsh path and pass that path to chsh, then log out and back in.
command -v zsh
chsh -s "$(command -v zsh)"
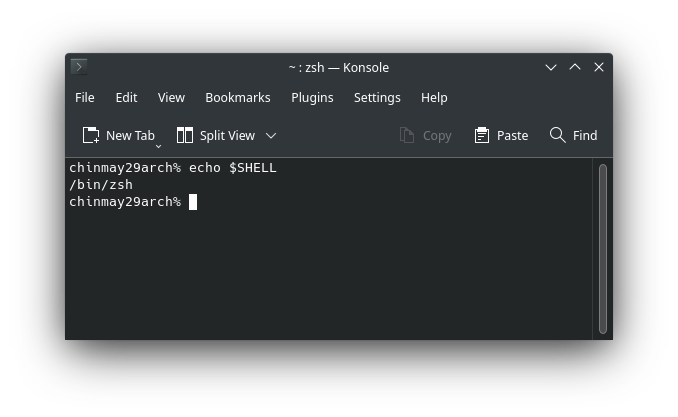
echo "$SHELL"
Echoing SHELL shows the recorded login shell. Inspect the terminal profile if it starts a different shell.
Initialize Starship in Zsh
Starship reads its configuration from ~/.config/starship.toml and starts through your shell startup file.
printf '\neval "$(starship init zsh)"\n' >> ~/.zshrc
exec zsh
Add the initialization line, then start a fresh Zsh session. Starship works without a custom file, so confirm the integration before tuning modules.
mkdir -p ~/.config
starship preset plain-text-symbols -o ~/.config/starship.toml
Use the plain-text preset when you do not want icon-font dependencies. Remove that file later to return to Starship defaults.
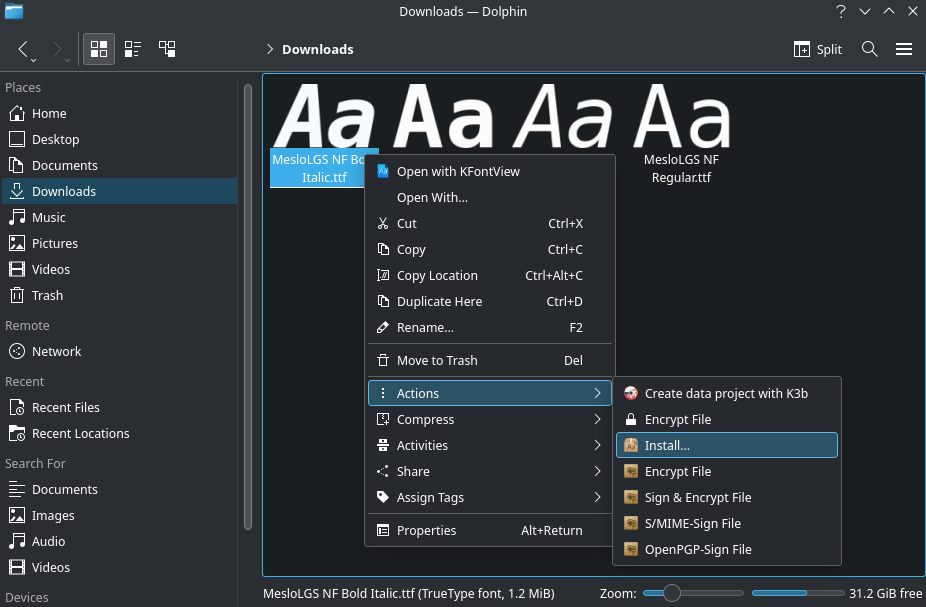
Use a Nerd Font only when you want icons
A Nerd Font adds glyphs that themes and prompts can display as icons.
Add syntax highlighting and history suggestions
Install the two Zsh extensions for interactive command entry.
sudo pacman -S zsh-autosuggestions zsh-syntax-highlighting
printf '\nsource /usr/share/zsh/plugins/zsh-autosuggestions/zsh-autosuggestions.zsh\nsource /usr/share/zsh/plugins/zsh-syntax-highlighting/zsh-syntax-highlighting.zsh\n' >> ~/.zshrc
exec zsh
Source syntax highlighting last, after the other startup work, because it needs the completed command line.
Autosuggestions draw from command history, while syntax highlighting changes recognized commands and arguments before execution.
Keep the startup file small
Your ~/.zshrc runs for every interactive Zsh session. Add integrations one at a time and start a new Zsh session after each change, so a broken line has one obvious source.
- Install packages with pacman.
- Set Zsh as the login shell and log in again.
- Add Starship initialization, then run exec zsh.
- Add a font only if your prompt configuration uses icons.
- Add one plugin integration at a time and reopen Zsh.
Troubleshoot a terminal that does not change
If your prompt does not appear, run zsh -n ~/.zshrc to find shell syntax errors. If symbols render as empty boxes, select a compatible Nerd Font in the terminal profile or return to the plain-text preset.
- Use echo $0 to see the shell running in the current terminal.
- Use command -v starship to confirm that Starship is on your PATH.
- Use grep starship ~/.zshrc to confirm that the initialization line is present once.
- Keep zsh-syntax-highlighting as the final sourced plugin.
- Do not run multiple prompt frameworks from the same startup file.
Continue with the next Arch Linux task
Once the terminal is ready, use the Linux command line gives you concrete commands to practice. If this is a new desktop, install Arch Linux with archinstall covers the setup path first.
If you need to reason about Zsh startup behavior, understand shell startup files. For terminal-based editing, set up Vim completion is the next useful step, and compare Linux shell types puts the shell choice in context.
What this setup changes
Zsh changes interactive shell behavior. Starship changes the prompt shown by that shell. Your terminal emulator and font remain separate choices, which makes it easy to keep the parts that help and remove the rest.