

PPAs or software repositories are essential in Debian based distributions, since the mainline repos provide outdated packages sometimes and not all the packages are available in the official repositories. However, these PPAs can cause errors while updating the system. In such case, removing them would result in a quick resolution of the problem.
In this article, we’ll cover the simple steps to remove an apt repository in Ubuntu. While updating the Ubuntu system using the apt command, we may come across a scenario where some old repositories cause errors. The only feasible option that remains is to remove such repositories. In this article, we will demonstrate command-line as well as GUI methods to remove an apt repository or PPAs (Personal Package Archives).
How to remove an apt repository on Ubuntu
Let’s go over the steps that you’d need to take to remove an apt repo.
1. Using the apt command
This might not come as a surprise to any Ubuntu user that this task can be achieved by using the all powerful apt command. To remove the ppa, run the following command:
sudo add-apt-repository --remove ppa:<PPA_NAME>

If you want to remove a specific repository, we need to know the exact PPA name which is involved. Not every user is aware of the names of the repository present on the system, therefore Ubuntu has a command to list the repositories.
apt policy
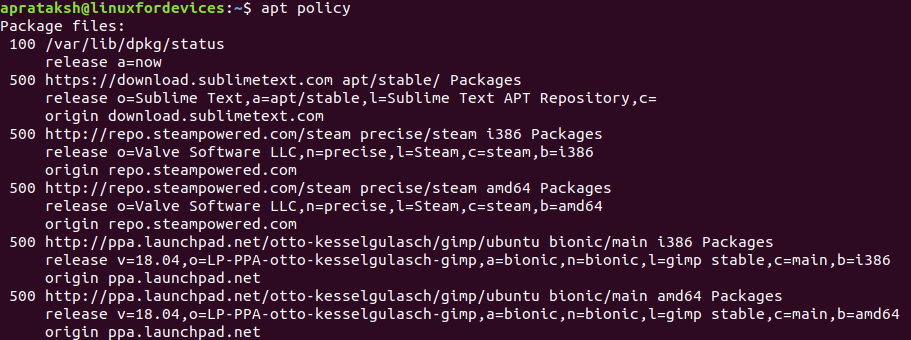 Reading various repos using Apt Policy
The number before the name of the repository is a priority number.
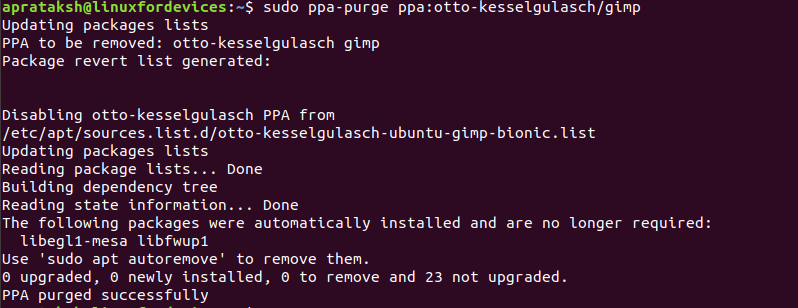
2. Using the ppa-purge command
As the name of the command name suggests, it specifically deals with removing repositories in Linux systems. Since this is not a system built-in function, we’ll install the package using the apt command:
sudo apt install ppa-purge
After installing the tool, we can run:
sudo ppa-purge ppa:<PPA_NAME>
3. Removing a repository from ‘apt directory’
Like every other configuration on Linux, repositories are stored in the system as a file. Instead of using predefined commands, we can remove these repositories manually.
These repositories are stored in 'etc/apt/source.list.d/' in the form of '.list' files. Before removing any repository, we can list the contents of the directory by using the ls command:
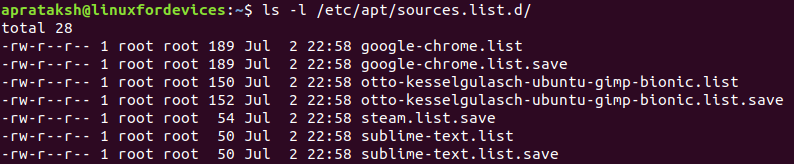
The 'ls' command is used to display the contents of any directory in a Linux system. We have a complete documentation on ls command. From the repository files, we can choose the ones we wish to remove.
According to the permissions displayed at the start of each line, we need elevated privileges to remove these files:
sudo rm /etc/apt/sources.list.d/<Repo_Filename>.list

The 'rm' command is responsible for removing files from the command line.
This basically sums up all the ways to remove repositories using the command-line.
4. Removing a repository using ‘Software and Updates’
There is no easier method to remove a repository than using a GUI-based application. To do the required, we open “Software and Updates” in Ubuntu, which is a graphical application.
In the “Other Software” section of the application, we can see a list of both third party and official repositories on Ubuntu which act as the software sources on our system.
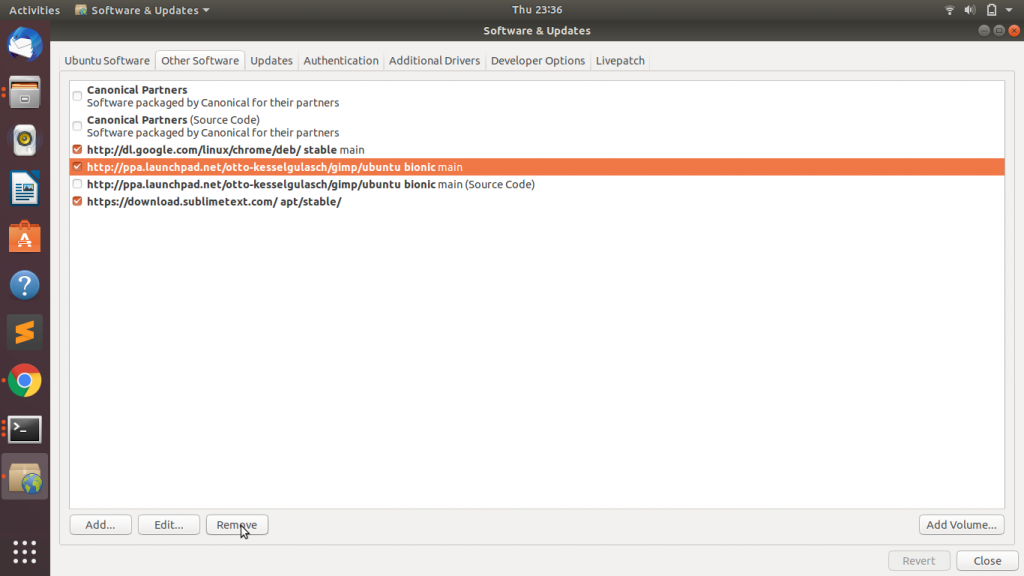
To remove a ppa repository, Select and press the “Remove” button and authenticate from the “Authentication” screen.
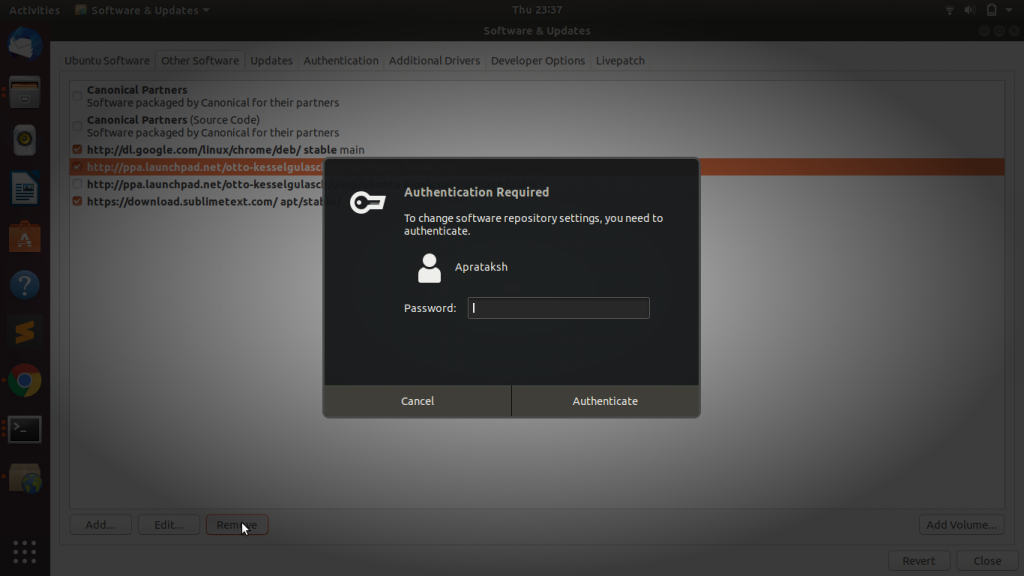
After entering the password and clicking “Authenticate,” we are done with dealing with the specific repo.
Note on removing apt repository by deleting its keys
Ubuntu does not advocate removing an apt repository by deleting its gpg keys. The public keys are used for authentication and verification, and deleting them may result in system issues. That being said, if it is absolutely necessary, the following procedures can be taken and don’t say we didn’t warn you in case of a system failure due to this procedure:
- To launch the terminal, press “Ctrl + Alt + T” on the keyboard
- Execute the following command to list the repository-associated keys on your system:
sudo apt-key list
- Locate the key associated with the repository you wish to delete, and record its ID
- Execute the command below to delete the gpg key:
sudo apt-key del <key-id>
- Replace <key-id> with the ID of the key to be removed
- Run the following command to remove the repository item from the sources.list file:
sudo nano /etc/apt/sources.list
- This will allow access to the sources.list file in the nano text editor. Delete the line containing the repository in Ubuntu you wish to delete, and then save the file by hitting “Ctrl + X,” “Y,” and “Enter.”
Here’s in-depth documentation on apt-key, the APT key management utility tool that you can educate yourself with, if you are still planning to go with the procedure above. It’s essential to refresh the system by running the apt update command after you remove the software repositories and keep your system up to date. You can also use the autoremove command if you wish to uninstall any unrequired or orphaned software packages.
Summary
The task of removing PPAs is not difficult. The Graphic-based method is very convenient and saves time. Whether you use the apt command, ppa-purge, manually delete repository files, or the GUI-based approach, the process is straightforward and accessible to all users. Yet, there is no harm in learning about new things and commands on Linux. By eliminating obsolete or unnecessary repositories, you may be sure of a seamless and error-free update of the Ubuntu operating system.
On other distributions such as Debian or Linux Mint, you can simply use the command line method since they do not have the Ubuntu software center. We hope that this tutorial was able to find the answer you’re looking for.