

Redis is an open-source, in-memory data structure store that can be used as a key-value cache and message broker. It supports various data structures such as strings, lists, sets, hashes, bitmaps, and HyperLogLogs. In this guide, we will install the latest stable version of Redis on Ubuntu 22.04 from the project’s own repositories.
Before starting with the installation you need to update your system’s package index using the apt command:
sudo apt update
This shows the updated list of available packages & their versions (but not actually installing them)
sudo apt upgrade
Different Ways to Install Redis on Ubuntu Linux
Let’s get right into the steps to install Redis on our Linux system.
1. Installing Redis using apt install command
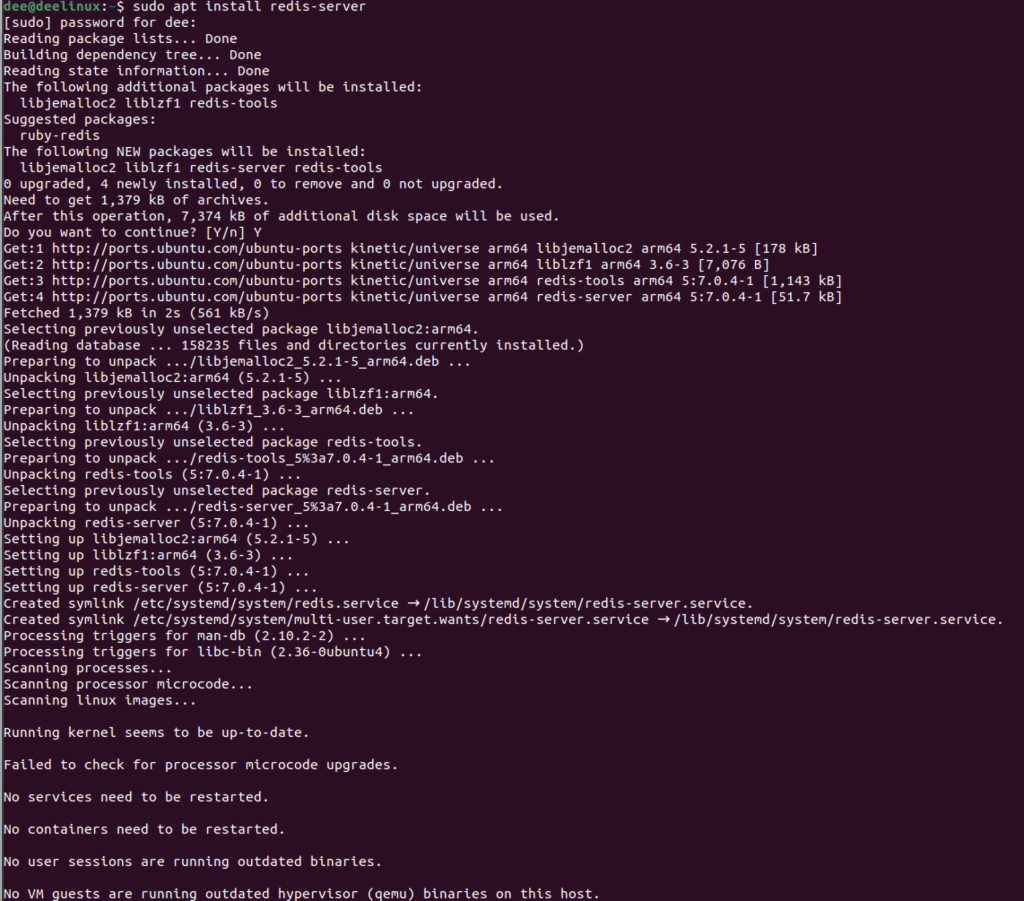
Now we can start installing the Redis server, by using the following command in the terminal.
To get into your Ubuntu terminal, you will have to press CTRL+ALT+T. This will open up the terminal. In the terminal insert the displayed command:
sudo apt install redis-server
2. Installing Redis using Snap
Installing Redis using a snap package is extremely easy. All you have to do is run the following command in your terminal,
sudo snap install redis
If your system doesn’t have snap package manager installed you can do so by running the following command,
sudo apt install snapd
3. Installing Redis via a Official Repository
First, we need to add the repository to our OS’s apt index:
curl -fsSL https://packages.redis.io/gpg | sudo gpg --dearmor -o /usr/share/keyrings/redis-archive-keyring.gpg

echo "deb [signed-by=/usr/share/keyrings/redis-archive-keyring.gpg] https://packages.redis.io/deb $(lsb_release -cs) main" | sudo tee /etc/apt/sources.list.d/redis.list
Now, let’s update the apt index,
sudo apt update
Finally, all we need to do now is run the apt install command,
sudo apt install redis
This will automatically install the required dependencies and files along with the program.
Check If the Redis Service Is Running Properly
Redis should now be installed and running on your system. You can check that by typing:
systemctl status redis
The output should look something like this:
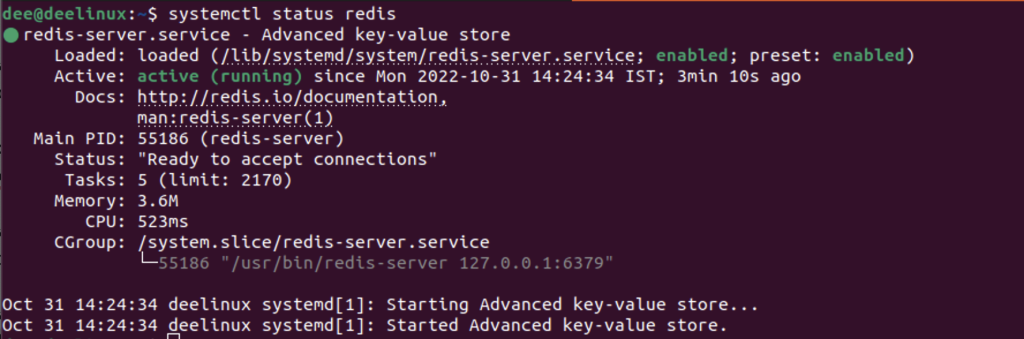
If it shows that Active is set to inactive (dead), you may need to try starting it manually using systemctl start Redis and check its status again afterward.
By default, Redis does not enable password authentication so anyone having access to your server can connect and use your database without any restrictions. For security reasons, we will configure a password for our Redis instance later on in this guide.
Before doing that though, let’s test if everything is working as expected by connecting directly to our localhost instance of Redis using its command line interface (CLI):
Testing Redis To Connect Directly to Localhost Redis via CLI
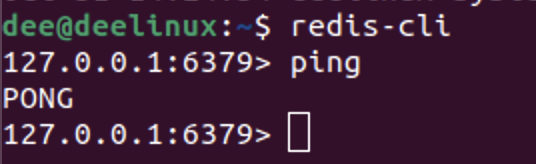
To connect to the localhost instance via CLI type the following,
redis-cli
This should open up a new prompt where you can start interacting with Redis. Type `ping` at the prompt and hit Enter.
If you get back a response of “Pong” then everything is working as expected and you can exit out of the CLI using Ctrl + C or by typing `exit` at the prompt.
So far we have successfully installed and tested our local instance of Redis. Next, let’s bind it to our local host so that we can access it from other devices on our network.
Configuring Redis & Binding Redis to localhost
By default, Redis does not bind to any IP address, so it can only be accessed by connecting to your server via a local host.
If you want to be able to connect to it from other devices on your network, you need to bind it to your server’s public IP address.
To configure the installed Redis installation, we will require any code editor or text editor. For the sake of simplicity, we will be using nano, as nano ships with Ubuntu.
sudo nano /etc/redis/redis.conf
This will open up the Redis configuration file,
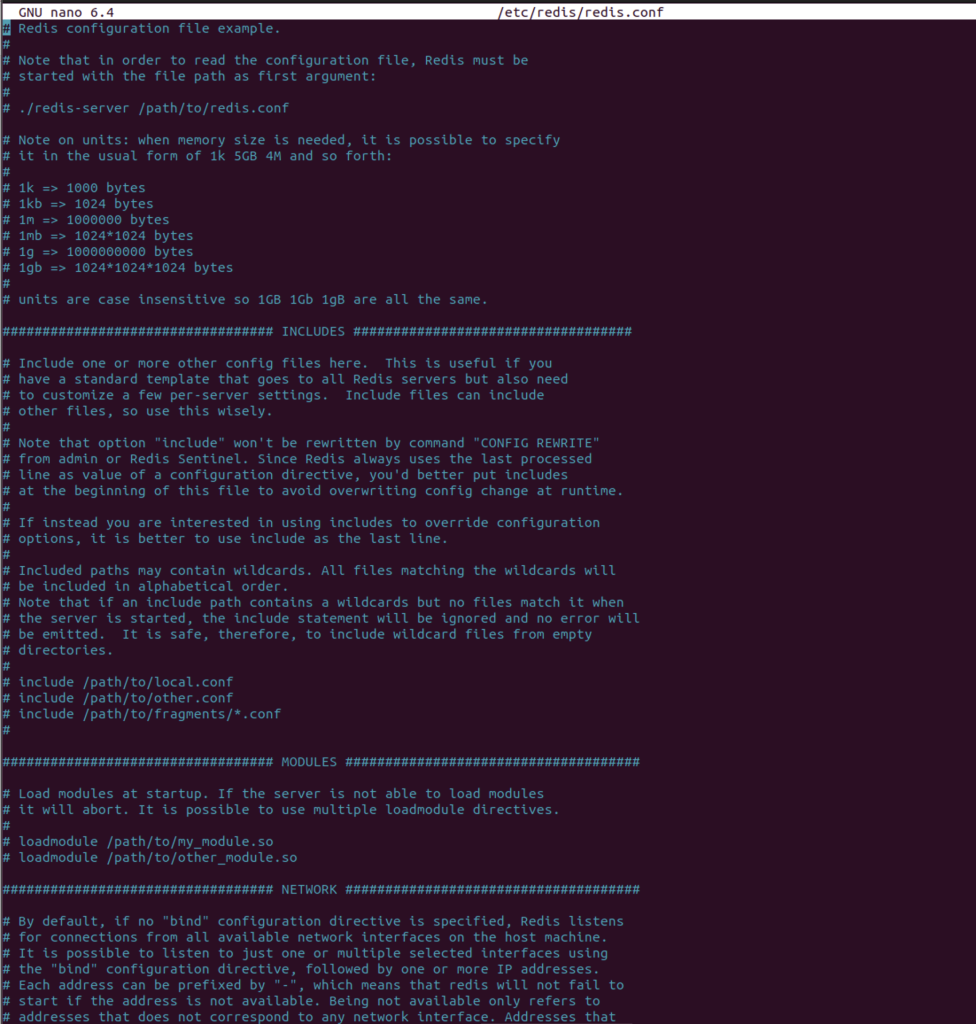
Look for the line that begins with bind and uncomment it by removing the # character at the beginning of the line.
Then, replace the line’s current value with your server’s public IP address: bind 192.168.0.100
After making this change, save and close the file.
To apply the changes you made to redis.conf, restart the Redis service:
sudo systemctl restart redis
You can now connect to your Redis database from other devices on your network by using your server’s public IP address instead of localhost.
However, anyone who knows your server’s IP address and has access to your network will be able to connect to your database without any restrictions.
In the next section, we’ll show you how to password-protect your database to prevent unauthorized access.
Configuring a Redis Password to Password-Protect Your Database
You need to edit Redis’ configuration file again and set the requirepass directive to a strong password of your choice.
For example requirepass your_password
After setting the requirepass directive, save and close the file.
Then, restart the Redis service for the changes to take effect:
sudo systemctl restart redis
You will now need to provide your password when connecting to your database via the Redis CLI.
To do that, type the below command:
redis-cli
Then enter:
AUTH
followed by your password:
Output
( error ) NOAUTH Authentication required
If you get back an error message saying that authentication is required, it means that the password protection is working as expected.
You can now exit out of the CLI by typing exit.
Renaming Unsafe Commands
There are a number of Redis commands that can be dangerous because they can be used to delete your entire database. To prevent accidental deletion of your data, you can rename these commands so that they can only be executed by someone who knows the new name.
To do that, open Redis’ configuration file again:
sudo nano /etc/redis/redis.conf
Find the section labeled “Safety” and look for the rename-command directive.
By default, it is commented out, so you will need to uncomment it by removing the # at the beginning of the line.
Then, you can specify a new name for each of the commands that you want to rename. For example, to rename the KEYS command to something else, you would set the directive like this:
rename-command KEYS new_name
After making the changes, save and close the file. Then, restart the Redis service for the changes to take effect:
sudo systemctl restart redis Y
You can now test the changes by trying to execute the command that you renamed. For example, if you renamed the KEYS command to new_name, you should get an error message saying that the command does not exist if you try to execute it:
redis> KEYS
( error ) ERR unknown command KEYS , with args beginning with : KEYS ,*,0,
Now that you have successfully renamed the dangerous commands, your database should be better protected against accidental deletion.
Conclusion
In this guide, you installed Redis on your Ubuntu server and configured it to better protect your data. You can now start using it in your applications.